Turkey Craft for Thanksgiving Flower Pot Craft
As an Amazon Associate, I earn from qualifying purchases. This post may contain affiliate links. See our full disclosure here.
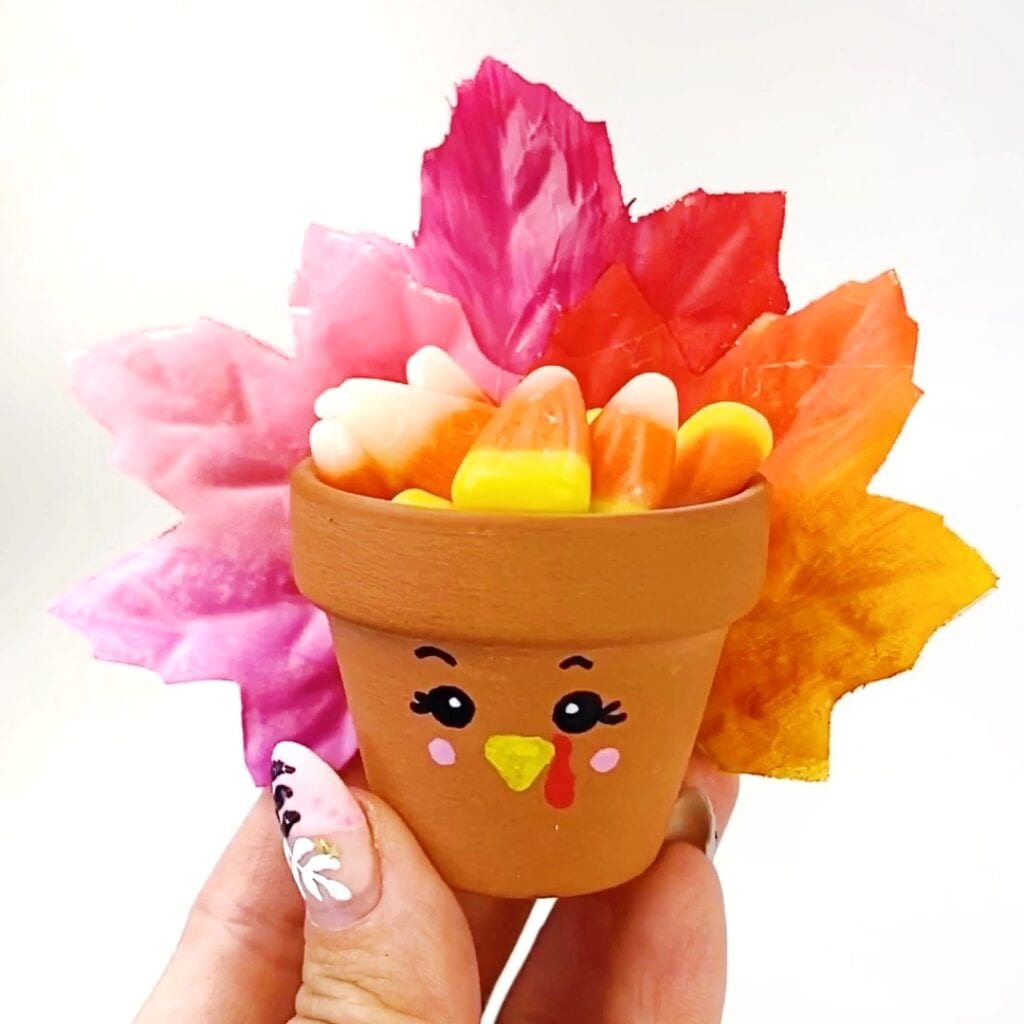
This easy turkey craft is a great way to get excited for Thanksgiving. These cute flower pot turkeys can be used as table decor, name cards, or just as a cute gift to give for “Friendsgiving”. Even kids can make this fun and easy flower pot turkey craft for Thanksgiving.
See below for a complete list of supplies and step by step directions.
Related: How to Draw a Cute Turkey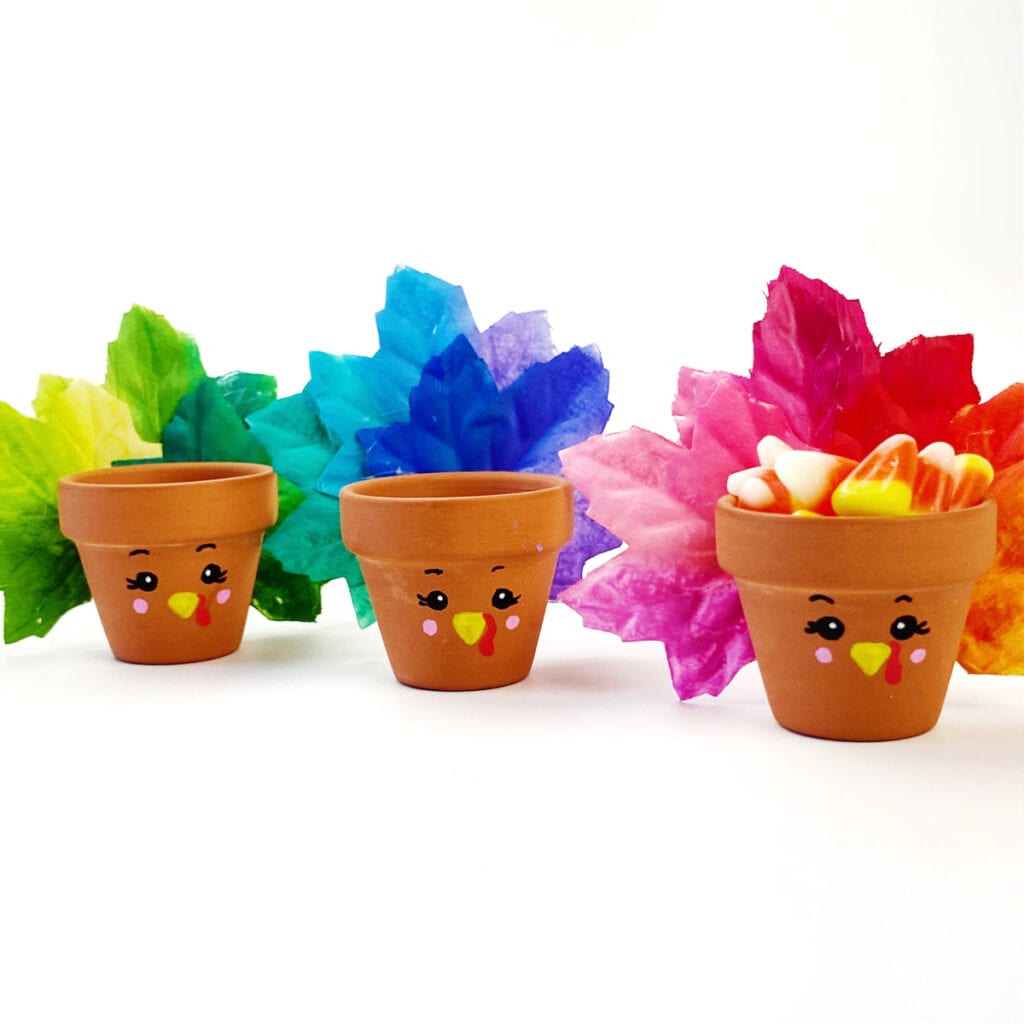
Flower Pot Turkey Craft Supplies (affiliate links provided for convenience)
- Mini Terra Cotta Pots – 1.5″ or 2″ pots (I used 1.5″ because I wanted them tiny)
- Acrylic Paint Pens- I like both these Tooli Art extra fine acrylic paint pens and these Artistro extra fine paint pens.
- Artificial Maple Leaves – I found small white leaves at the craft store and painted them. You can paint your leaves whatever color you like or keep them as is!
- Acrylic Paint (optional if you want to paint your leaves)– This is a great paint with a lot of color options Arteza acrylic paint.
- Hot Glue Gun
Directions for Making a Thanksgiving Flower Pot Turkey Craft
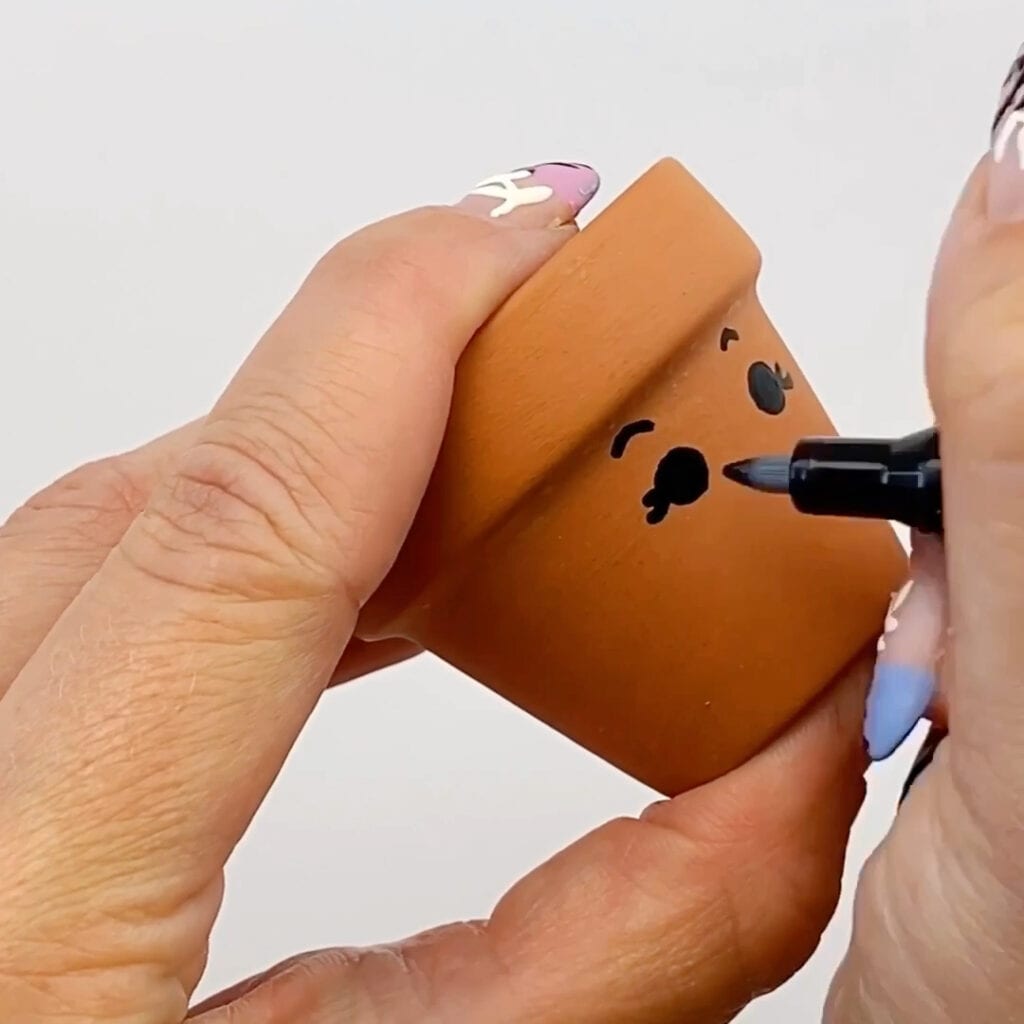
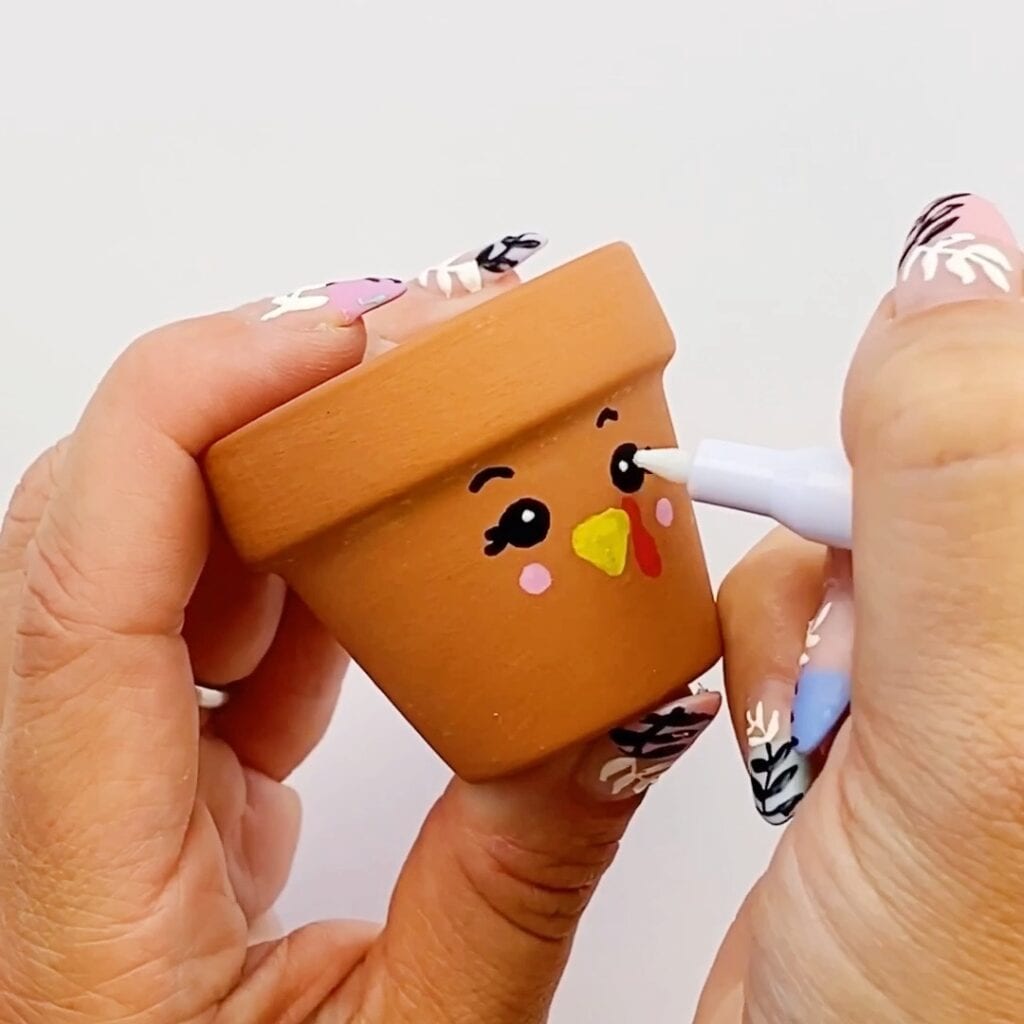
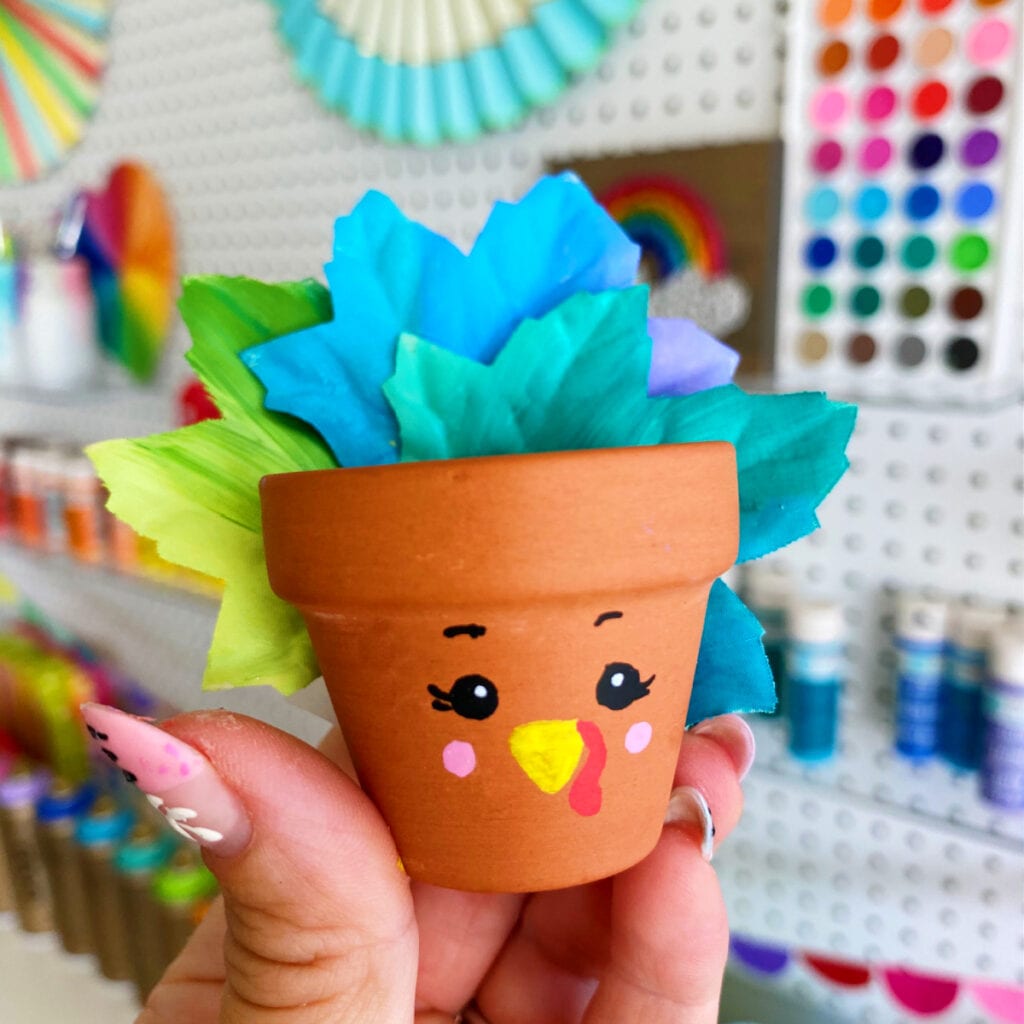
1. Draw the Eyes
Start by adding the turkey face to your flower pot using extra fine paint pens. Use black for the eyes.
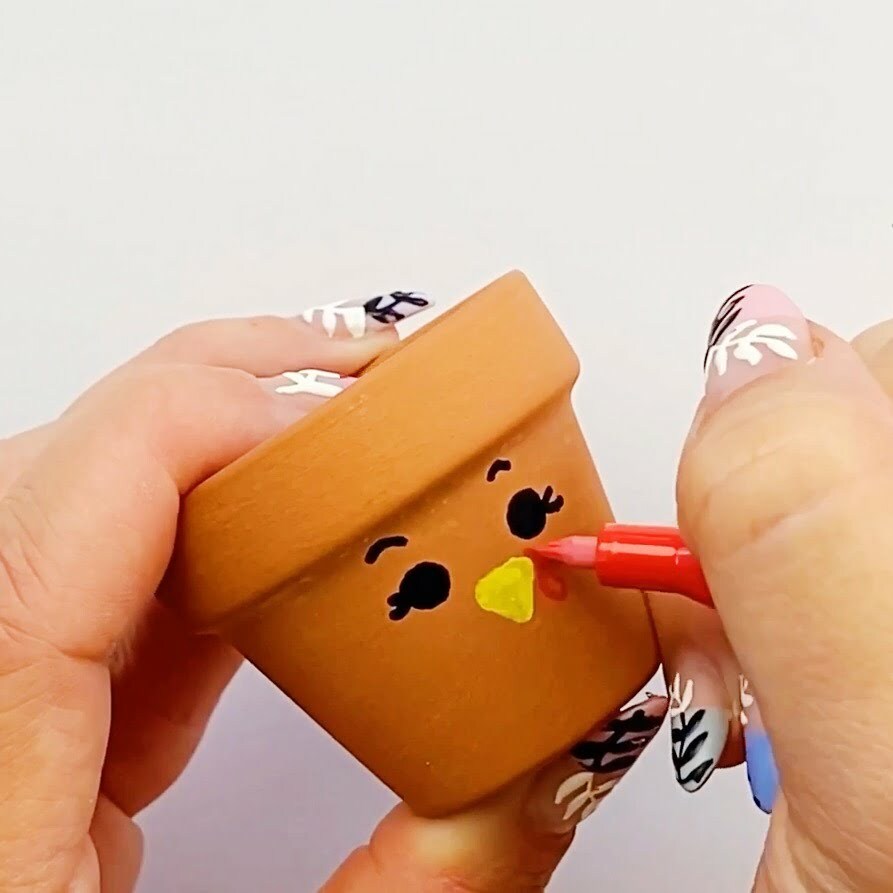
2. Add the Nose
Draw a triangle nose with a yellow paint marker. Then add the wattle (that’s the red thing that hangs off a turkey) with a red paint marker.
3. Finishing Touches
Let the paint markers dry, then use white to add whites of the eyes. You can also add pink on the cheeks to make your turkey flower pot craft extra cute!
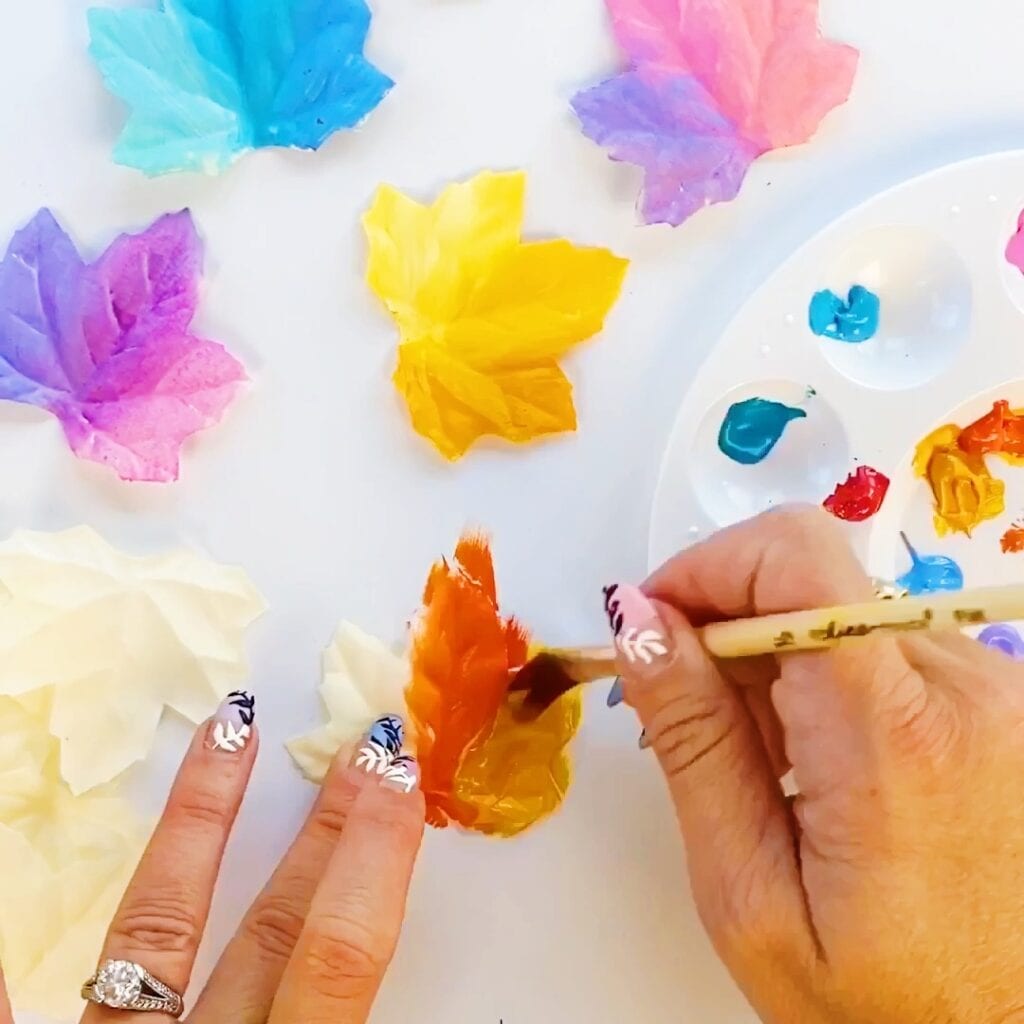
4. Prepare the Leaves
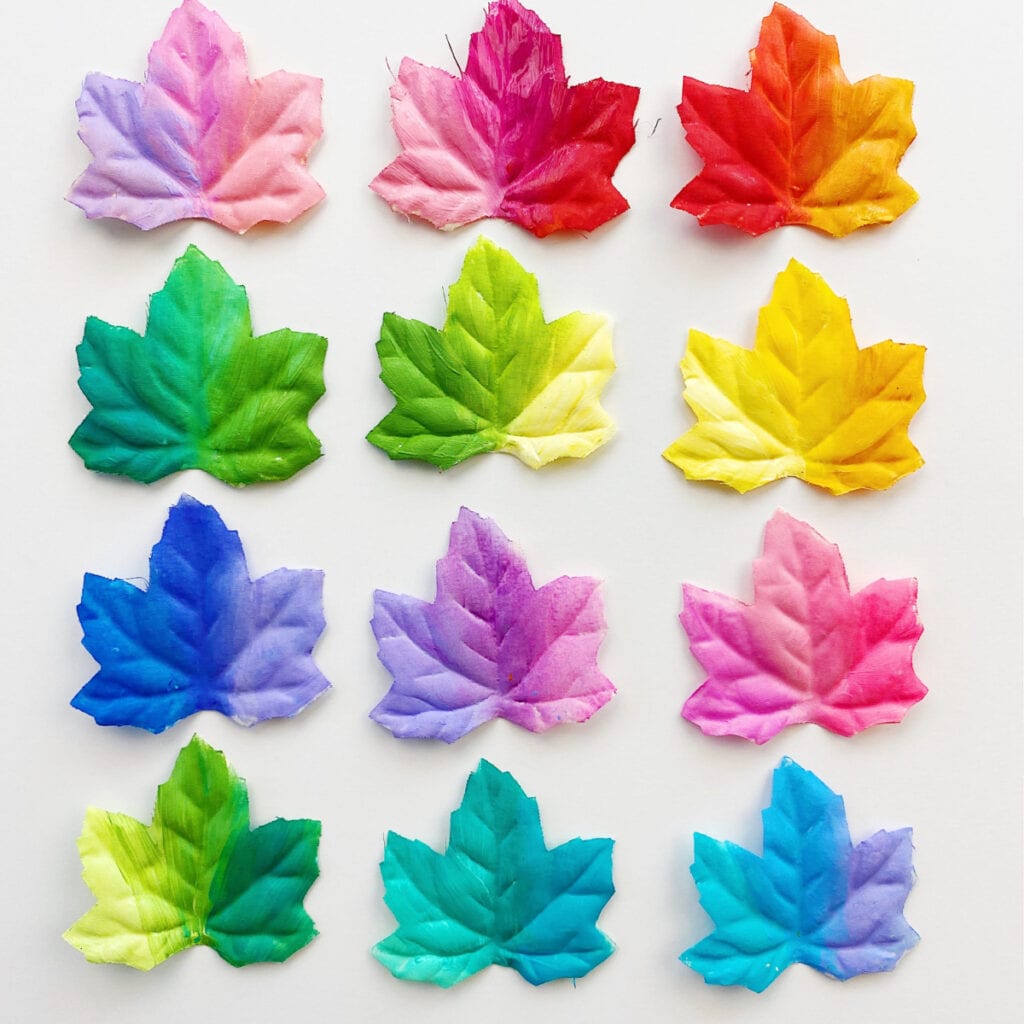
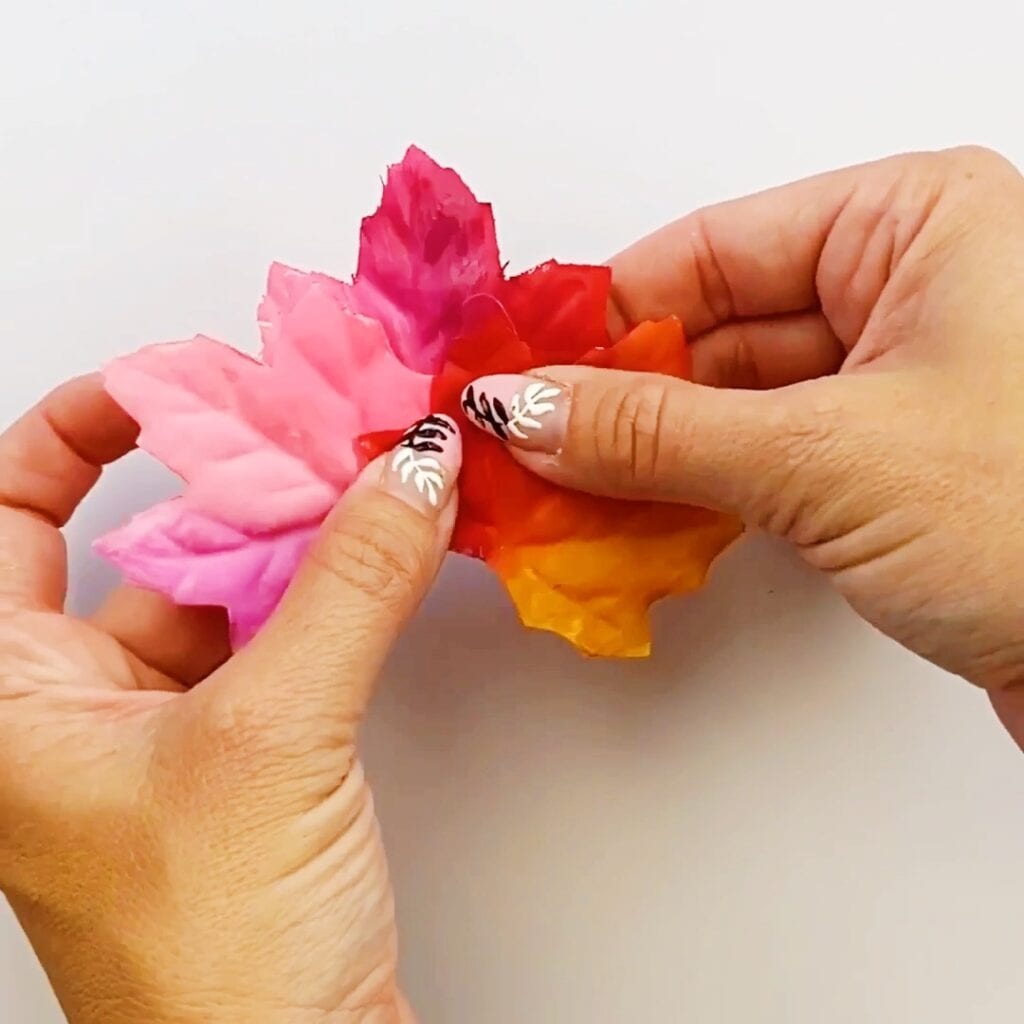
Next you’ll prepare the leaves which will be the turkey feathers. I wanted my leaves to be a variety of colors so I painted them using acrylic paint. I was able to find white leaves to paint but you should be able to paint any color leaves. If you need, you could always spray paint them white first before you paint.
5. Paint the Leaves
Just select three colors or mix your own. Then paint your leaves in three parts to create a cool multi-colored effect.
6. Let Leaves Dry
Make sure you let your leaves dry completely before you move onto the next step.
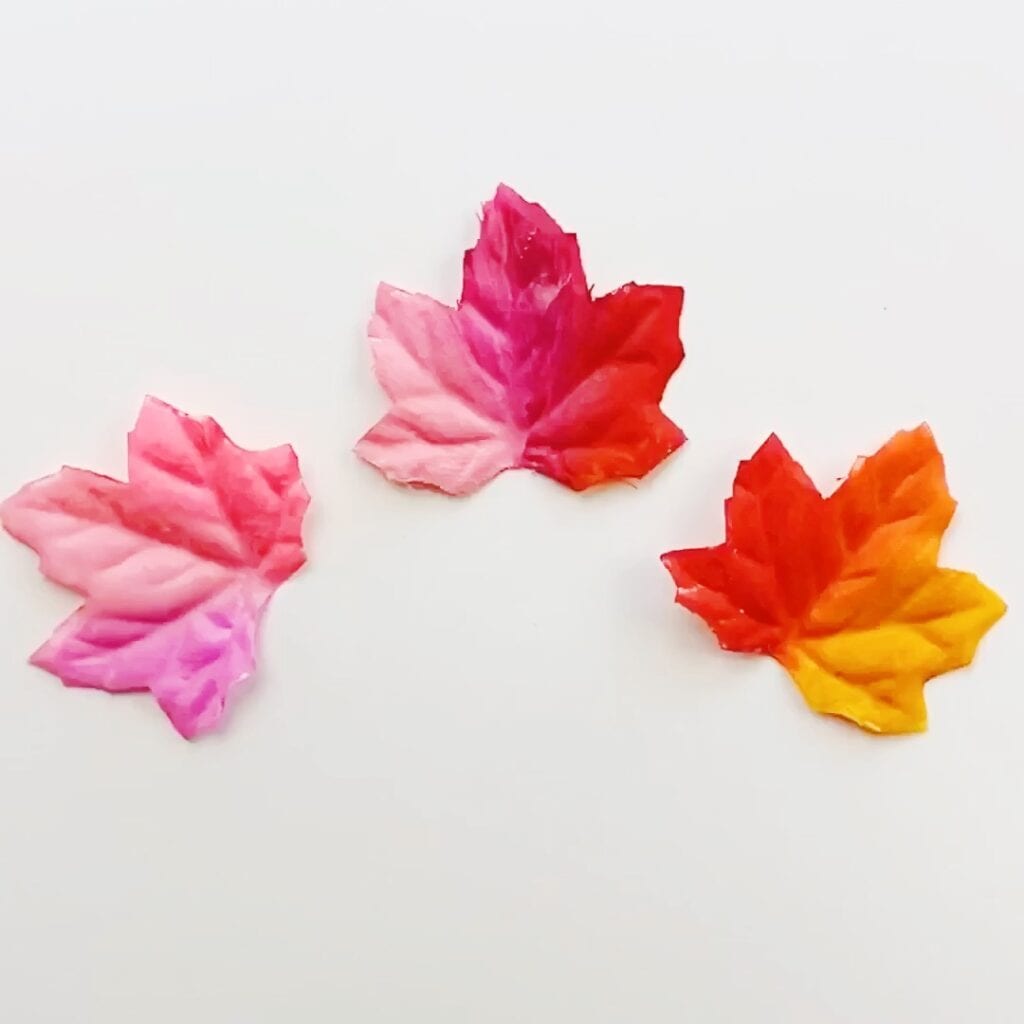
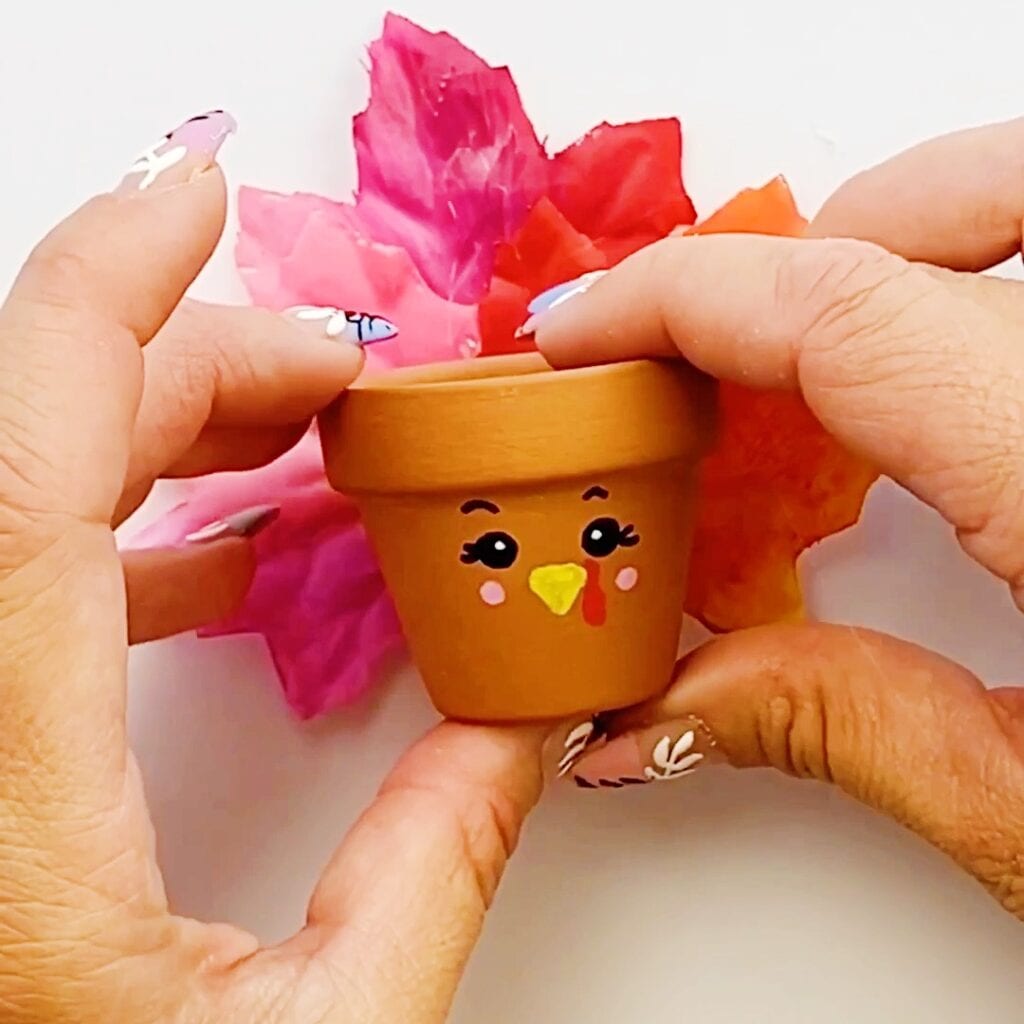
7. Choose Leaves to Glue On
Once the leaves are dry, select a few to glue onto the back of the flower pot. my leaves were pretty small so I used three.
8. Glue the Leaves Together
I glued the leaves together first before then gluing them to the back of the flower pot.
NOTE: I recommend using a hot glue gun to glue them together. I tried other glues at first and hot glue worked the best and dried the fastest.
9. Make Sure They Set
Hold the leaves together and press down while your glue dries. Make sure the leaves set and stick together before you continue – you don’t want your leaves falling apart!
10. Glue Leaves to Flower Pot
Add the leaves to the outside back of the flower pot. Again, I used hot glue because it held the best. Make sure it sets really good by pressing down until it cools and sets.
What to do With These Thanksgiving Turkey Flower Pots?
These are such a cute craft idea! But once you’re done, you might be wondering what you can use these for besides a cute fall or Thanksgiving decoration.
Candy Holder
Now that your cute little turkey is finished, you can add candy corn or other treats. These mini flower pots are the perfect size to hold candies. They’d make great gift ideas for family and friends, or as thank you gifts for a Thanksgiving dinner or a party.
Thanksgiving Dinner Table Place Setting
You could also add a toothpick in the candy corn and a little name card if you’re using it as a turkey place card setting for your Thanksgiving table. Or leave it empty and write the guest’s name right on the front of the flower pot for a personalized touch.
Turkey Flower Pot Teacher Gift Idea or Class Craft
Make these with the kids at home, fill it with wrapped treats, and give it to their teachers as a fun gift idea before Thanksgiving weekend. It would also be a cute craft idea for teachers to make with their class to send home with the kids before the holidays!
So many fun ways to use this cute little turkey craft.
I’d love to see your finished turkeys! Come share with me a picture on Instagram or Facebook! I love showing examples of my tutorials being made!