How to Decoupage Rocks with Napkins
As an Amazon Associate, I earn from qualifying purchases. This post may contain affiliate links. See our full disclosure here.
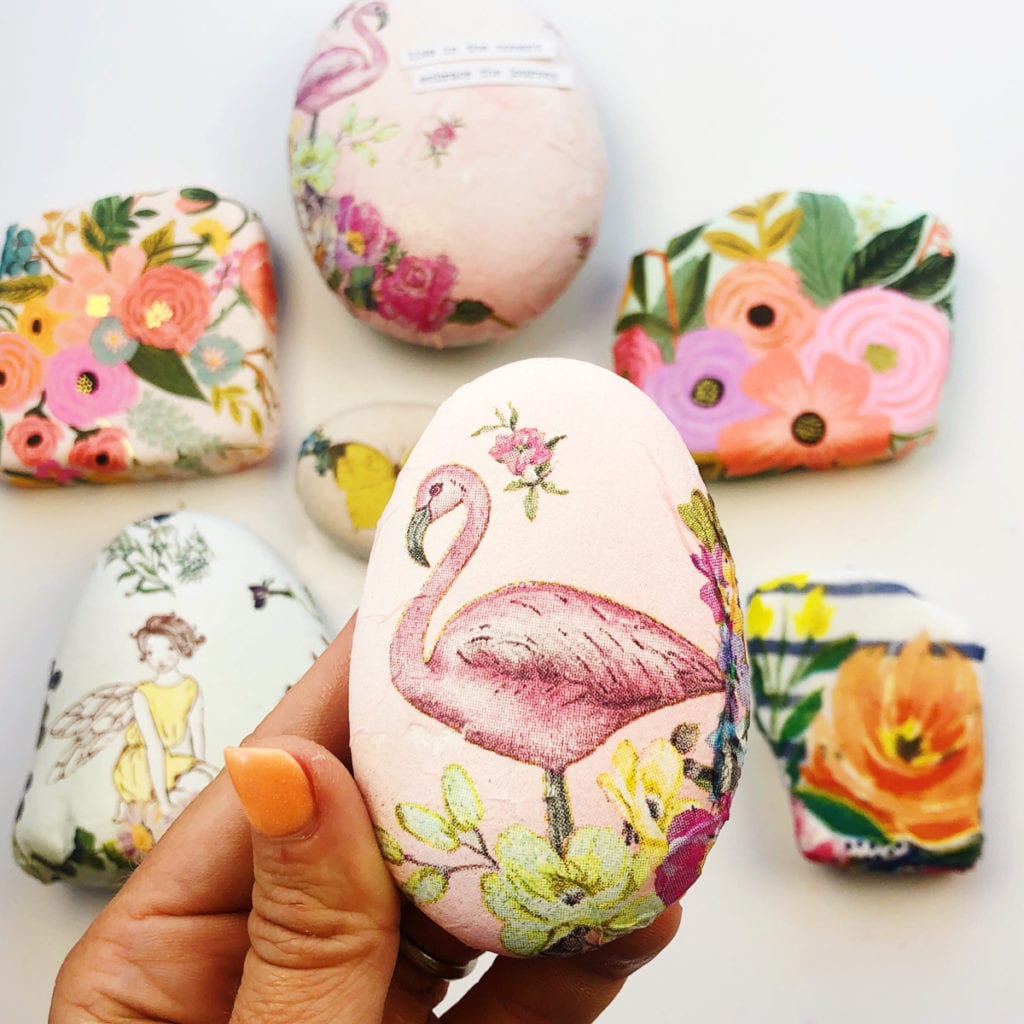 One of my favorite tutorials from my book, Rock Art Handbook, is how to decoupage rocks with napkins. The finished decoupaged rocks are perfect for beautiful table settings and look great on display throughout your home. The best part is that you can make them throughout the year for different holidays using holiday themed napkins. And once you know how to decoupage a napkin onto a rock, you can use the same technique for decoupaging fabric, papers, and tissue paper on rocks.
Supplies for How to Decoupage Rocks with Napkins (affiliate links provided for convenience)
- Rocks – I like these rocks as well as these. And these if you want larger flat, white rocks that you don’t have to prime.
- Decoupage glue
- There are quite a few different decoupage glues to choose from but I typically like to use Mod Podge.
- Napkins – I’ve linked some of my favorite below:
- Saran wrap
- Foam brush
- Paint brush
- Small cup of water
Watch the Video on How to Decoupage Napkins on Rocks and then see the full directions below:
Directions for How to Decoupage Rocks with Napkins
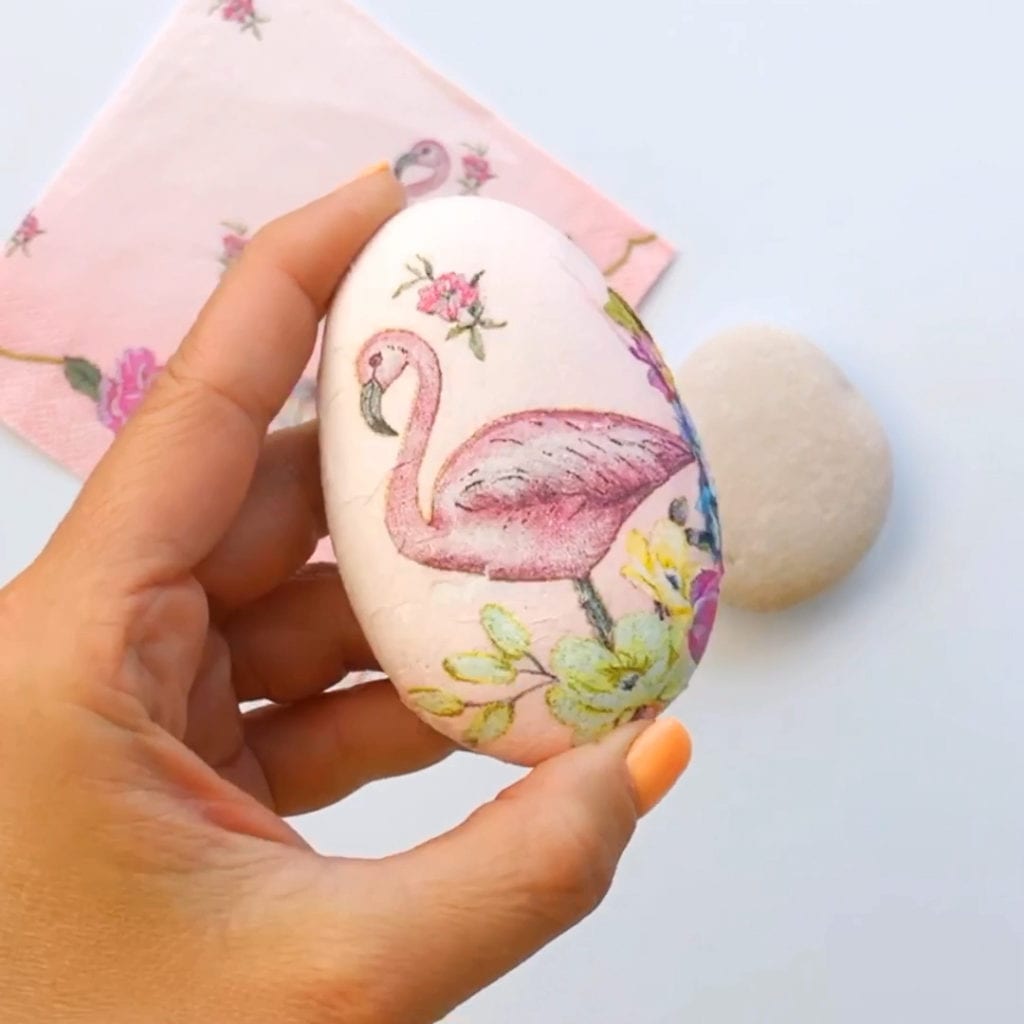
- Start with a rock that is prepped with a white background. The white background will make the napkin design standout and be more vivid. You can paint with white acrylic paint or use this flat white paint and primer spray which is great for covering a bunch of rocks at once.
- Separate the napkin to 1 ply.
- Select the part of the napkin you’d like to adhere to the rock.
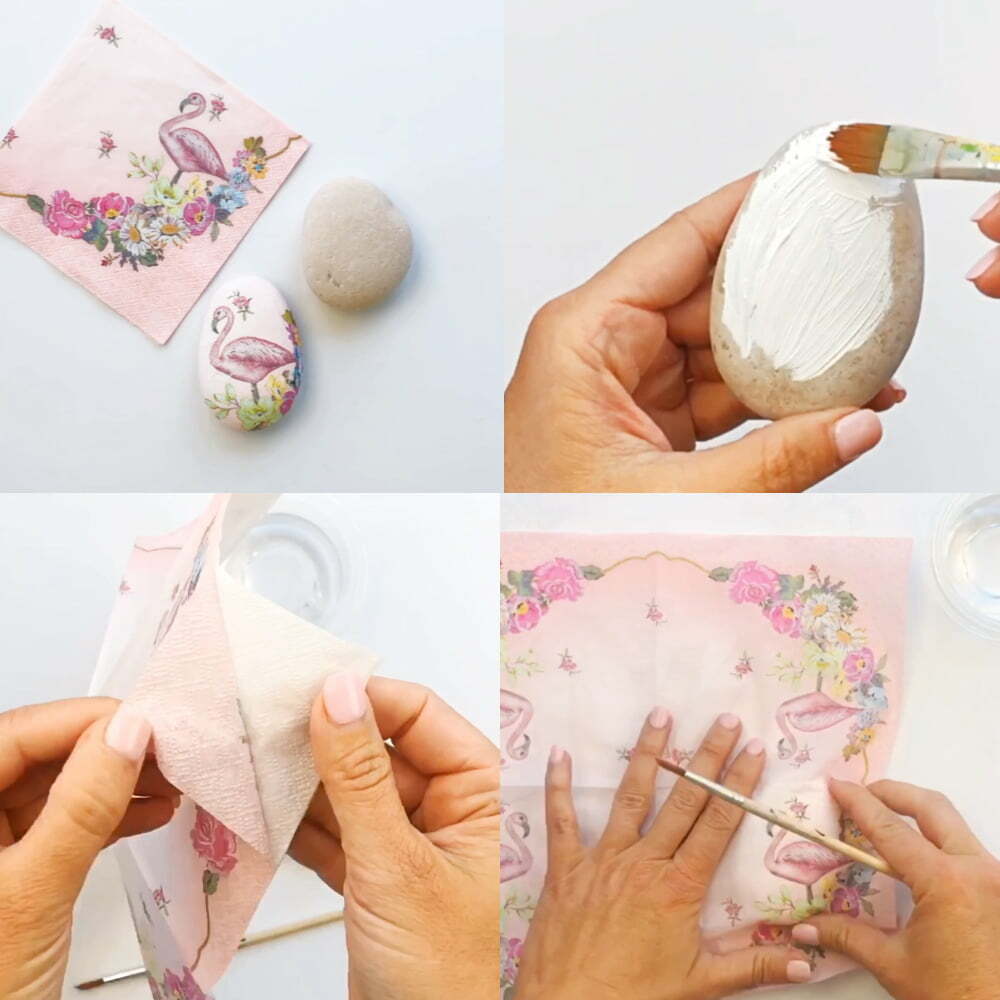
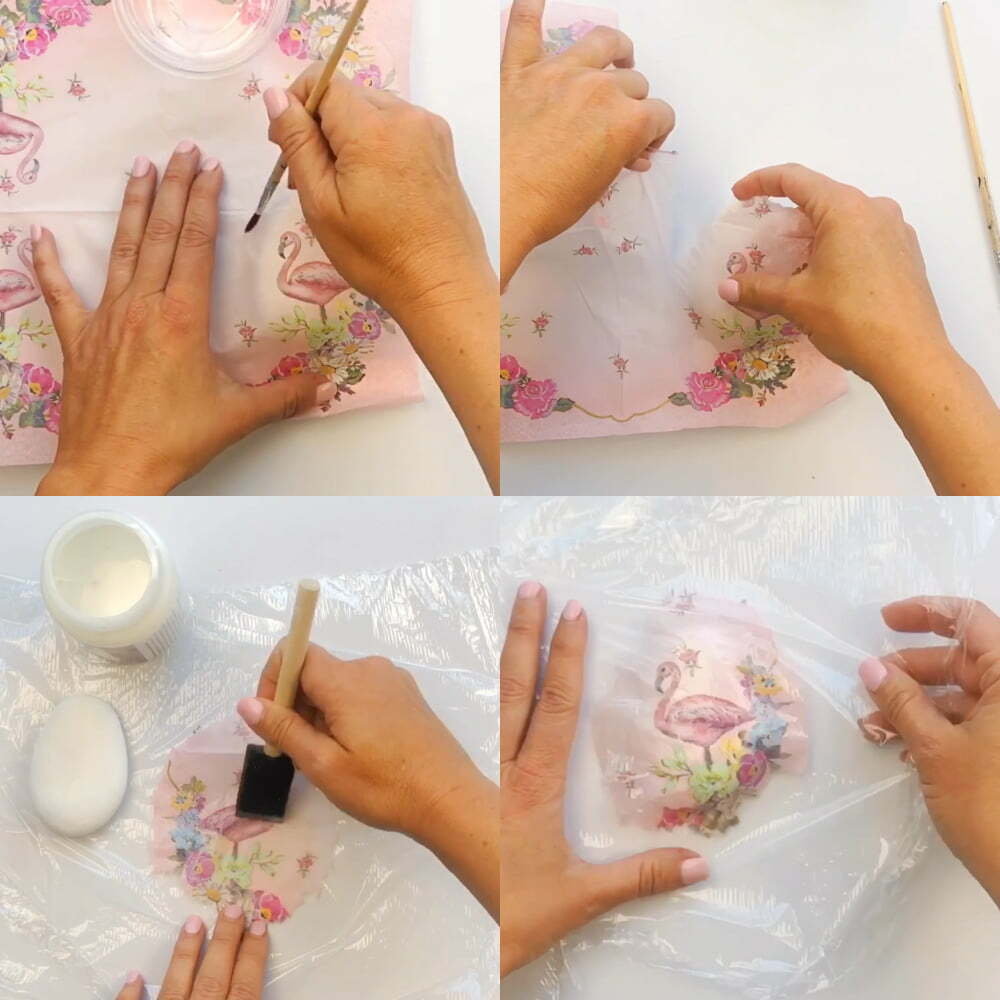
- Using a wet paintbrush that has been dipped in water, draw an outline around the image you want to use. This step makes it easier to tear the napkin without ruining the image.
- Slowly tear along the water outline you just made. Let the napkin image dry completely.
- Place the napkin with the design face down on top of the saran paper.
- Apply a thin layer of decoupage glue over the napkin.
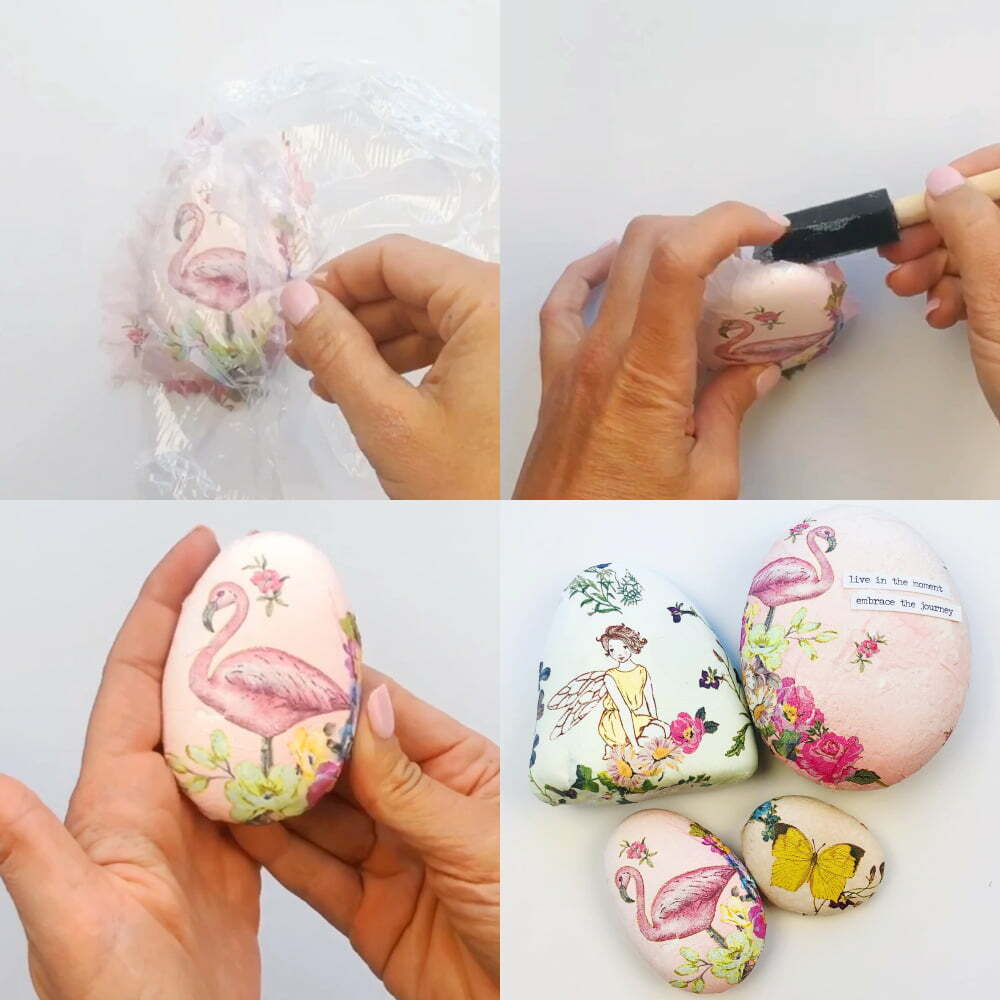
- Pick up the Saran wrap and turn it over to place the napkin directly onto the rock.
- Adjust the placement of the napkin until you are satisfied. Gently pull on the sides of the Saran wrap to even and smooth out the napkin. You can also run your finger over the outside of the wrap.
- Remove the Saran wrap. You’ll find that the napkin stays perfectly in place on the rock.
- You’ll probably have some left over edges that are not completely on the rock. You can either wait for them to dry completely and then use a nail file to file them off. Or you can tuck them under the rock with a small amount of decoupage clue to keep them in place.
- If you desire you can paint the backside of the rock or decoupage another napkin.
More Decoupage Ideas for Napkins
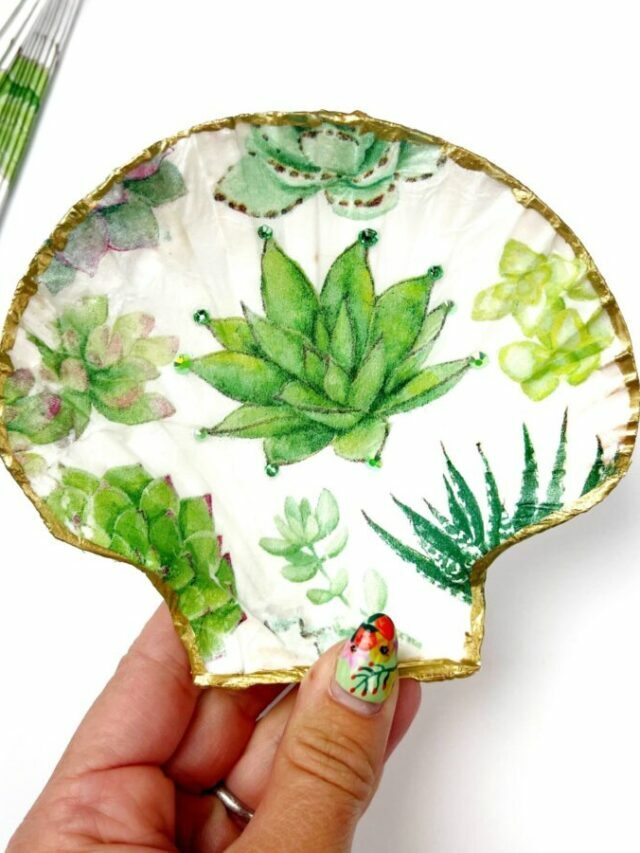
If you like using napkins for decoupage, another great use for them is on shells! You can easily turn shells into beautiful colored masterpieces with napkins. See this tutorial and learn how to decoupage a shell ring dish.
This tutorial along with over 30 others tutorials featuring dot painting, marbling, embellishments, and much more can be found in my book, Rock Art Handbook. You can also find more rock painting tutorials right here.
I’d love to see your decorated rocks. Come share with me a picture of your finished rocks on Instagram or Facebook! I love showing examples of my tutorials being made!