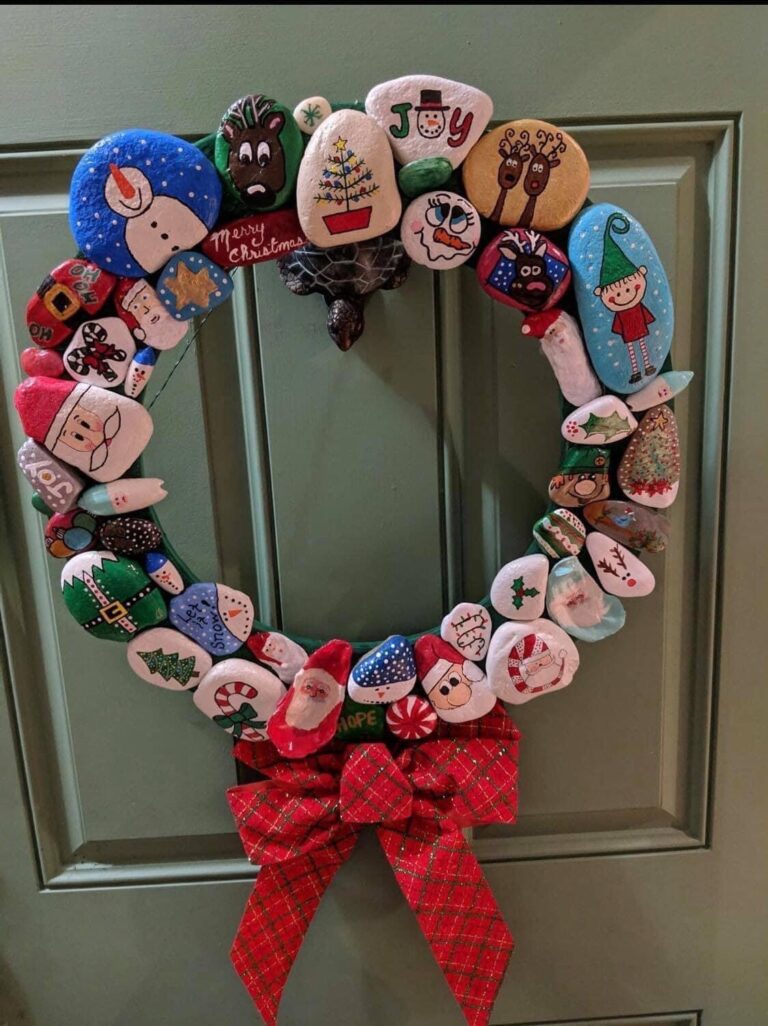
Christmas Painted Rocks Tutorial
As an Amazon Associate, I earn from qualifying purchases. This post may contain affiliate links. See our full disclosure here.

Had so much fun making these festive Christmas painted rocks. Below I’m sharing some of my top tips and tricks for creating beautiful art on rocks along with some of my favorite supplies that I used to make these Christmas rocks.
Make Your Own Christmas Painted Rocks
It’s easier than you think to add your own designs to painted rocks! With a bit of practice you be able to make all kinds of painted rocks for Christmas. Even though they look hard, many of these designs are actually pretty easy – especially when you use paint makers for your creations.

Winter Painted Rock Supplies (affiliate links provided for convenience)
- Rocks – If you can’t find any outside or at your local garden center, check out Amazon here, there’s a huge selection to choose from.
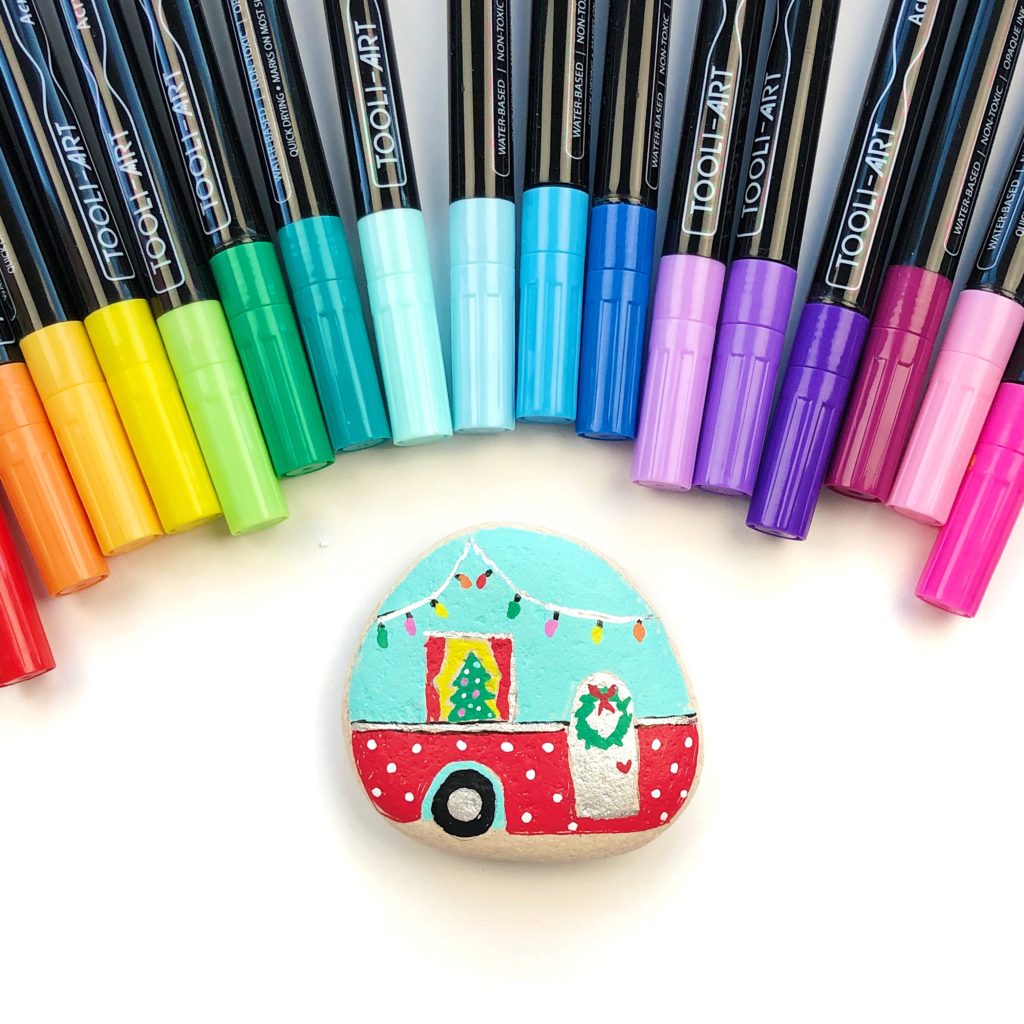
- Paint Pens – I used a mixture of the following paint pens. All are great sets.
- Acrylic Paint – I use paint for covering larger areas and backgrounds on the rocks. I love the Folk Art brand of paint.
- Micron Black Fine Liner Pens – I use these pens for outlining images and adding face details.
- Sealant – Lately I’ve been using this sealant for a glossy finish.
How to Make Christmas Painted Rocks Step by Step
1. Sketch the Design
I always start by sketching out my designs on paper. I like to use this mixed media sketchbook.

2. Sketch Onto the Rocks
Once I decide which designs I want to do on the rocks, I next sketch the design onto the rocks using a pencil. To see the full tutorial for this Christmas camper painted rock here.
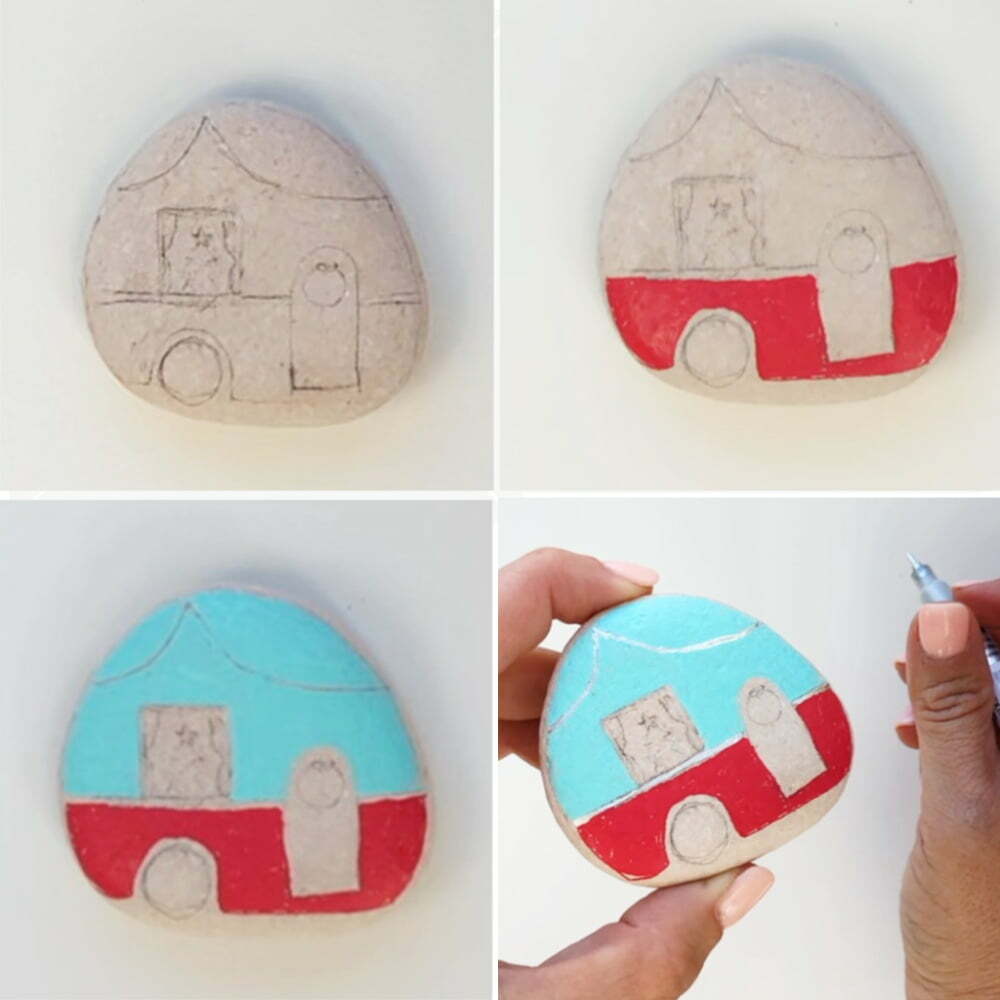
3. Fill in the Design
Using a mixture of paint and paint pens, I fill in my design. For skin tones, I’ve found that this skin tone paint pen set is amazing and has the perfect skin tone colors.

4. Add Outlines
Once my designs are filled in with color and dry, I go back and outline them with a micron black fine liner pen to help the design standout.

5. Seal the Rocks
If you’d like to seal your rock you can use this glossy sealant and spray it lightly and evenly over the entire rock.

Quick Step by Step Christmas Painted Rock Guide
- Sketch out your designs to practice in a sketchbook.
- Draw the designs on your rocks with pencil.
- Fill in the main parts of the design using paint or paint makers.
- Add in details. Let it dry between layers!
- Seal the rock to preserve it.
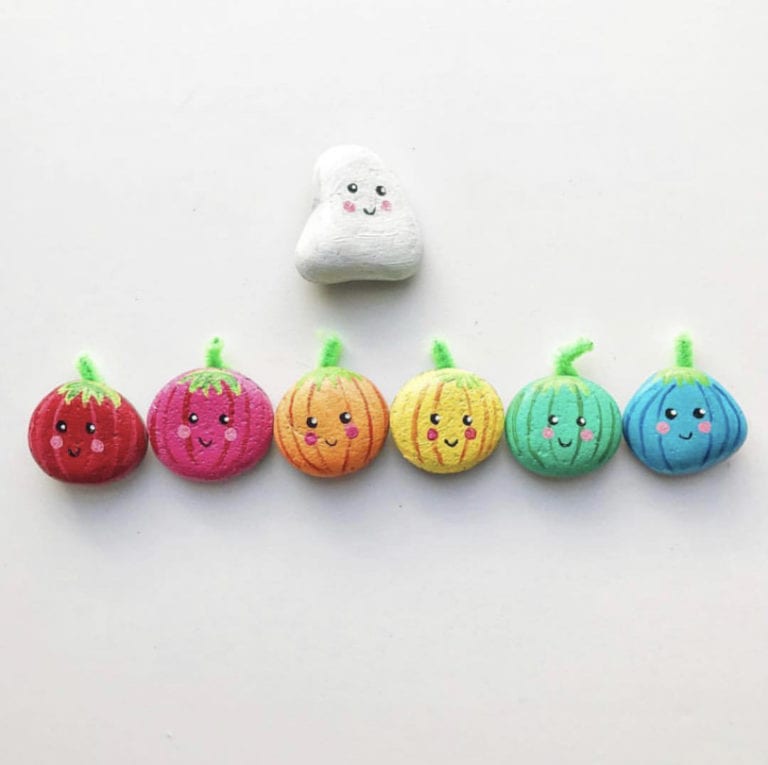
How to Make a Penguin Painted Rock
If you want to recreate the penguin design like in the above picture it’s actually really easy. First draw your design on the rock. Next, paint in the white parts of the penguin with paint makers or a brush. It’s easier to do the white first since the black will cover it if there’s any mistakes. Let it dry, then do the hat and scarf. If you want an easier design, you can omit the scarf too.
Once you’ve done that you can fill in the black parts being careful not to cover the wrong areas. Once dried, add the feet, face, and details. Finally, outline the drawing in black.
Cute Christmas Painted Rocks
Hope you’re inspired to paint your own Christmas painted rocks. If you’re looking for more rock painting inspiration, check out my bestselling book “Rock Art Handbook“. The book has over 30 tutorials for all kinds of ways to decorate rocks.
You can also find more of my projects on my Instagram page or Facebook page.