How to Make a Galaxy Painted Pumpkin
As an Amazon Associate, I earn from qualifying purchases. This post may contain affiliate links. See our full disclosure here.
If you’re a fan of colorful, no-carve pumpkin decorating ideas than you definitely need to add a galaxy painted pumpkin to your must make list before Halloween. I actually got the idea for making these outer space inspired pumpkins after having so much fun making these galaxy inspired painted rocks!
This pumpkin craft is great for all ages and it will work on all different sized pumpkins. I like the mini pumpkins because I think they’re cute to set-up throughout the house, but a large galaxy painted pumpkin would be beautiful too!
Supplies for Galaxy Pumpkin Painting
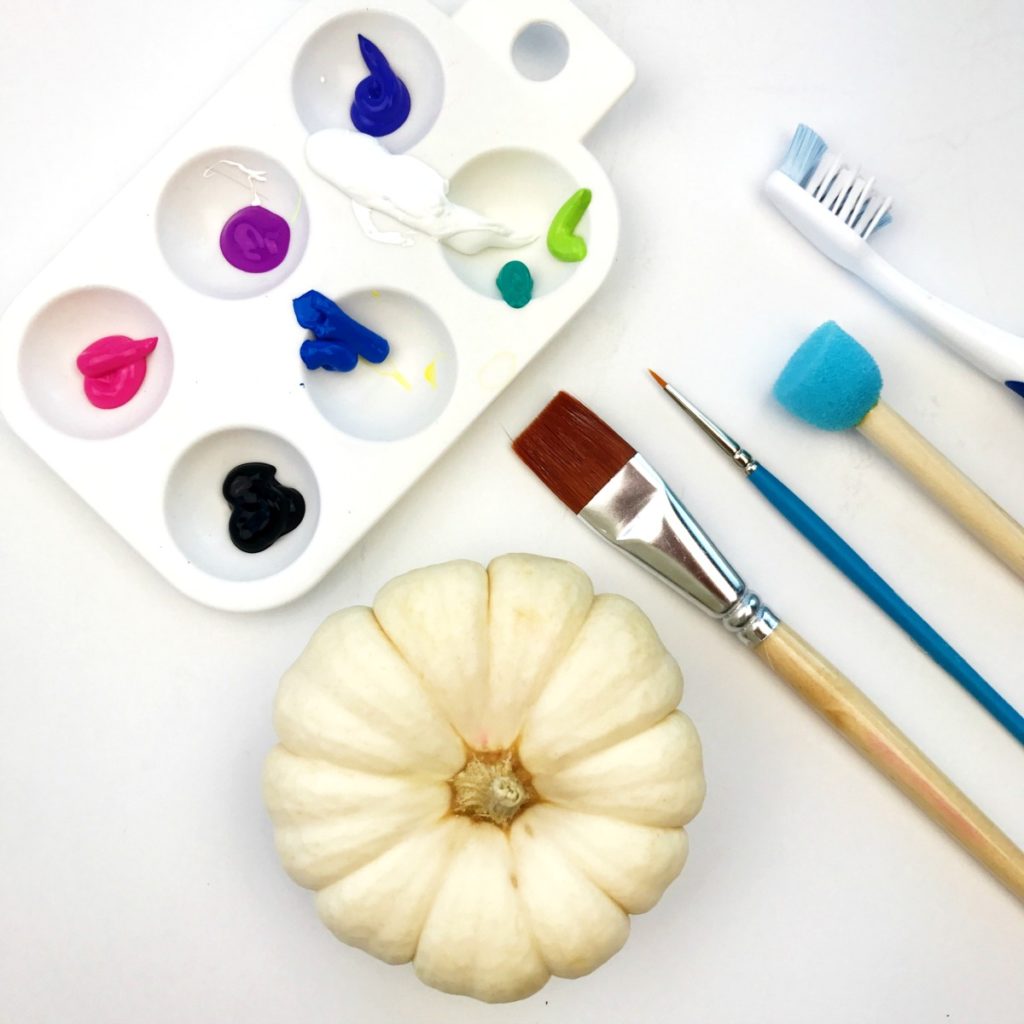
- Mini pumpkins (white or orange) – I got mine at Trader Joe’s. You could also use fake plastic pumpkins or ceramic ones.
- Acrylic paint – I used the Martha Stewart brand of acrylic paint.
- Black spray paint or primer (Optional) – This is a great option if you want to make a bunch of these pumpkins.
- Round foam sponge brush
- Large paint brush
- Small round paintbrush
- Toothbrush
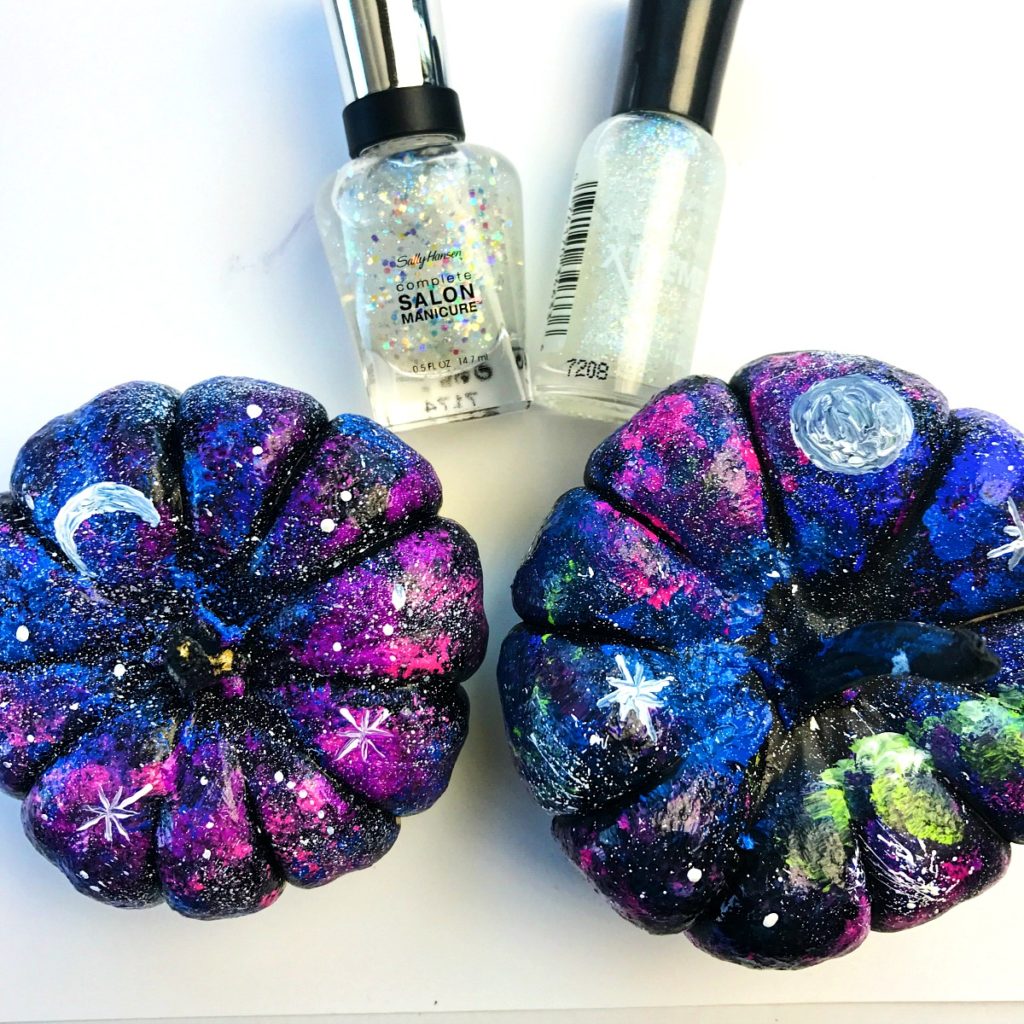
- Glitter nail polish (optional) – I used Sally Hansen nail polish in Snow Globe color Disco Ball
Full Directions to Make Galaxy Painted Pumpkins
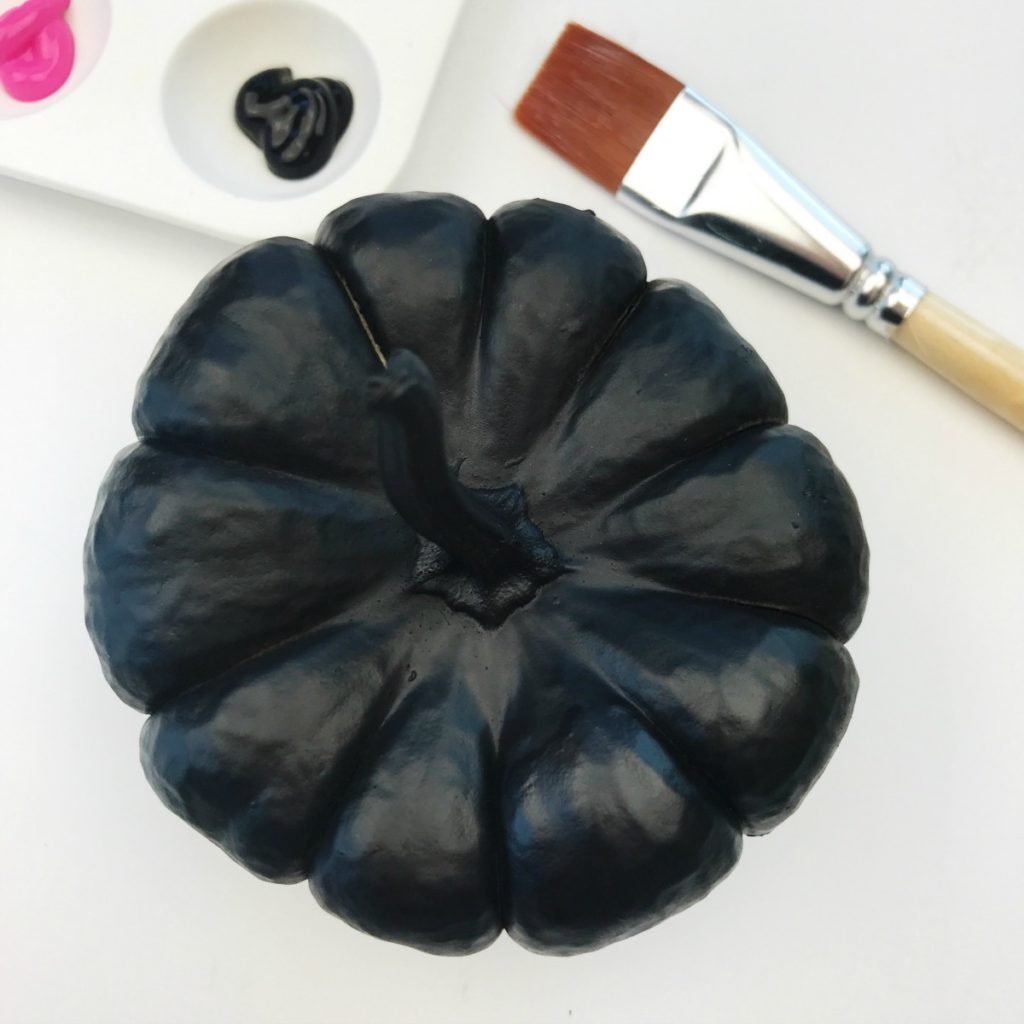
1. Paint the Pumpkin Black
Cover the entire pumpkin with black acrylic paint using a large paint brush. If you want to make a large batch of these pumpkins I suggest using a black spray primer or spray paint so you don’t have to paint each pumpkin individually.
Let it dry.
2. Sponge on a Second Color
Using the round foam sponge brush, pick a color of acrylic paint and lightly sponge it onto part of the pumpkin.
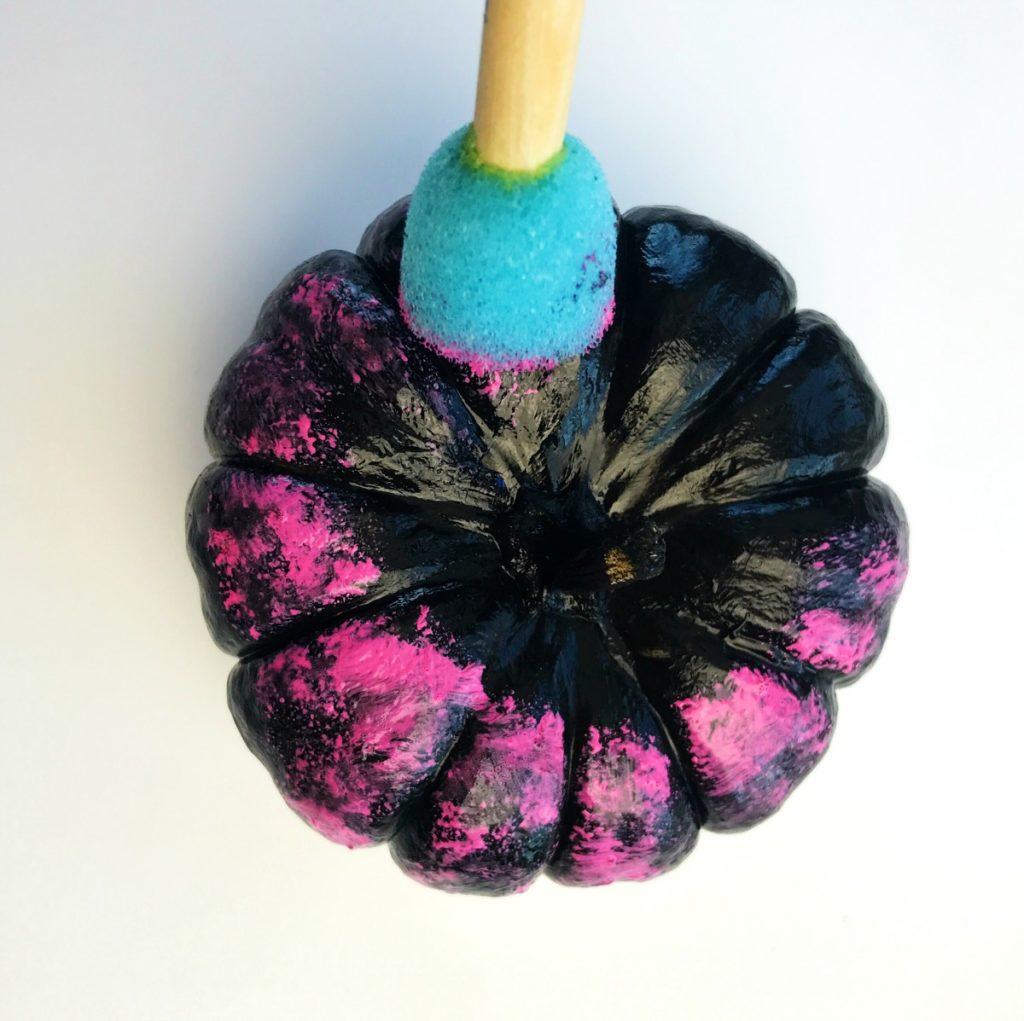
3. Add More Colors
Sponge on more paint colors to other parts of the pumpkin using the round foam sponge brush.
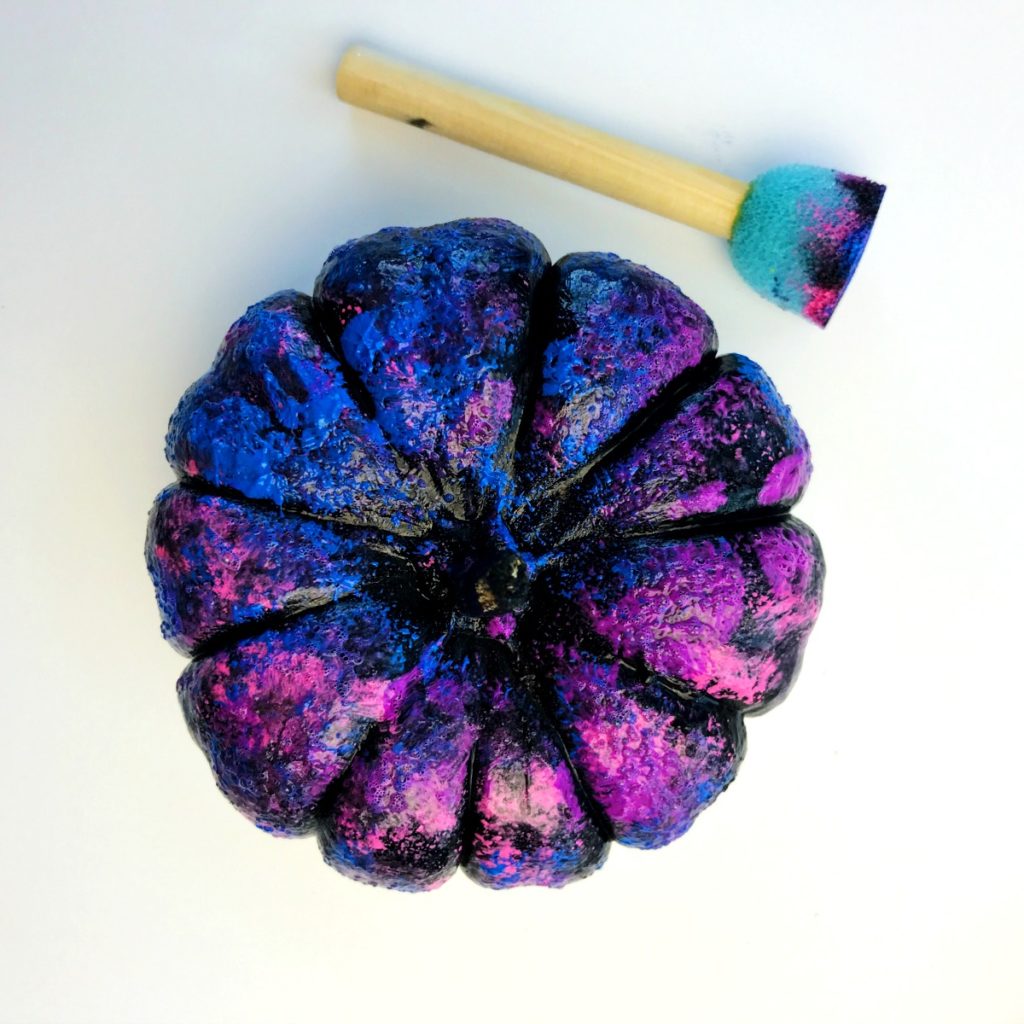
4. Clean Up the Design
If you cover up too much of the black, you can always go back and sponge on some more black.
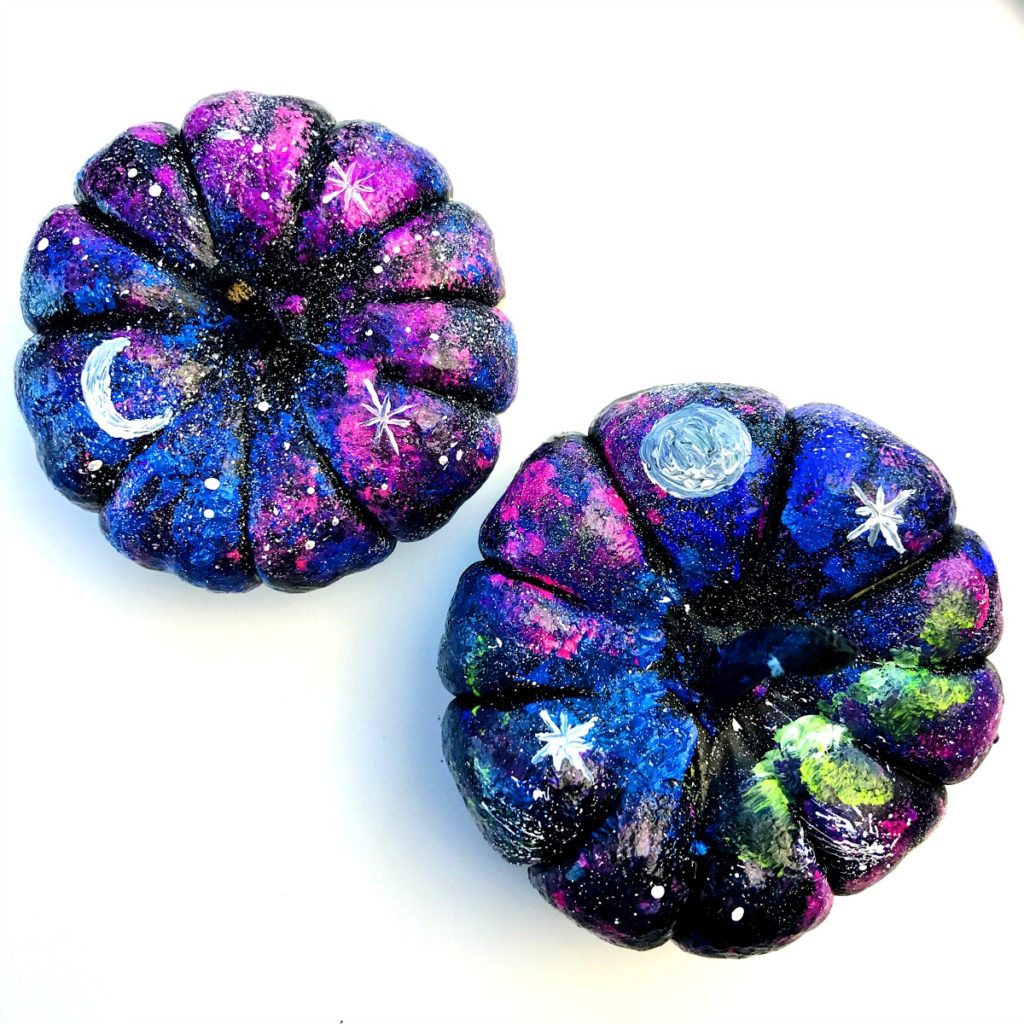
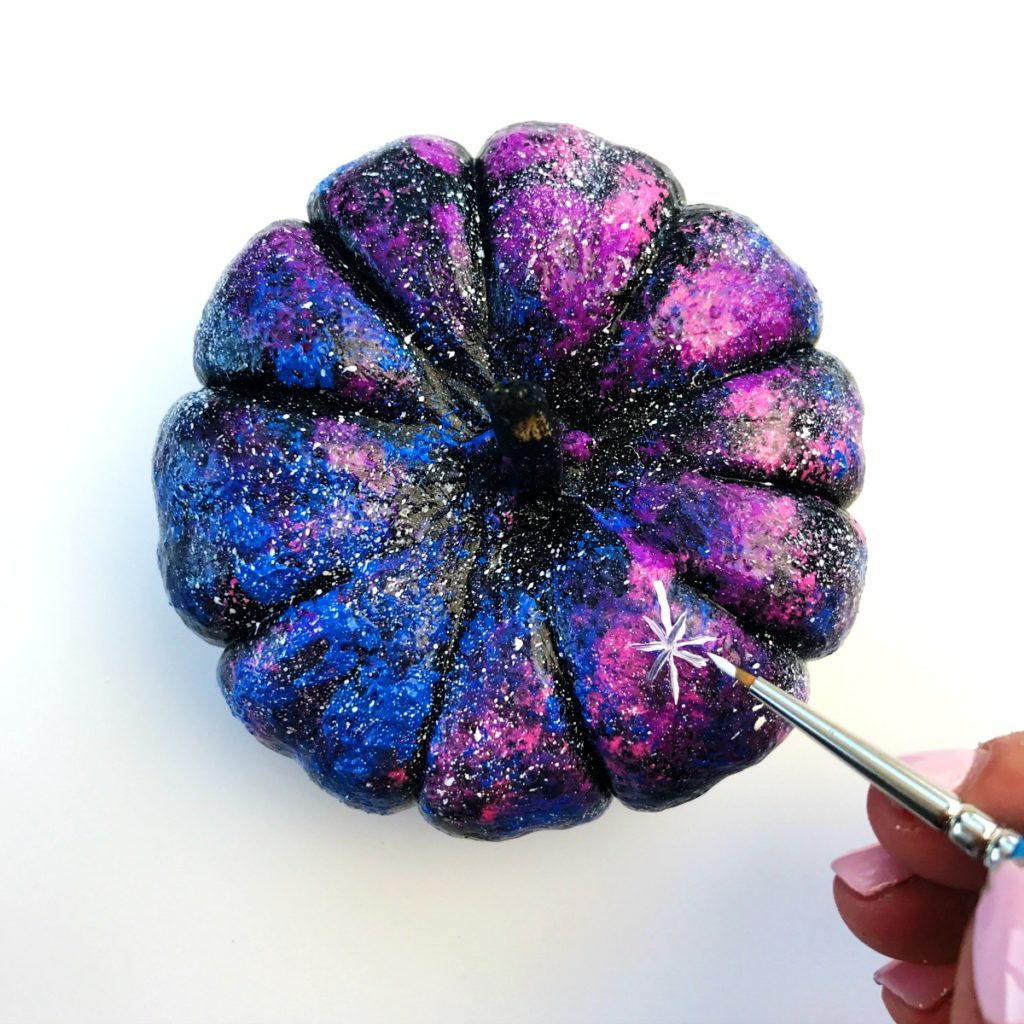
5. Add Stars
Add stars by applying white acrylic paint to a toothbrush. Keep the bristles pointed away from you (you want them facing the rock), and run you finger up the bristles, gently flicking the paint onto your rock.

6. Paint on Details With a Brush
Once the paint has dried, add larger stars, a moon and constellations using a small paintbrush.
7. Add Sparkles
If you want some added sparkle, use a little nail polish and apply to parts of the pumpkin for extra shine.
Tips for Making These Galaxy Painted Pumpkins
If you find they’re smudging too much, let your paint dry more between coats. Sometimes mini pumpkins can be tricky to paint on because they’re smooth! The nail polish helps seal the pumpkins. If you don’t use it, use a spray sealer instead.
Glow in the dark paint would also be great on these pumpkins. Especially if you want an easy no carve pumpkin idea for Halloween that will still look great after dark.
Be creative and try out different space or galaxy themed designs!
How to Paint Galaxy Pumpkins Easy Step by Step
- Paint the pumpkin black.
- Sponge on bright galaxy themed colors one at a time.
- Add more black if needed to balance out the design.
- Use a paint brush to flick on white paint to create the stars.
- With a fine brush, paint on details like bigger stars and moons.
- Use nail polish to add sparkles.
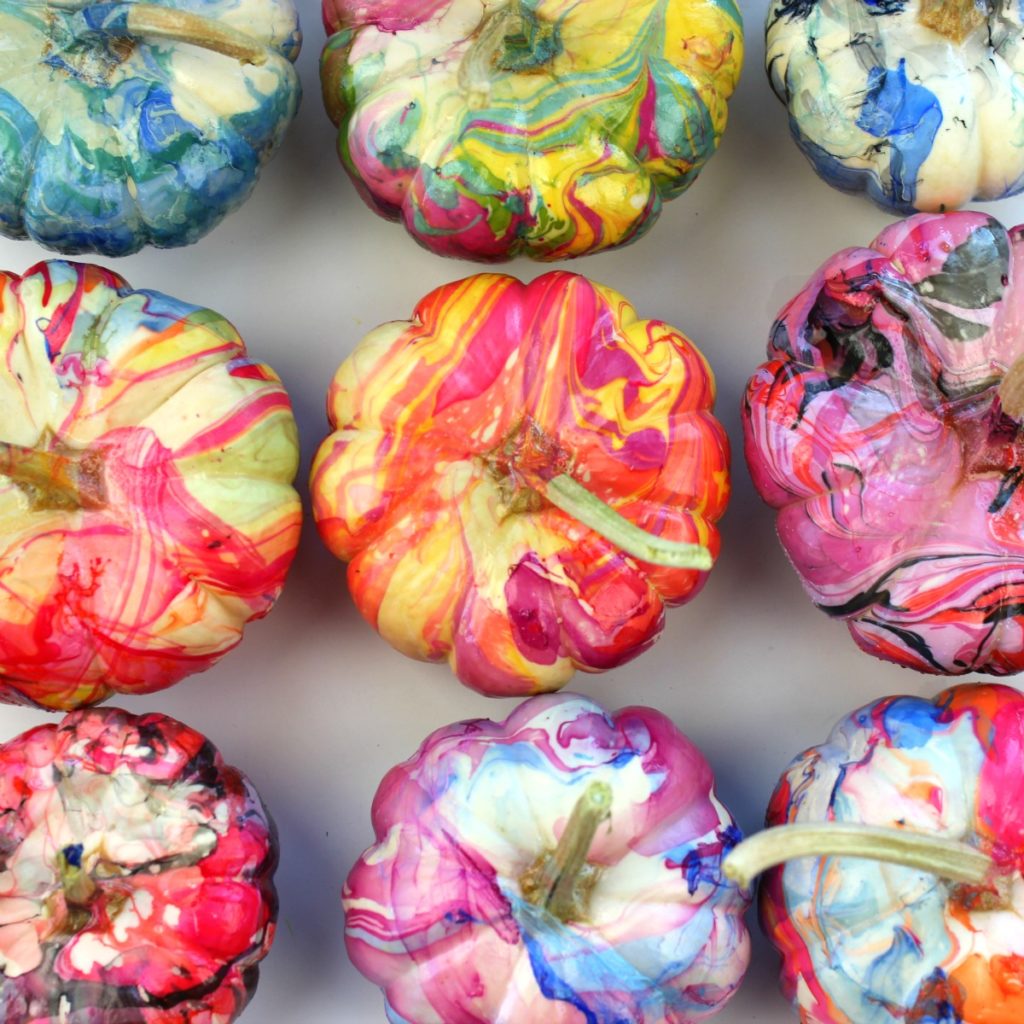
Doesn’t that look like fun? If you are looking for some other fun pumpkin decorating ideas, check these other colorful pumpkin crafts: Nail Polish Marbled Pumpkins

I’d love to see how your pumpkins turn out. You can share a pic with me on Instagram or Facebook.