DIY Ombre Christmas Tree Ornaments
As an Amazon Associate, I earn from qualifying purchases. This post may contain affiliate links. See our full disclosure here.
I love easy DIY ornaments and painting DIY Ombre Christmas tree ornaments is one of my favorite holiday crafts. If you like this ornament technique you can take it even a step further like I did with these Lisa Frank inspired ornaments. This is a fun and easy Christmas craft for all ages and it only requires three supplies.
Make These DIY Ombre Christmas Tree Ornaments
These ornaments are super easy to make and look so cool when they’re done! You can customize them to any color combination you like. They make a great gift idea too.
DIY Ombre Christmas Ornaments Supplies (affiliate links provided for convenience)
- Clear Plastic Disc Ornaments – I used these ornaments from Michaels but found these similar ornaments on Amazon. You want to be sure to use disc shaped ornaments as they lay somewhat flat, making it easier for you to paint.
- Acrylic Paint – I used the Mont Marte acrylic paint set. They are great colors and a great price.
- Makeup Sponge Wedges
How to Make a DIY Ombre Christmas Ornament Step by Step
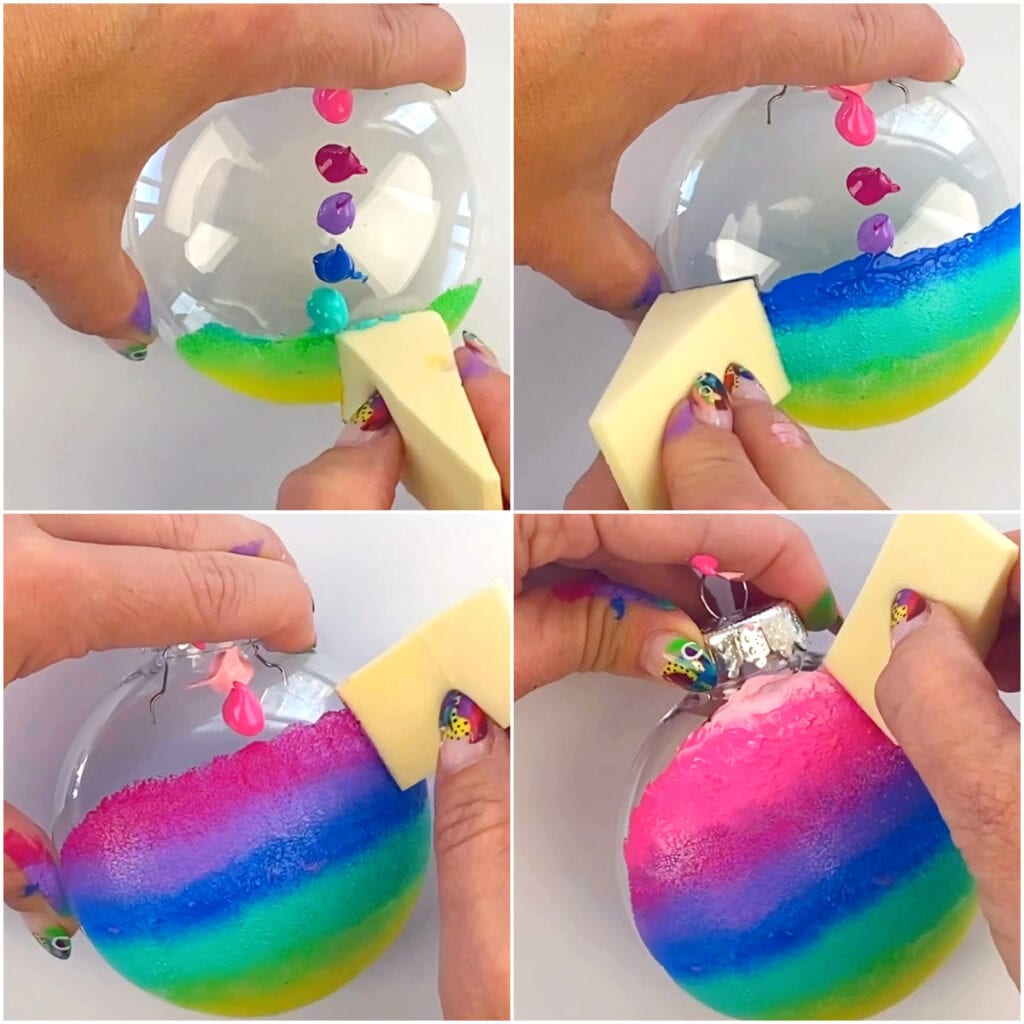
1. Add the Paint
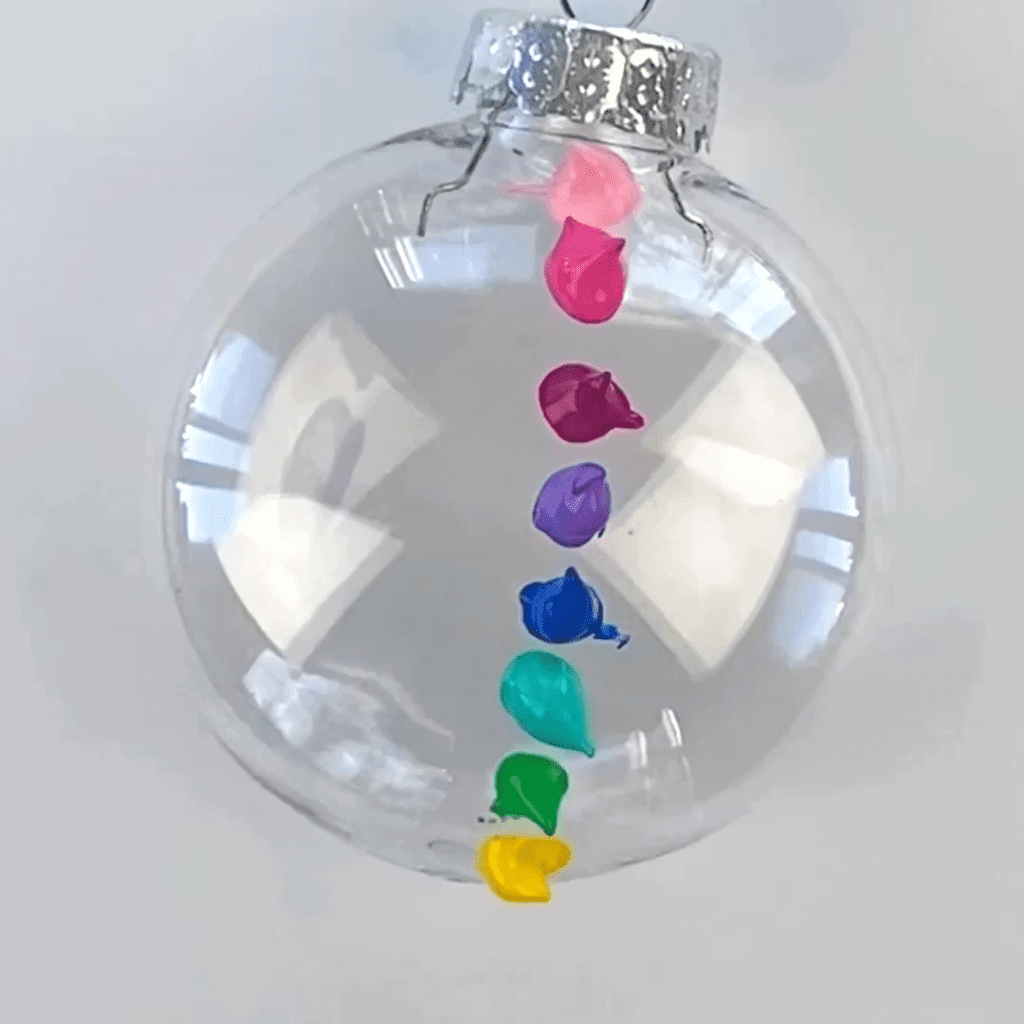
Start by adding the paint colors you want to your ornament (you don’t want to add too much. You can always add more if needed). If you prefer you could also just add the paint directly to the makeup sponge.
2. Spread the First Paint Colors
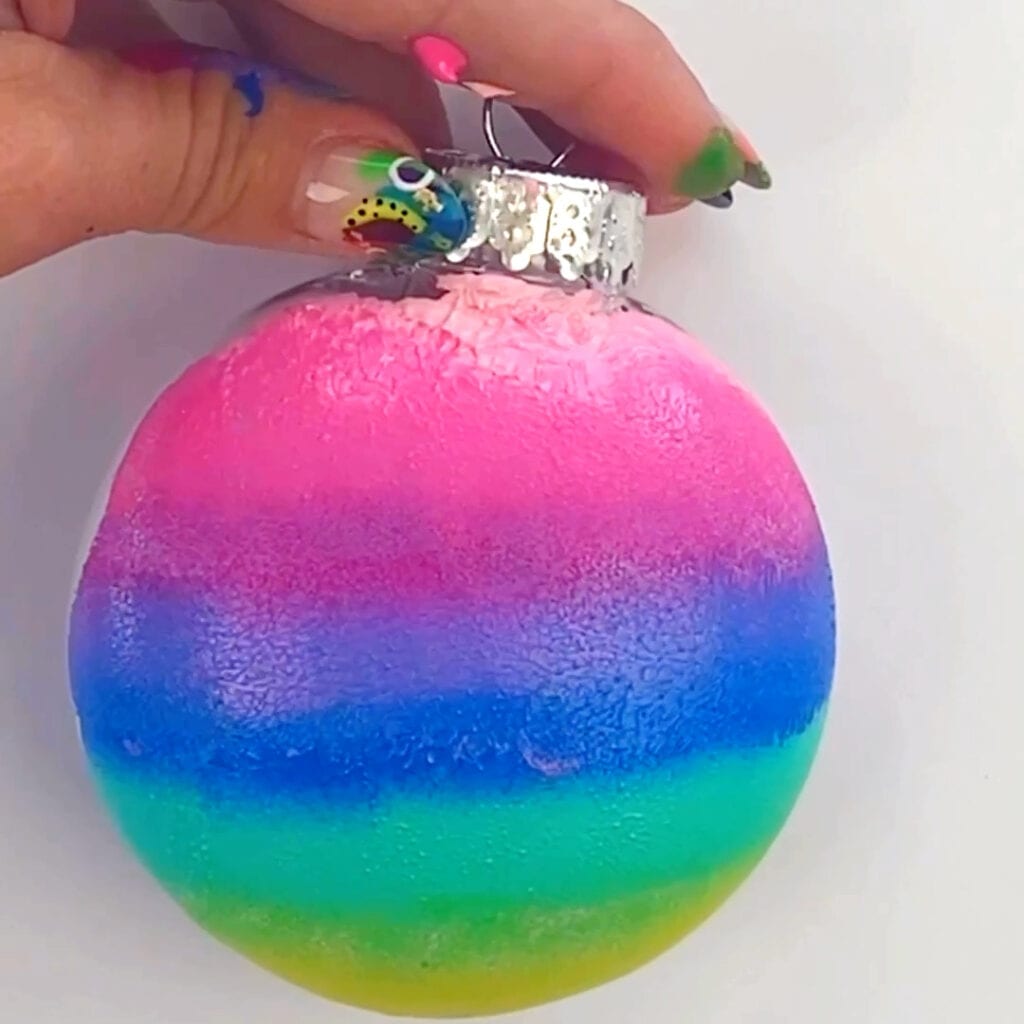
Using your first makeup sponge, lightly dab just the first two colors and go back and forth across the ornament.
3. Repeat With the Next Colors
Get a new, clean sponge, and repeat the same process for the next two colors.
4. Repeat Again
You’ll repeat this same process two more times with a clean sponge, each time blending two colors.
Helpful Tips
-
- You can always go back and blend more if you need to or add more paint. The key is to use clean sponges for each colored section.
- You can keep your finished ornament as is or add a design on top with a paint pen.
- And if you would like to seal your finished ornament, I like this glossy spray sealant.
Make Ombre Christmas Tree Ornaments – Summary
- Add dollops of each paint color in a row on your ornament
- Use a make up sponge to spread the paint of the first two colors across the ornament, blending them slightly as you go.
- Repeat for each set of two colors making sure to use a new makeup sponge each time.
- Once you’re done, clean up any blending problems or add more paint where needed.
- Optional: Add a design on top or seal it with a spray sealant.
I’d love to see your finished ombre ornaments. Come share with me a picture on Instagram or Facebook! I love showing examples of my tutorials being made!