DIY Christmas Ornaments Puffy Paint Craft
As an Amazon Associate, I earn from qualifying purchases. This post may contain affiliate links. See our full disclosure here.
Puffy paint is one of those universal craft supplies that not only works on a variety craft surfaces but it’s an art supply that’s loved by both children and adults. I think you’ll find that these puffy paint DIY Christmas ornaments are quick, easy, and colorful.
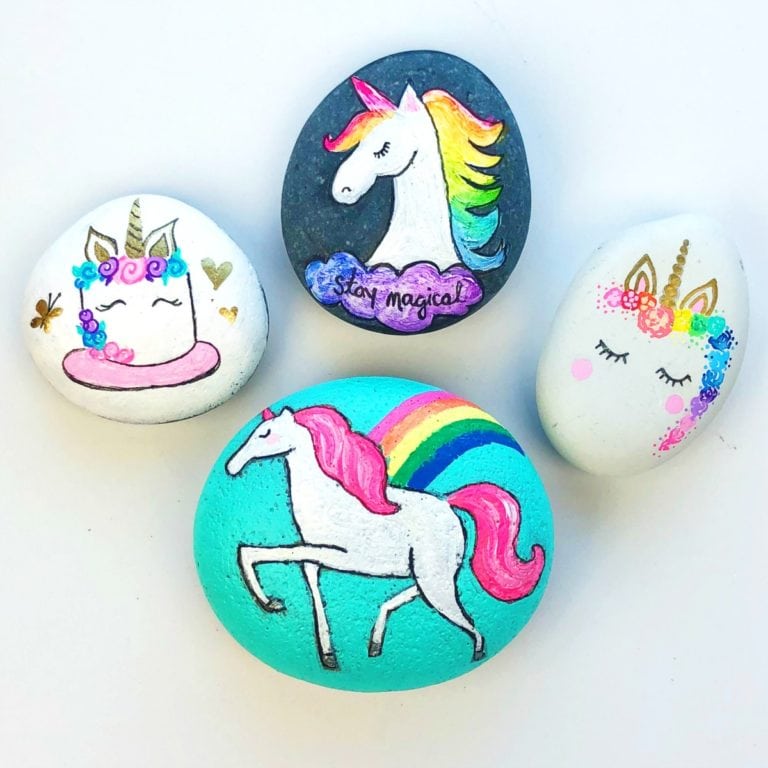
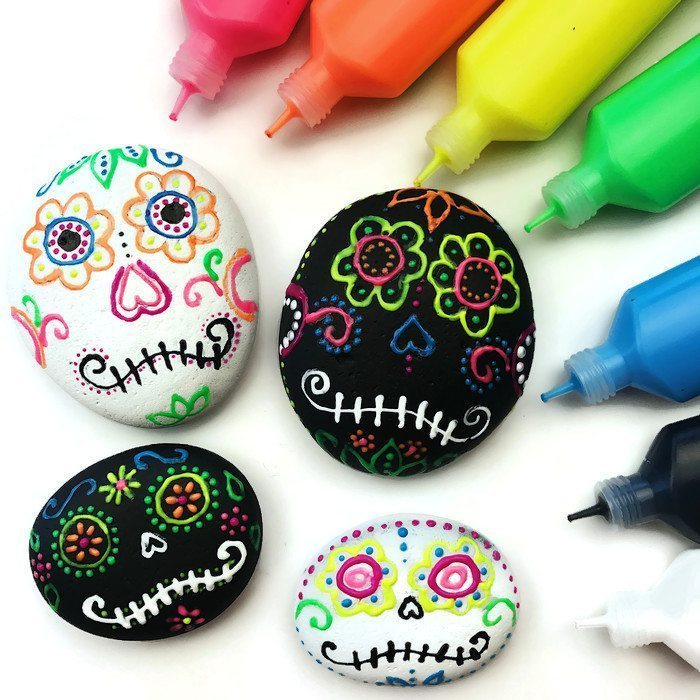
I actually got the idea after I made these puffy paint sugar skull rocks. It’s true…puffy paint works great on rocks too! But not all puffy paint is created equal. I definitely have my favorites listed below that will help you create smooth, clean lines and designs.
Easy Puffy Paint Christmas Ornament Craft Supplies
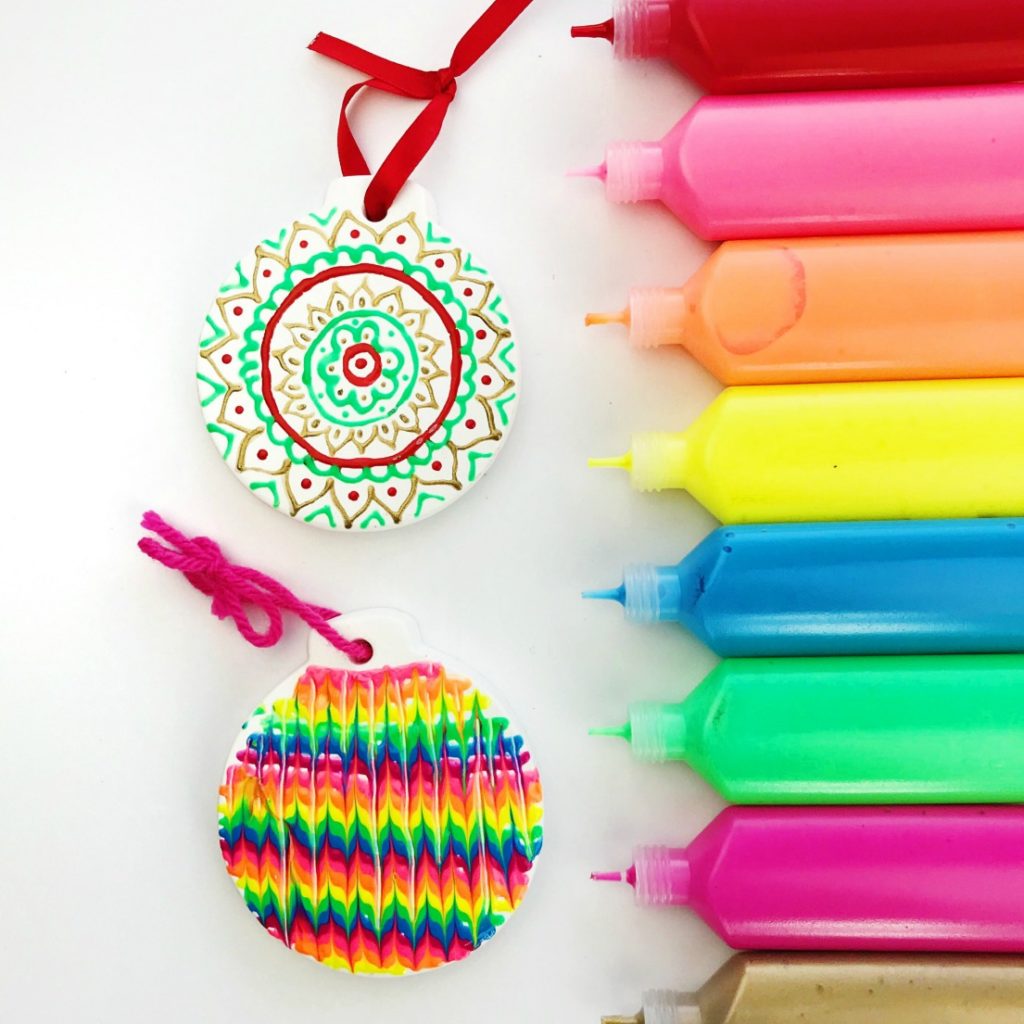
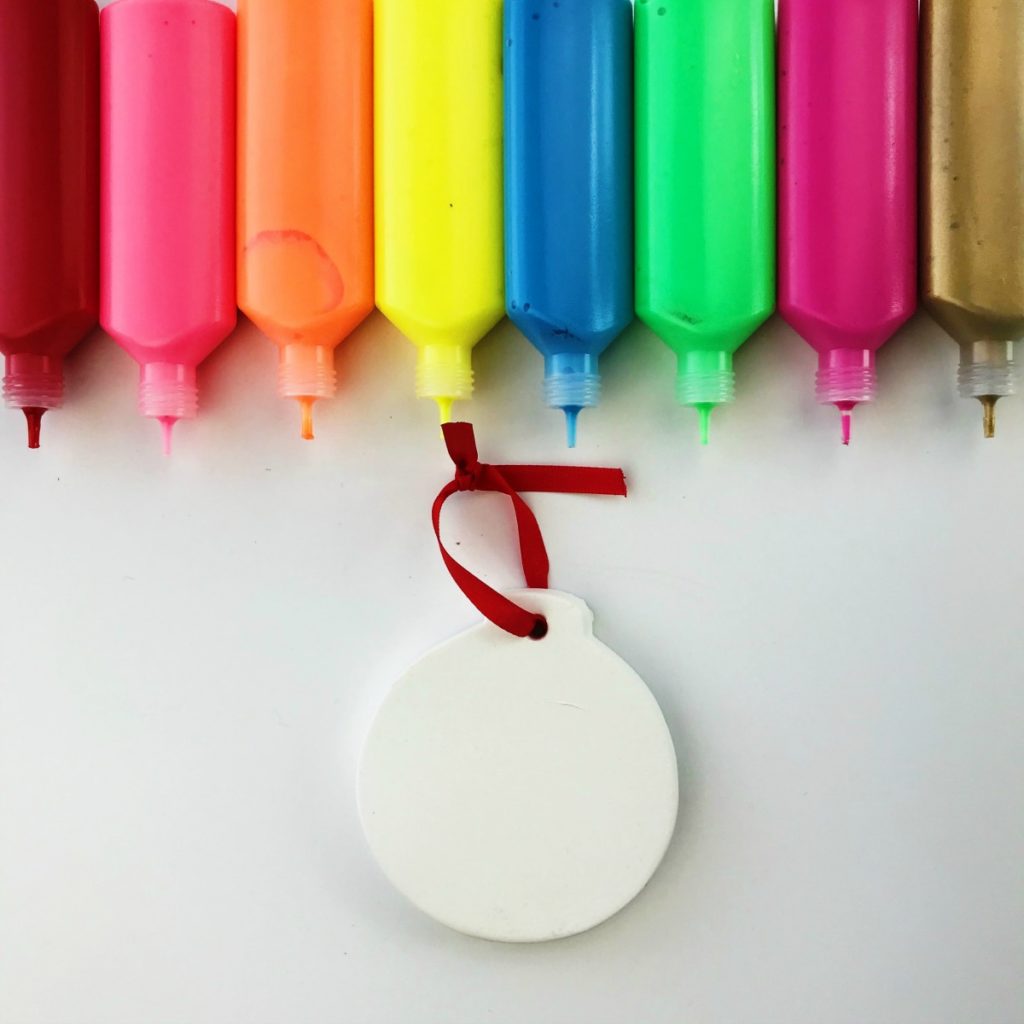
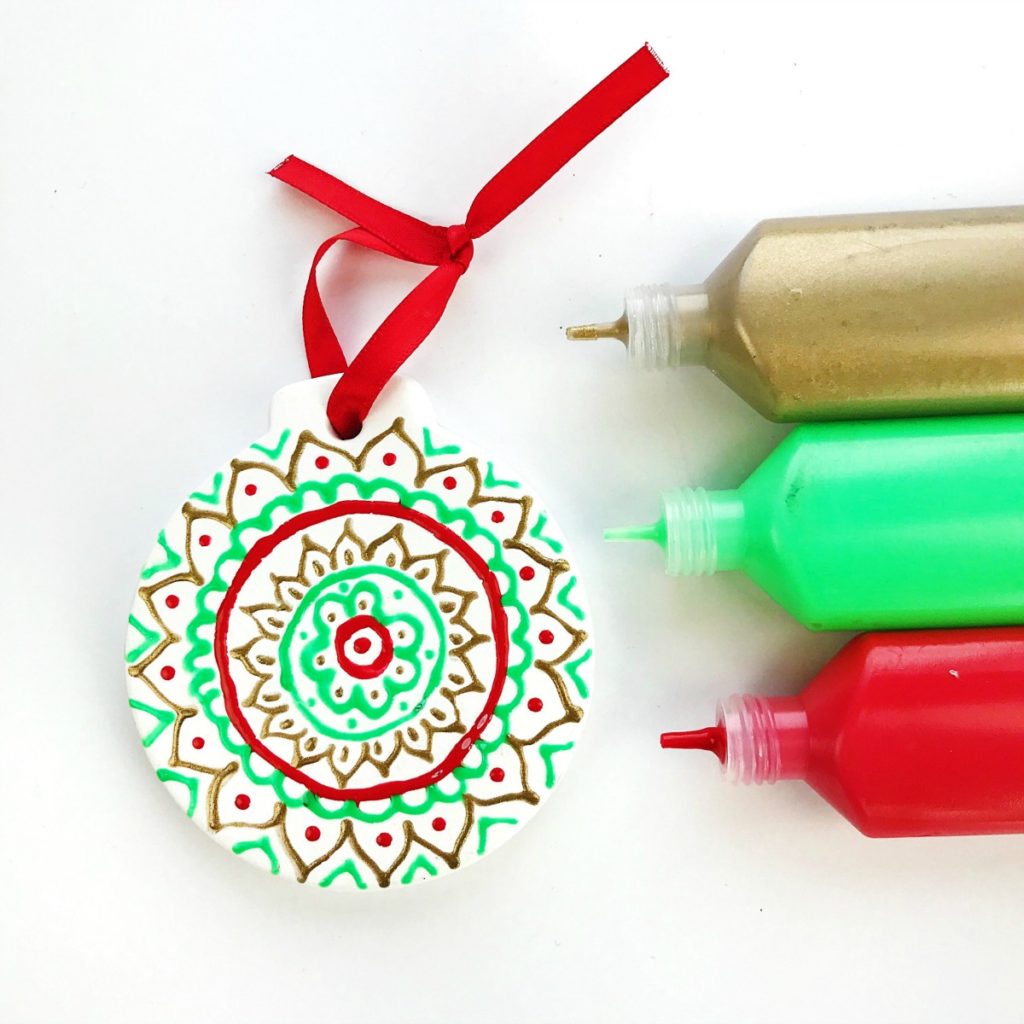
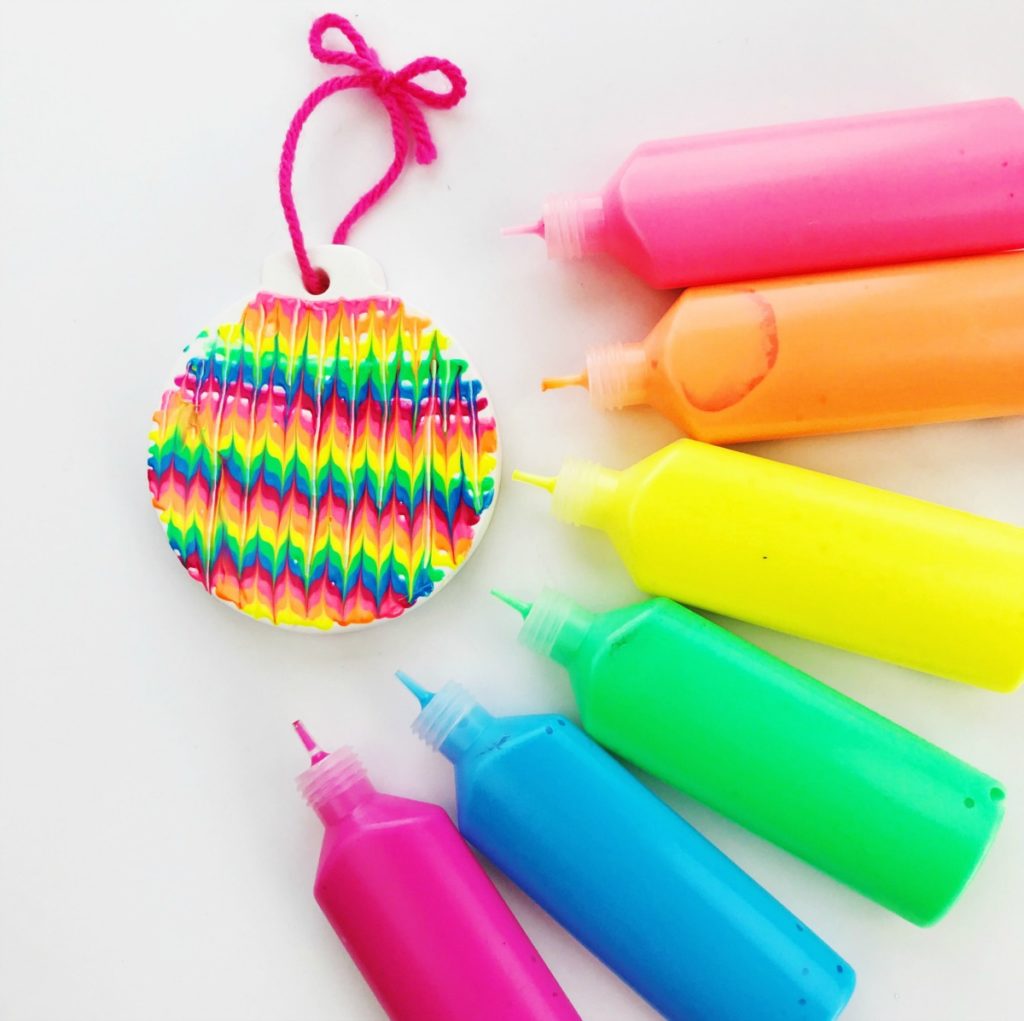
- Puffy Paint – I used these neon dimensional puffy paints as well as the metallic red and gold from this puffy paint set. It would also be fun to try the glow in the dark version.
- Ceramic White Ornaments – similar here and here. You could also use wooden ornaments.
- Toothpicks – You need these for the rainbow version.
- Sealant (optional) – This Rust-oleum Triple Thick Glaze will give your finished design a glass like appearance but it’s not required.
How to Make Christmas Ornaments Using Puffy Paint: Step by Step
Here’s a quick video of the ornaments being made. You can also keep reading to get the full step-by-step directions.
Mandala DIY Painted Christmas Ornaments Directions:
Mandalas aren’t difficult to make, the key is to keep your design symmetrical.
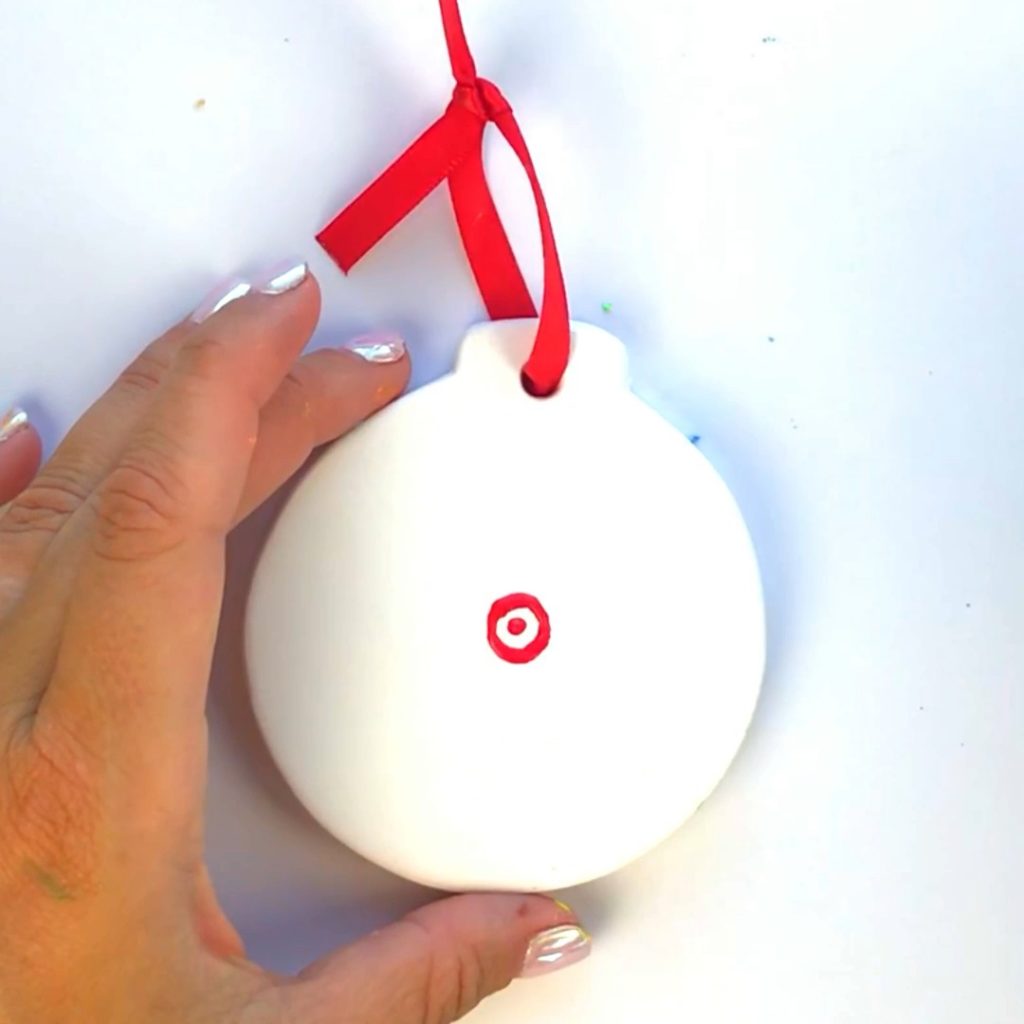
1. Start at the Centre
Using the metallic, red and gold dimensional puffy paint as well as the green puffy paint, start with a dot and circle surrounding it in the center of your ornament.
2. Outline the Circle
Next, outline the circle with small flower like bumps.
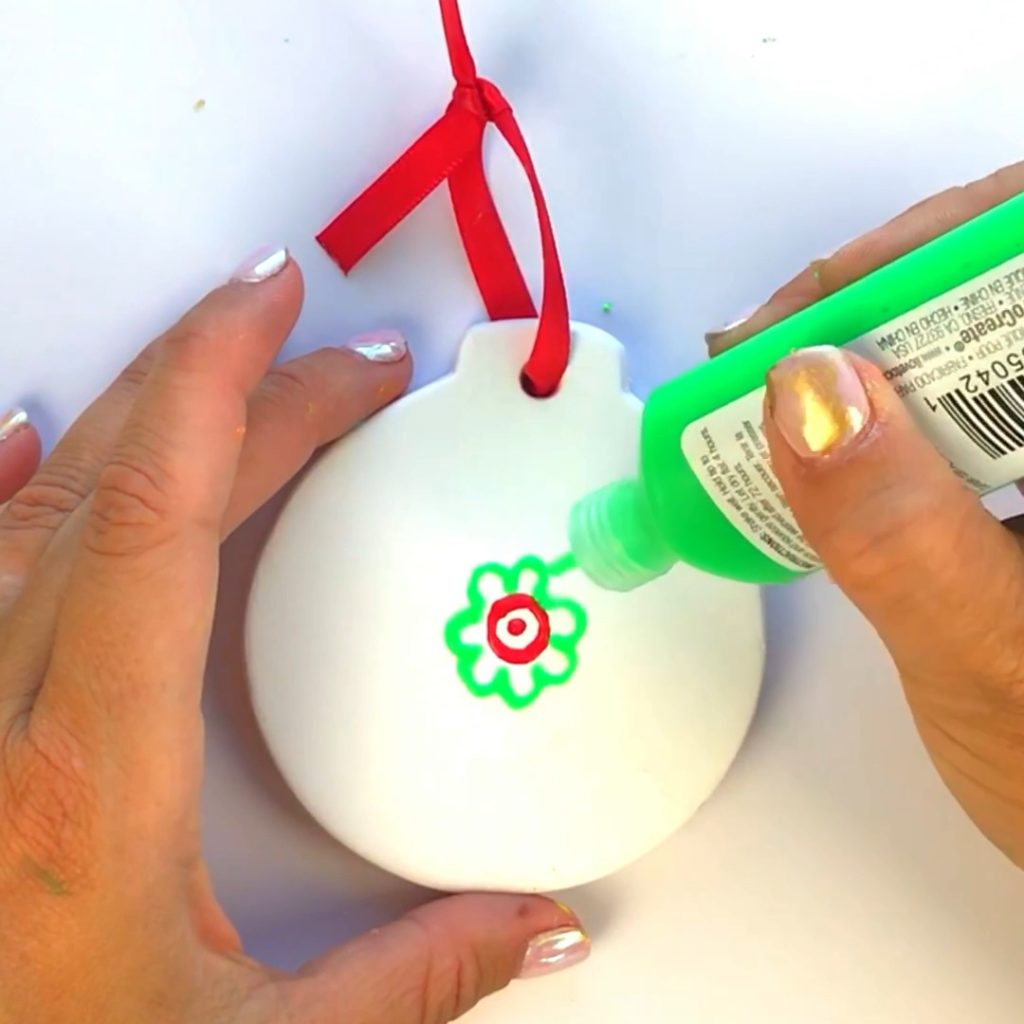
3. Add More Petals
Add a new flower petal shape to enhance your mandala design.
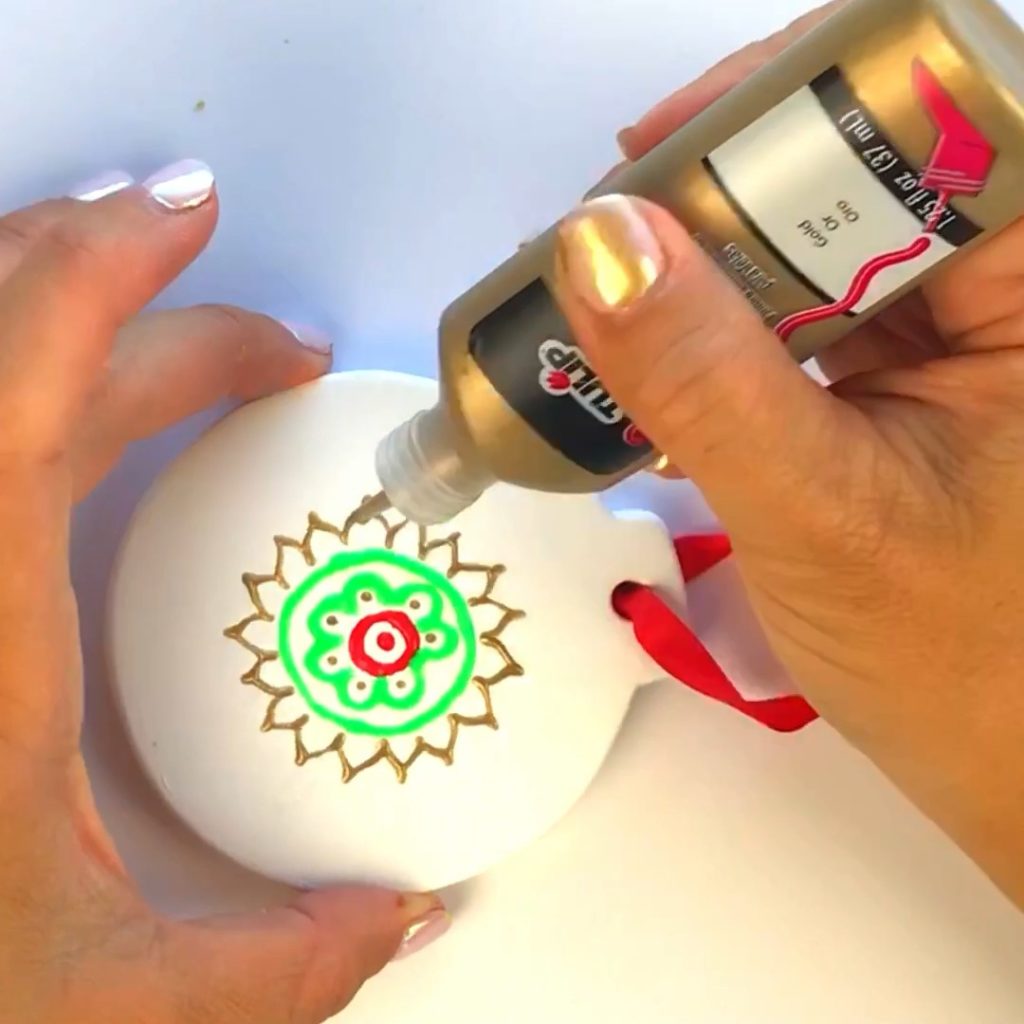
4. Continue the Mandala Design
Keep outlining and then adding a new design around the outline. It’s okay to repeat patterns.
5. Stop at the Edge of Your Ornament
Add designs until you reach the outer edge or the ornament.
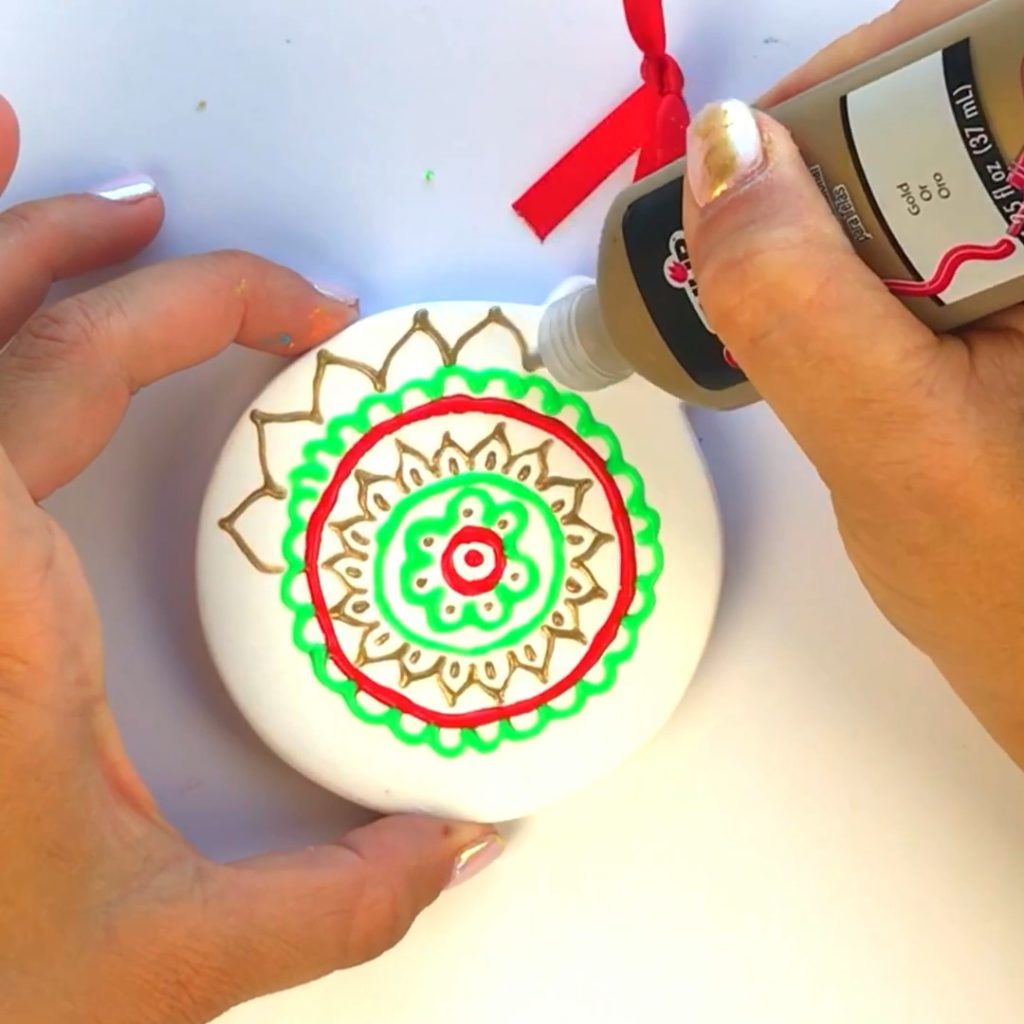
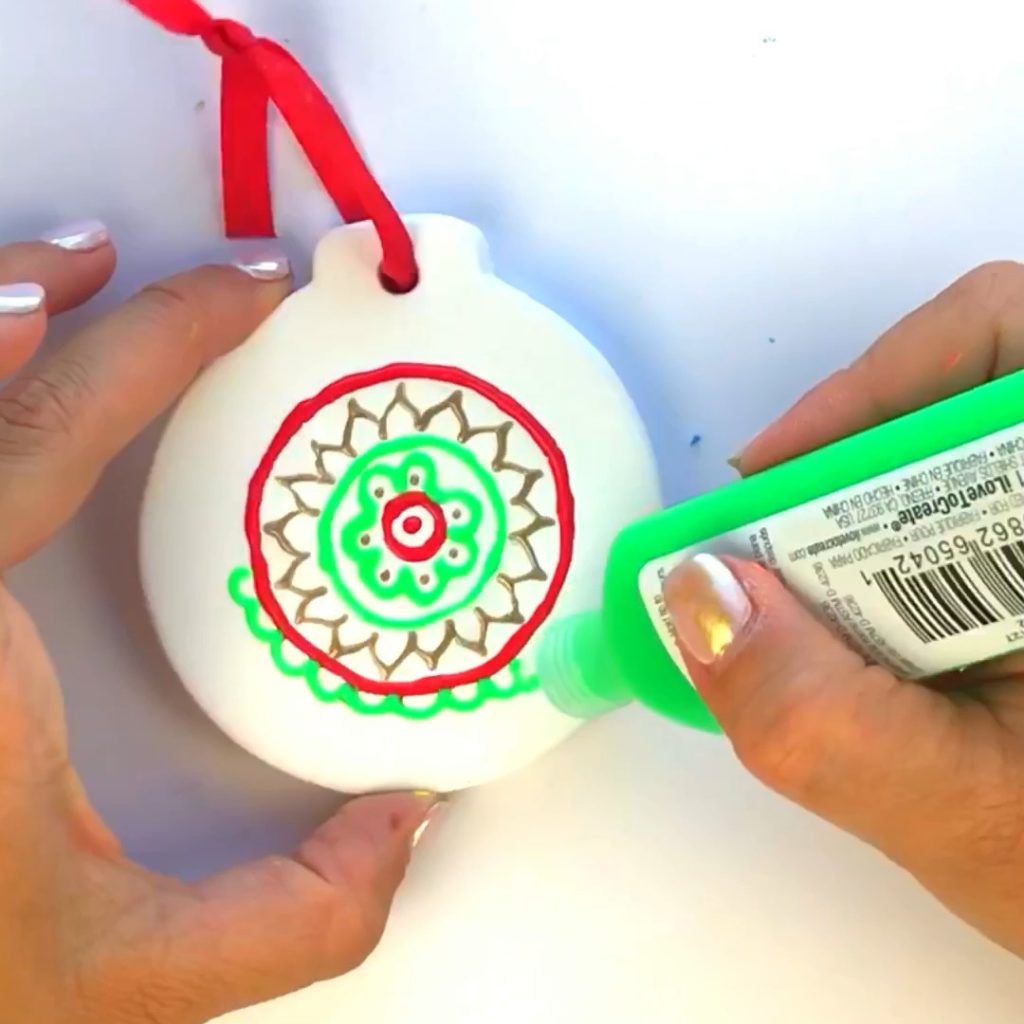
6. Add Details
Go back and add details to your designs with dots, lines, etc.
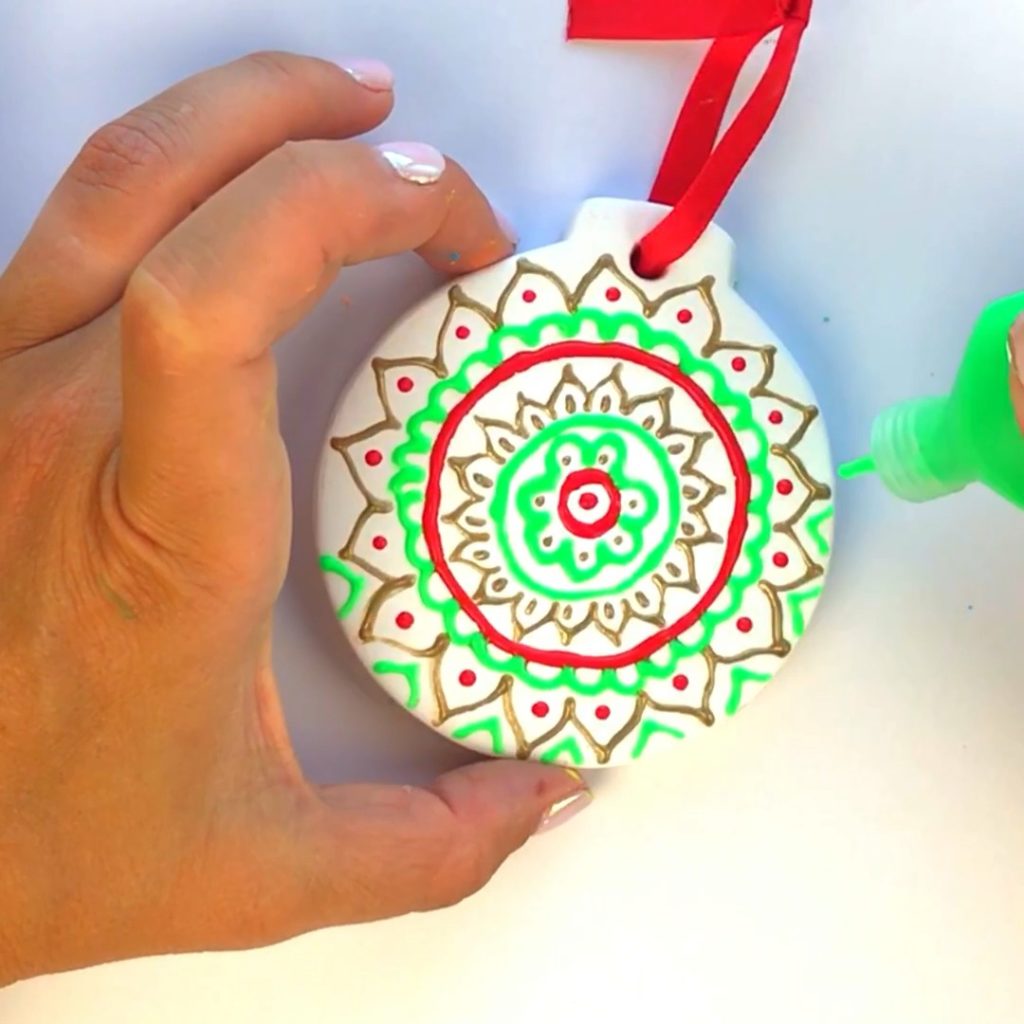
7. Let it Dry
Let dry completely. This is the hardest part. Puffy paint can take a bit of time to dry. If you want. You can spray an optional sealant once dry.
I like this Rust-oleum Triple Thick Glaze. It gives a glass like appearance to your finished designs.
Rainbow DIY Painted Christmas Ornaments Directions:
I love the abstract design of these rainbow Christmas ornaments and it’s very easy to achieve, you just need a few toothpicks on hand.
1. Start With Horizontal Lines
Begin by adding a horizontal line of each neon puffy paint color to the ornament.

2. Use a Toothpick on the Wet Paint
Starting at the far side of the ornament, drag a toothpick from top to bottom perpendicular to your puffy paint lines. On the next drag, change directions and drag from bottom to top. Repeat this until you reach the other side of the ornament.
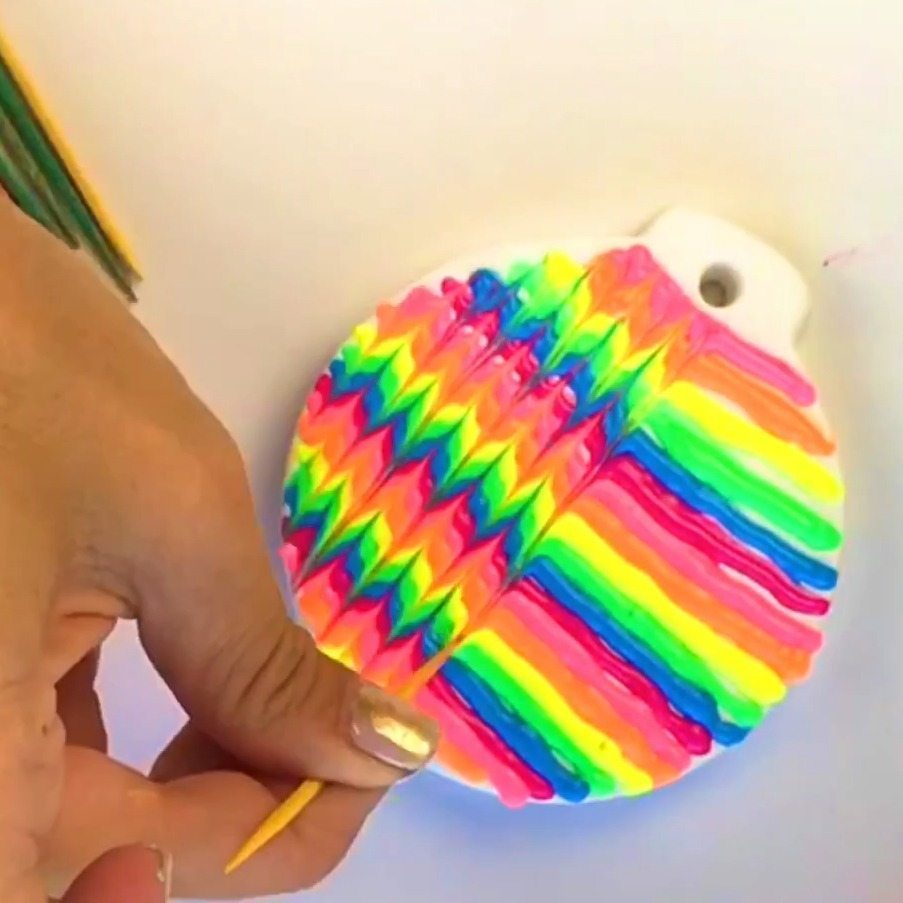
3. Prevent Color Mixing
Wipe your toothpick in between each drag or change toothpicks to help prevent the colors from mixing.
4. Let it Dry
Let dry completely. and leave as is or spray with an optional sealant.
What is the Best Paint to Use on Wooden Christmas Ornaments?
I’m a huge fan of puffy paint because it’s so easy to work with! You can use it to create fun and unique designs which transform basic wooden ornaments into something really cool. It also comes out thick. That means you get a much better control over your design vs other types of paints. Finally, puffy paint is a great choice if you want to create smudged designs like the rainbow one I made.
Besides puffy paint, you can also use acrylic paint like I did for these DIY Ombre Christmas Tree Ornaments or paint markers, which I used to create this Christmas Painted Rock Volkswagen Bus.
Can I Make These Designs on Wooden Ornaments?
Definitely! There’s just a few things that I would change to make these painting techniques work on wooden Christmas ornaments.
First, make sure you’re working with a white base so the colors show up vibrant. If your wooden ornament is unfinished, apply a base coat of white acrylic paint and let it dry before starting.
Second, be aware that rough wood might be more difficult to drag the toothpick across when creating the rainbow design.
Hope you’re feeling inspired to try your own DIY Christmas ornaments using puffy paint. For more fun crafts, make sure you’re following me on me on Instagram @Colormadehappy and Facebook. And be sure to come share what if you’ve created if you’ve been inspired by one of my posts. I’d love to see it.