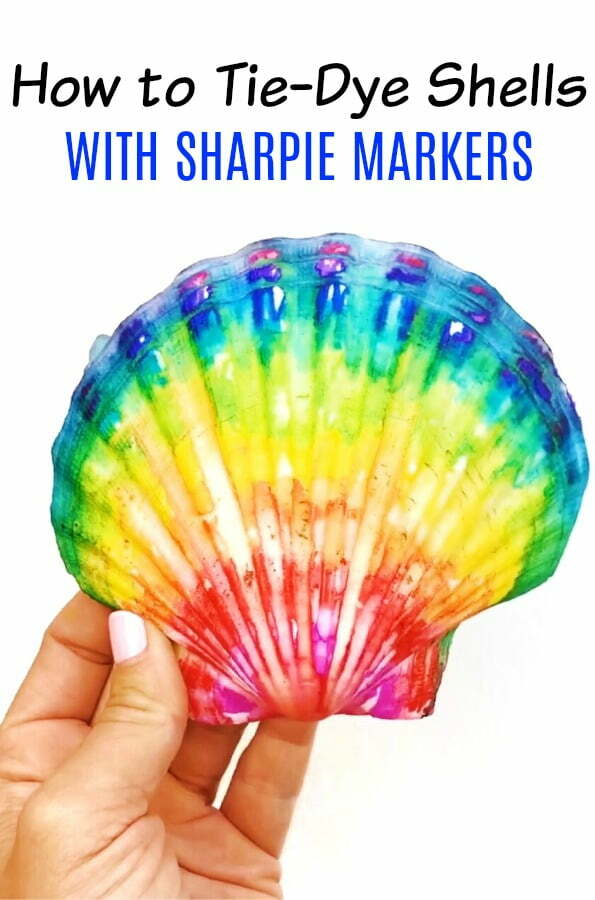
Tie Dye with Sharpies on Shells
As an Amazon Associate, I earn from qualifying purchases. This post may contain affiliate links. See our full disclosure here.
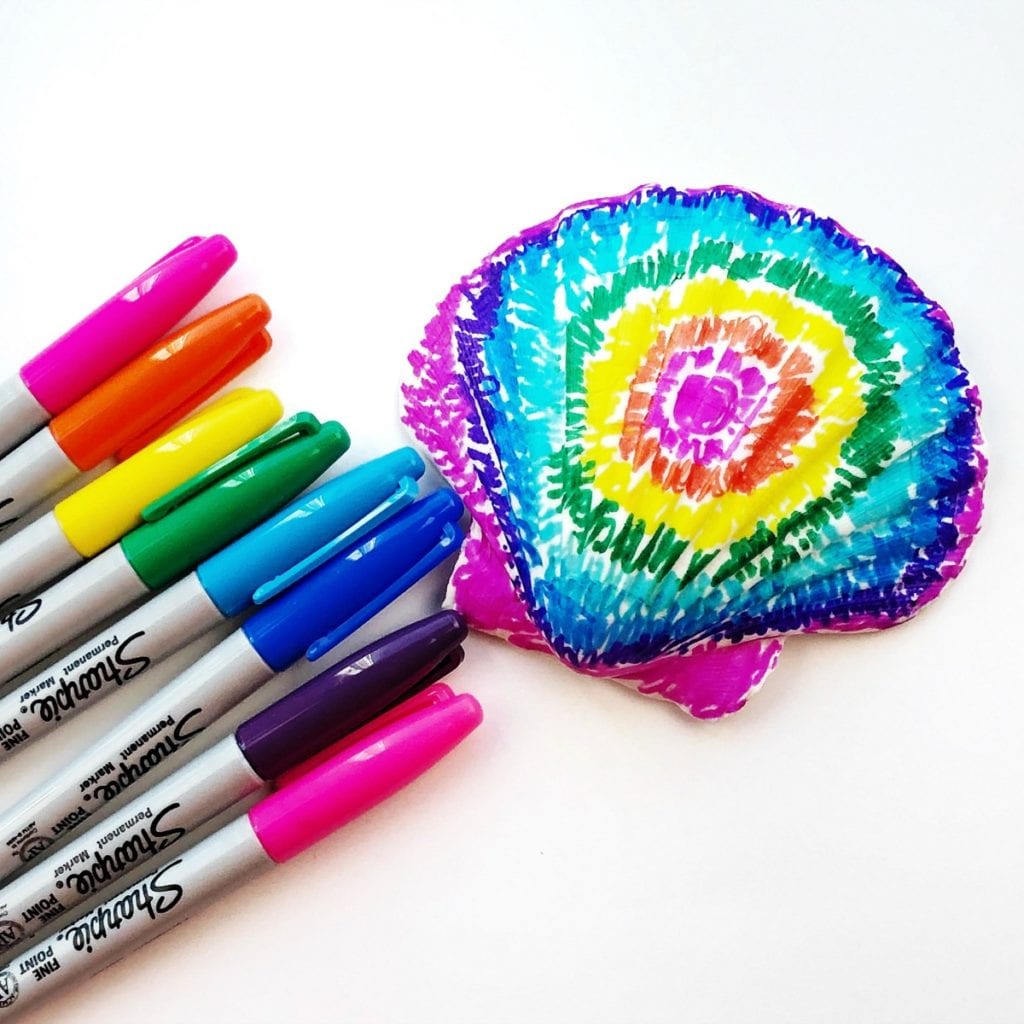
 I’m quite obsessed lately with turning shells into pretty pieces of art. I really love using puffy dimensional paint on shells and had lots of fun experimenting with alcohol inks on shells as well. What I really have been wanting to try though is to see if I could create tie dye with sharpies on the shells for a fun effect. I’ve seen tie dye with sharpies done on canvas shoes, tiles and even on just paper, but never on shells. So I tried it! And I’m happy to report it was a huge success. I actually couldn’t stop myself and made an entire collection of tie dye shells that were made using Sharpies and alcohol. See below for the complete step-by-step directions and helpful hints.
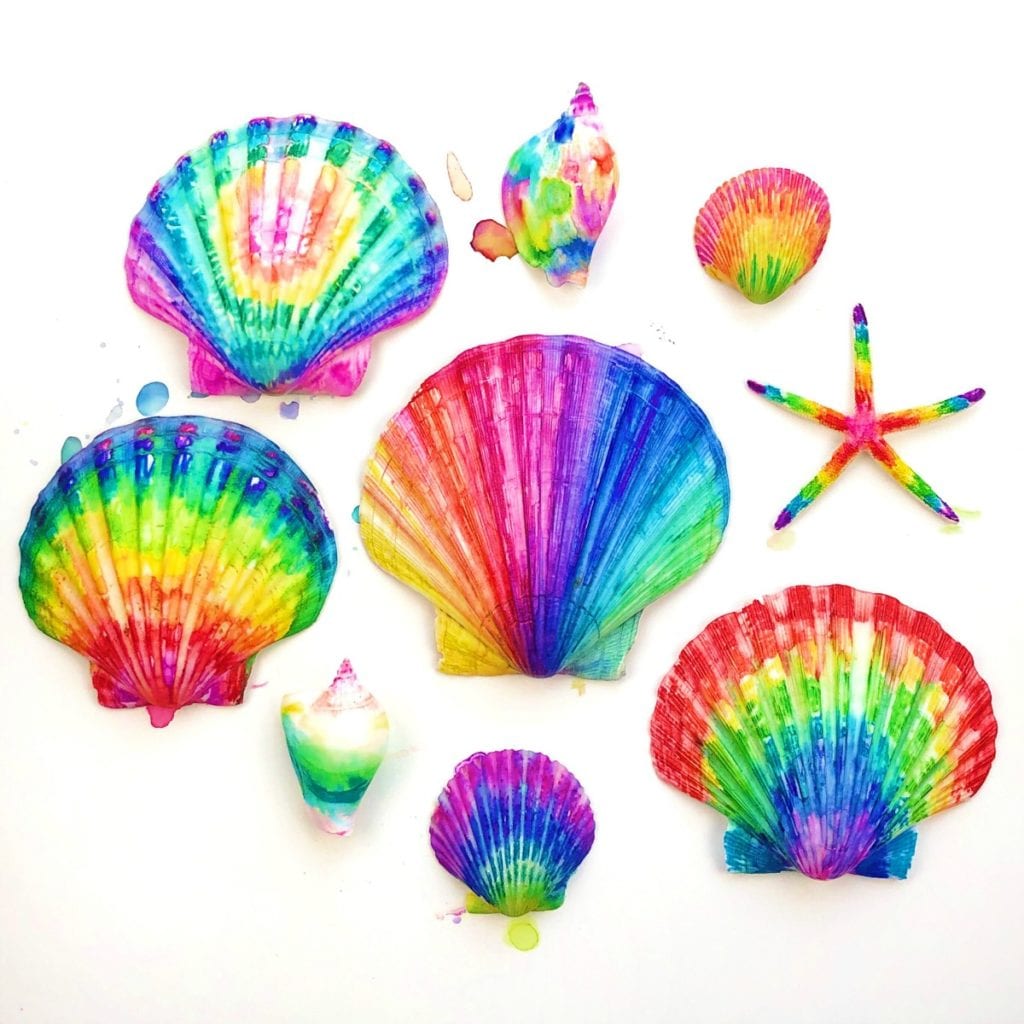
Tie Dye with Sharpies Shells Supplies (affiliate links provided for convenience)
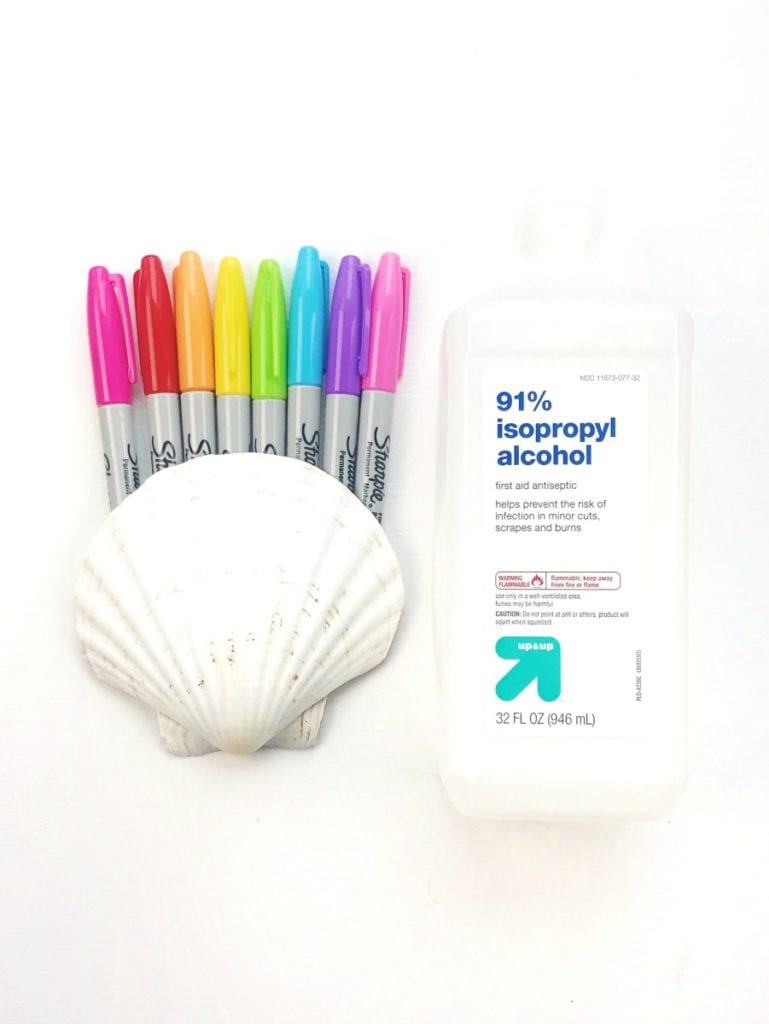
- White Shells – While collecting your own shells is great, you can also purchase shells online. Here are some great options. You just want to make sure your shells are white or light colored.
- White shells from this set
- Shells from Etsy like these shells, as well as these shells
- On Amazon you can find these 3″ scallop shells, 4″ scallop shells or these and also these 5″ scallop shells.
- Sharpie Markers – Fine tip Sharpie markers are what you’ll want to use.
- Isopropyl 91% Rubbing Alcohol
- Paintbrush or Q-Tips
- Plastic pipette or dropper (optional)
Watch the video and then see the full directions below:
Tie Dye with Sharpies Shells Directions
- When choosing your Sharpie colors, you’ll want to think about which colors will blend well together. This is part of the fun of experimenting.
- I like doing the colors in rainbow order as they blend really well this way.
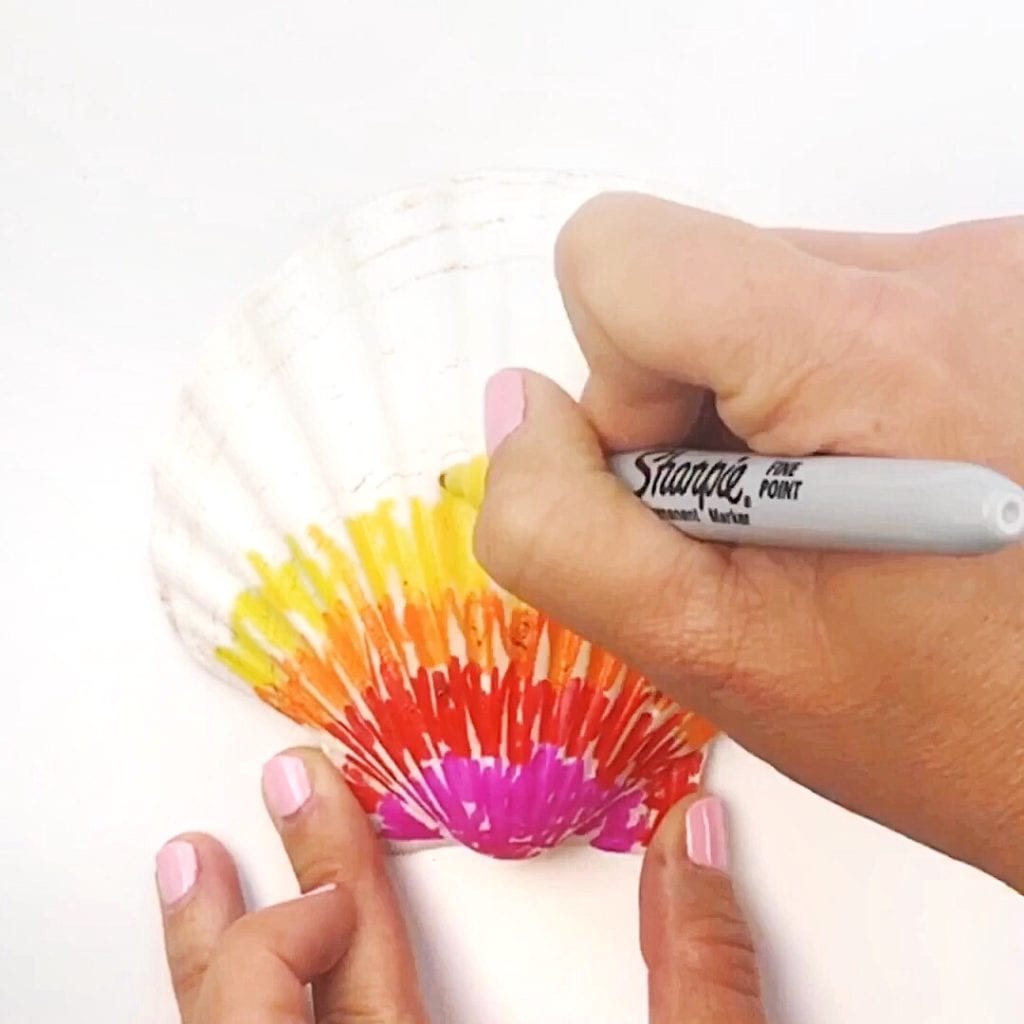
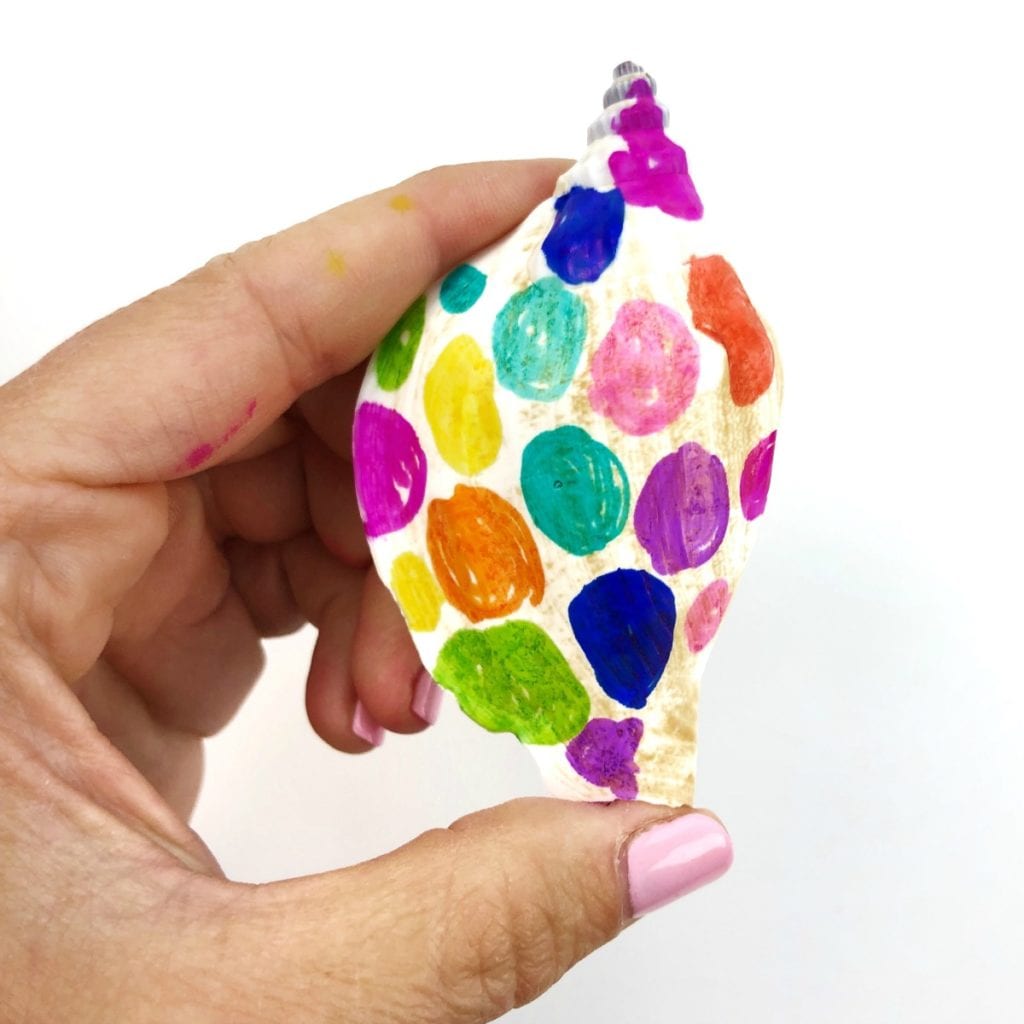
- You can also draw little squares or circles for a more color blended background.
- Once you have your marker design complete, dip a paintbrush or Q-Tip into rubbing alcohol or fill a pipette or plastic dropper and brush or drop the alcohol onto the colored design.
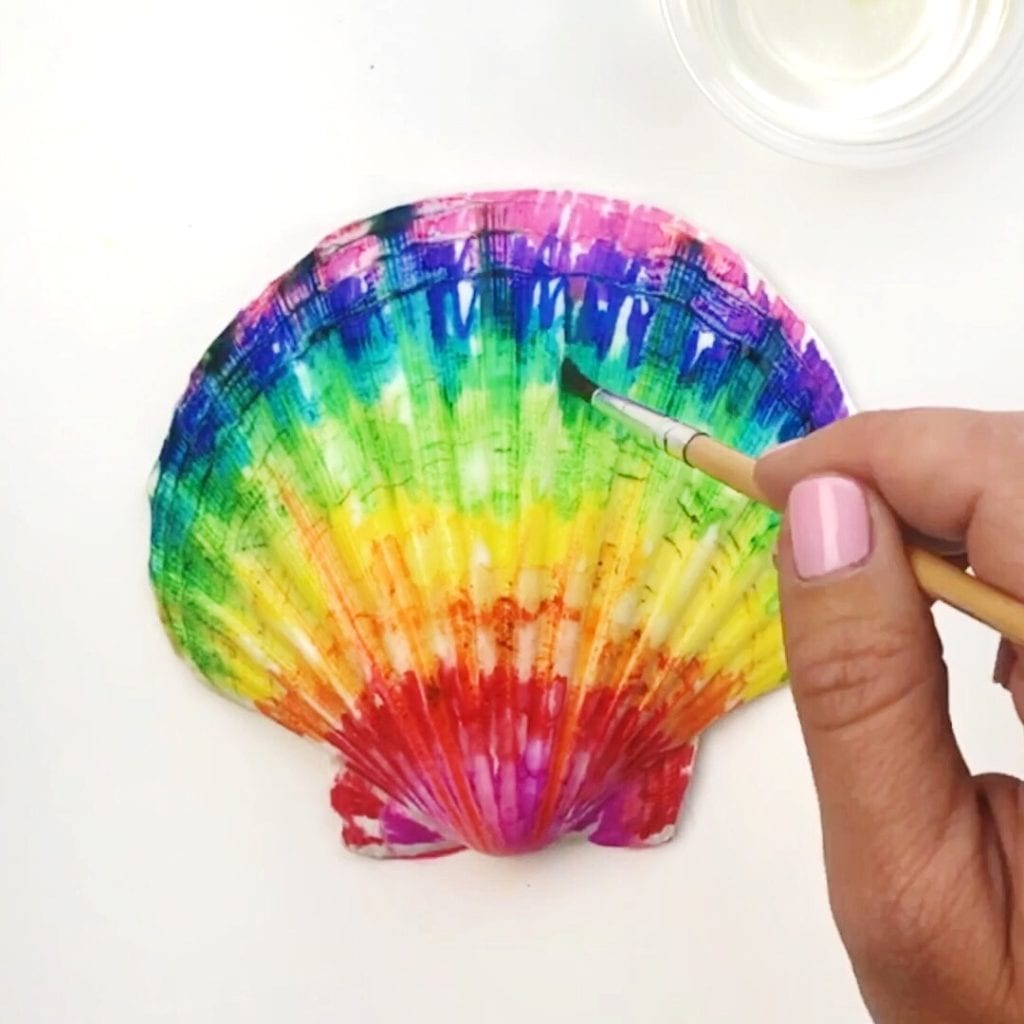
- To make your design more blended, just add more alcohol.
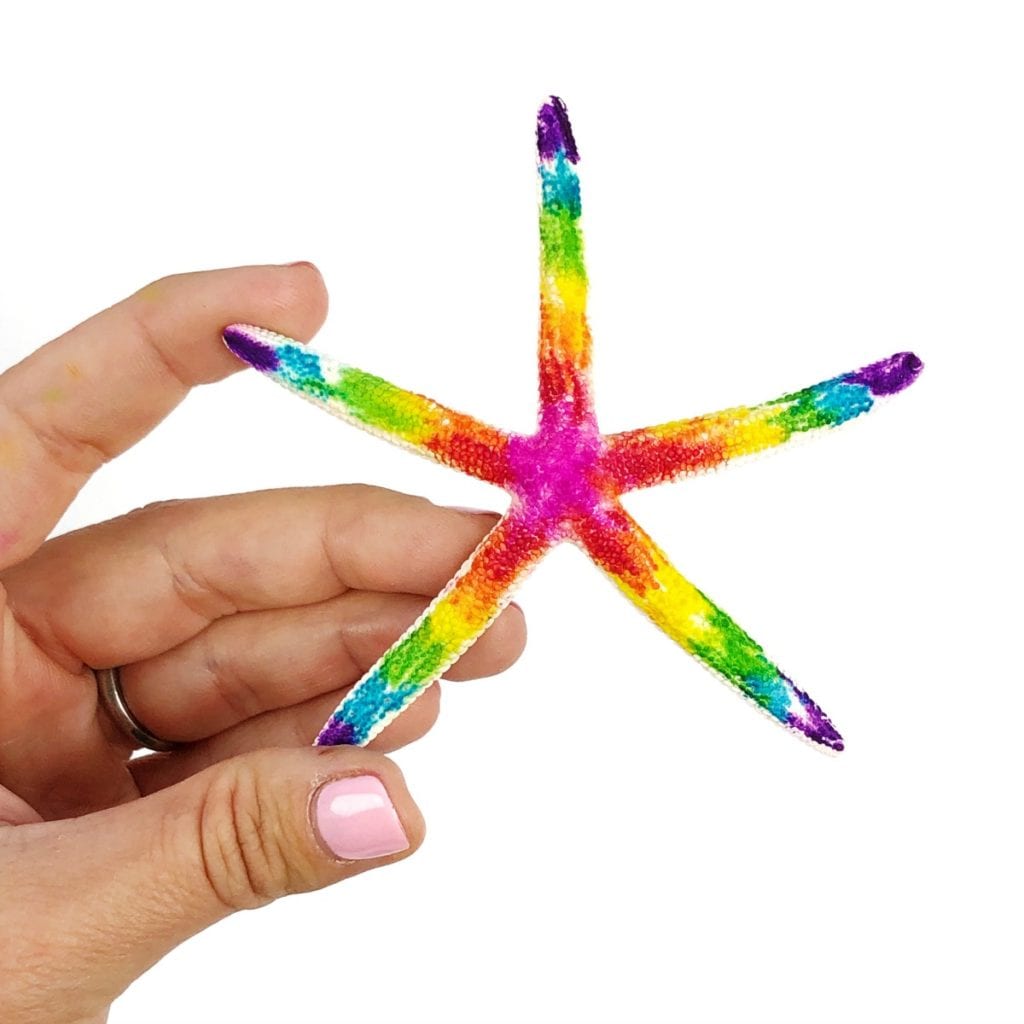
- This same technique also works well on more porous surfaces like a starfish.
What to Do with Your Finished Shells
- Display your finished shells in a dish or basket.
- Add your shells to a shadow box.
- Glue the finished shells to a piece of wood or a craft wood slice.
- Arrange shells as part of a centerpiece.
- Use shells as place setting decor or as name cards.
- Leave a shell outside for someone to find.
Would love to see your finished tie dye with Sharpie shells. Come share a picture with me on Instagram or Facebook! I love showing examples of my tutorials being made!