Perler Bead DIY iPhone Case Holder
As an Amazon Associate, I earn from qualifying purchases. This post may contain affiliate links. See our full disclosure here.
 Did you play with perler beads (aka hama or melty beads) when you were a kid? I sure did and I have to admit that I have just as much, if not more fun, playing with them as an adult. There are so many crafty things you can do with them, including making your own DIY iPhone case. This tutorial is easy as can be. The hardest part is figuring out your design. The good news is that I have a few designs to get your creative juices flowing or feel free to copy them exactly! You can even use the Perler iPad app to help you figure out your designs. And if you don’t feel like making a DIY iPhone case I highly recommend just getting yourself a set of perler fused beads and peg boards because they are SO much fun to create designs with.
 SUPPLIES (affiliate links are included for your convenience):
- Perler beads – I love this bright multicolor perler bead set as well as this neutral color set. I have both and use them constantly.
- Peg board – The large square peg boards are perfect for creating iPhone designs and you can even use several together to create larger art designs for other projects.
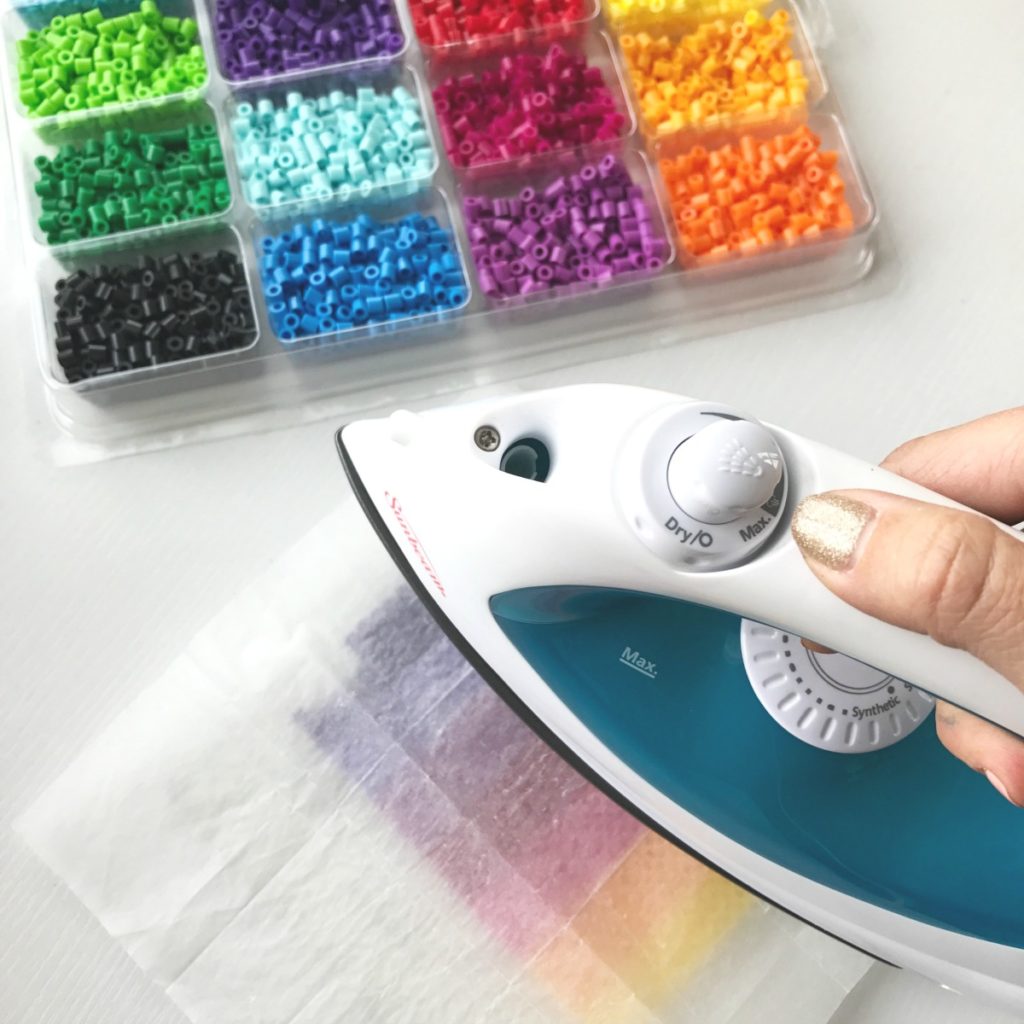
- Parchment paper – Most pegboards come with ironing paper. You can also use regular parchment paper.
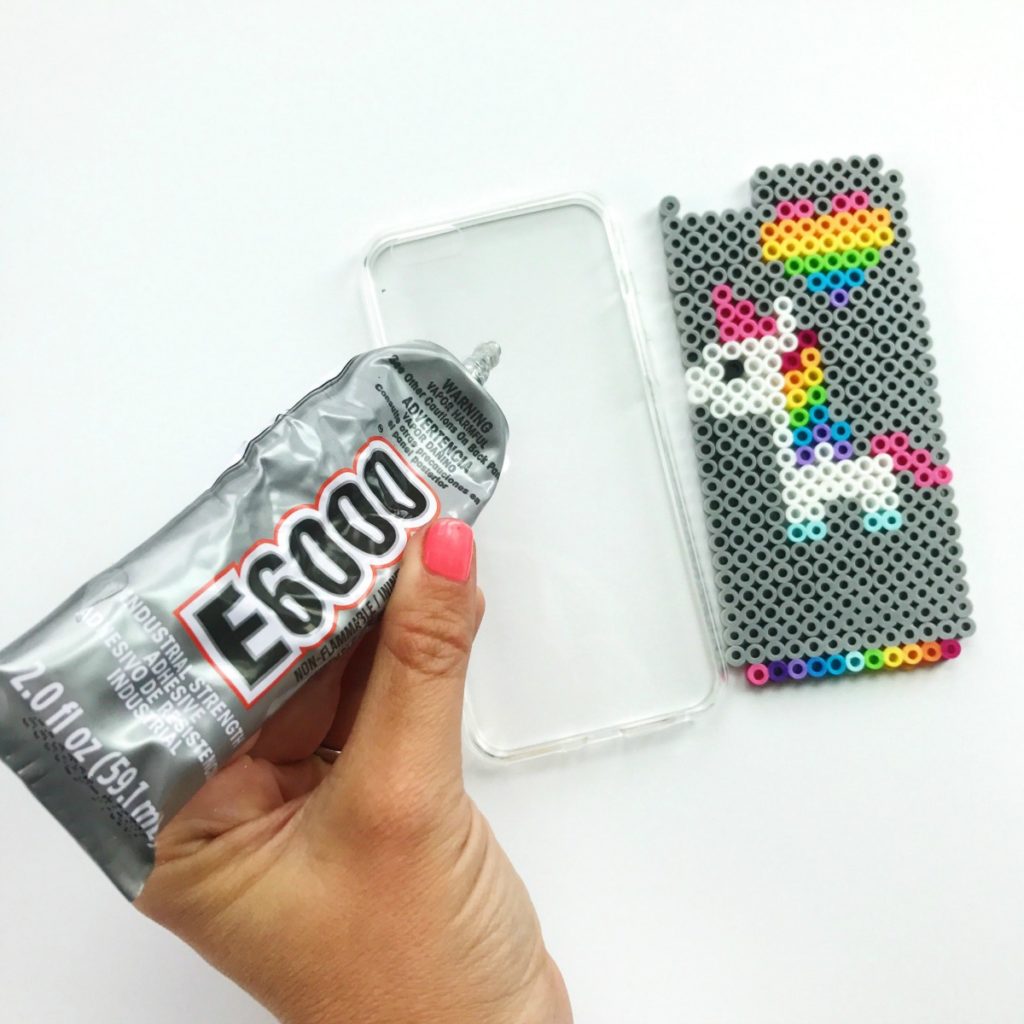
- iPhone Case – For the tutorial I used an iPhone 6/6s case but you can also do the same design for iPhone 7/7s cases (see layouts below). I used both white and clear iPhone cases and I definitely preferred the clear. It had a cleaner look. Amazon has a ton of cases in case you have a different model phone.
- Adhesive – My favorite heavy duty glue for craft projects by far is E6000 Craft Adhesive.
- Iron
DIRECTIONS:
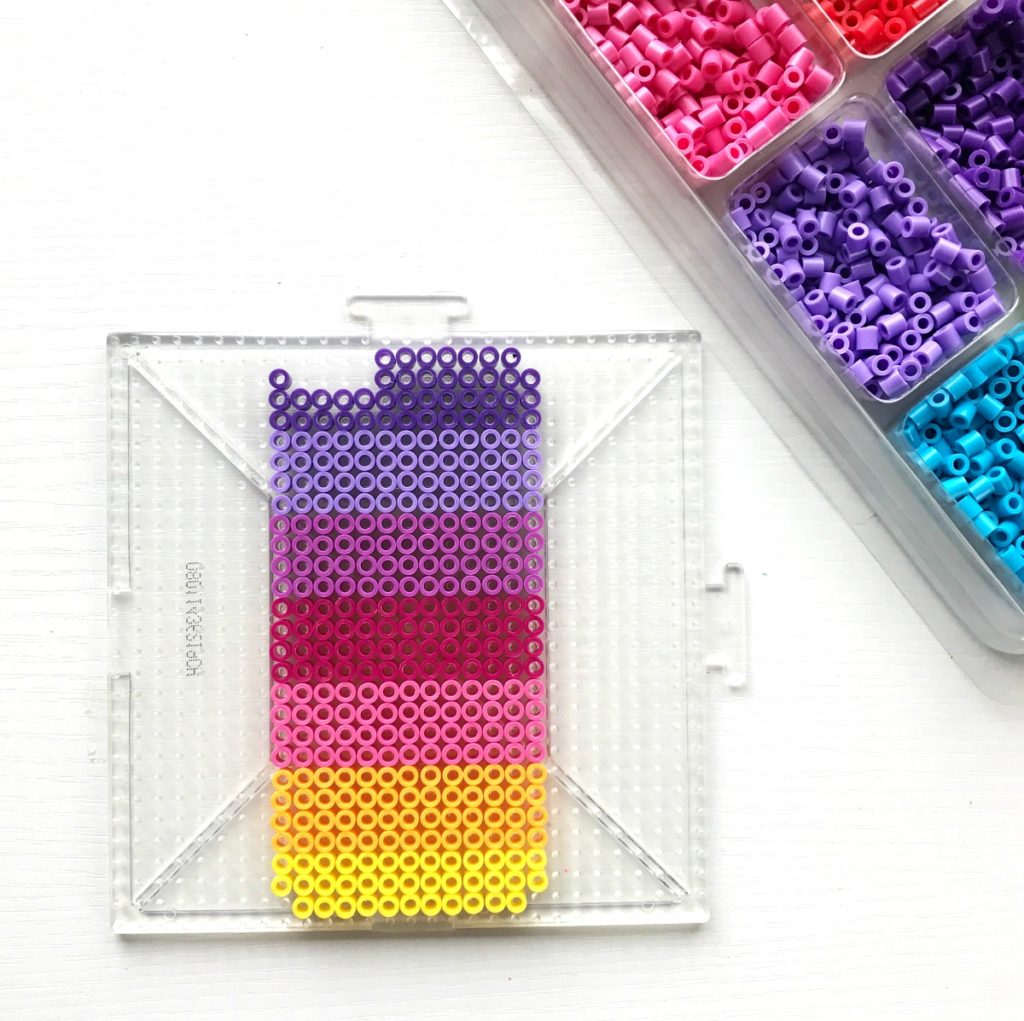
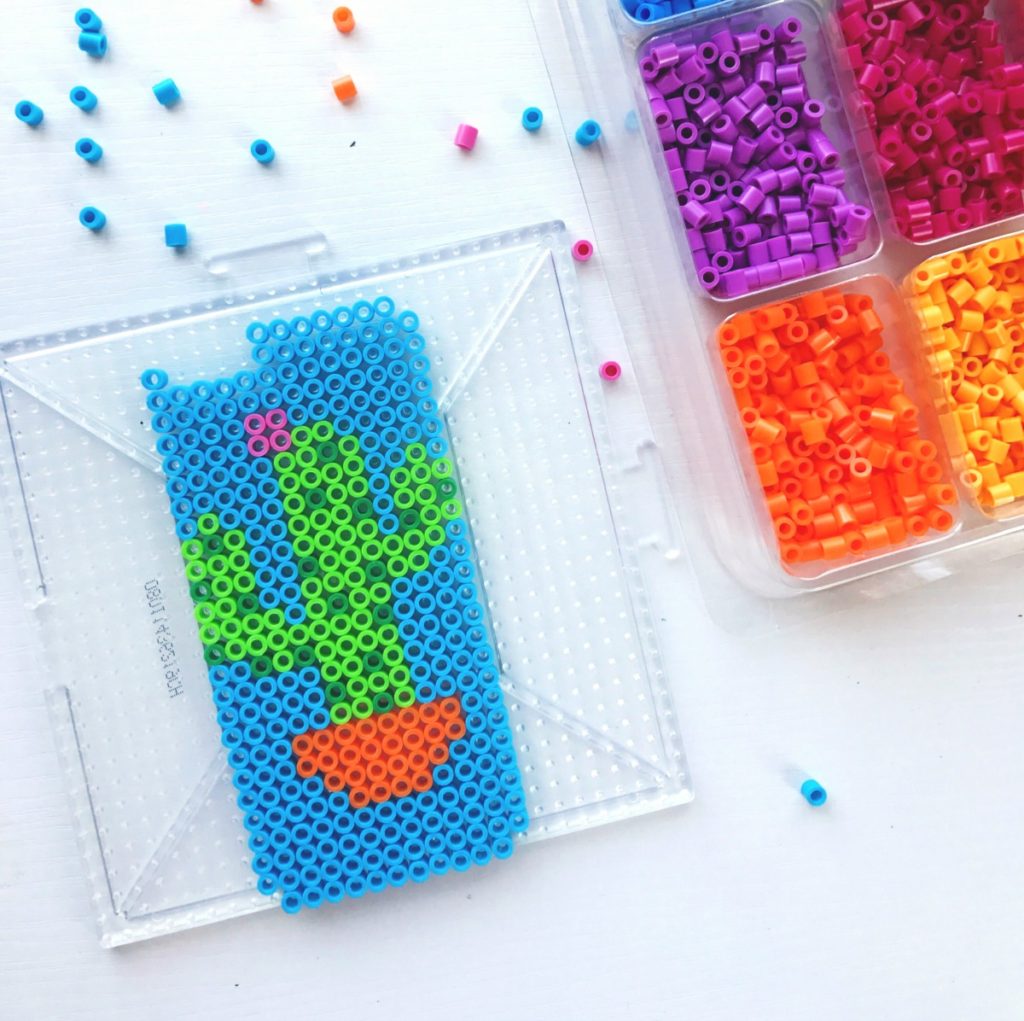
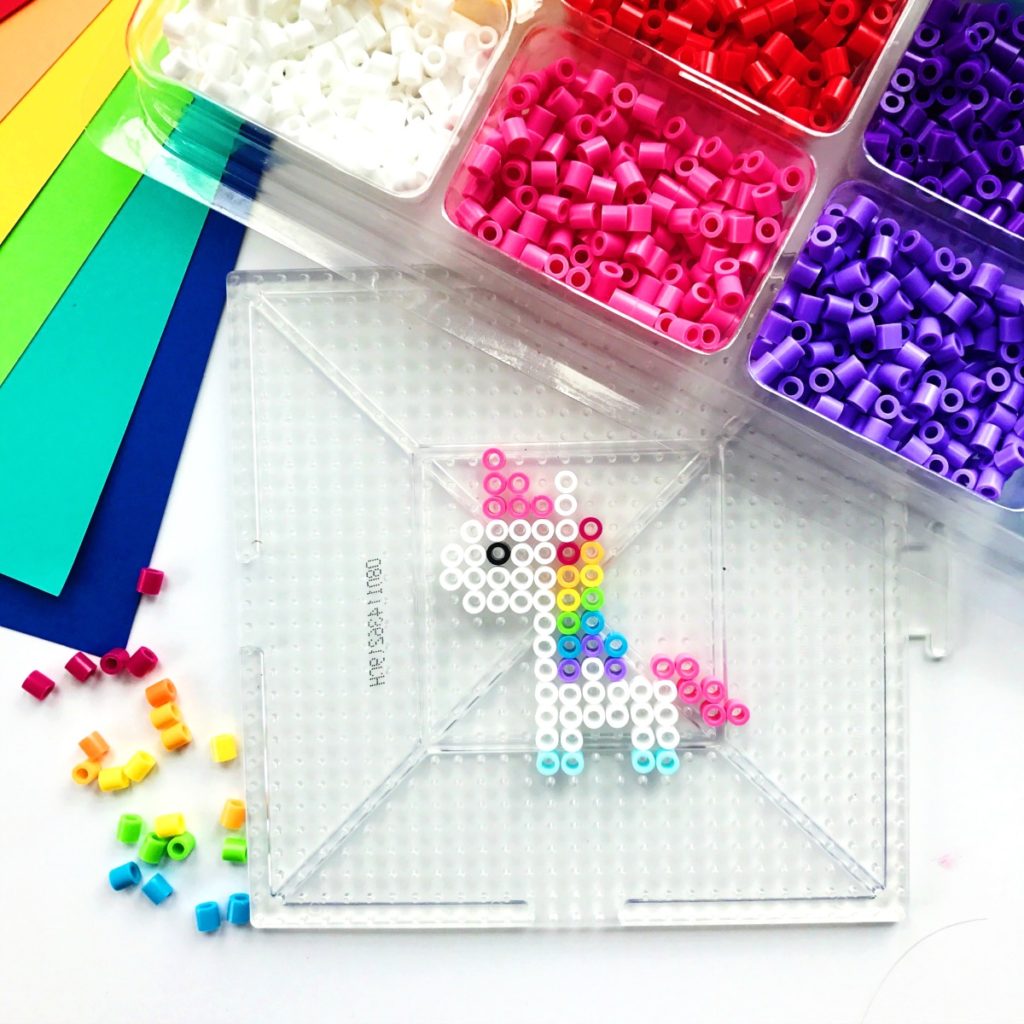
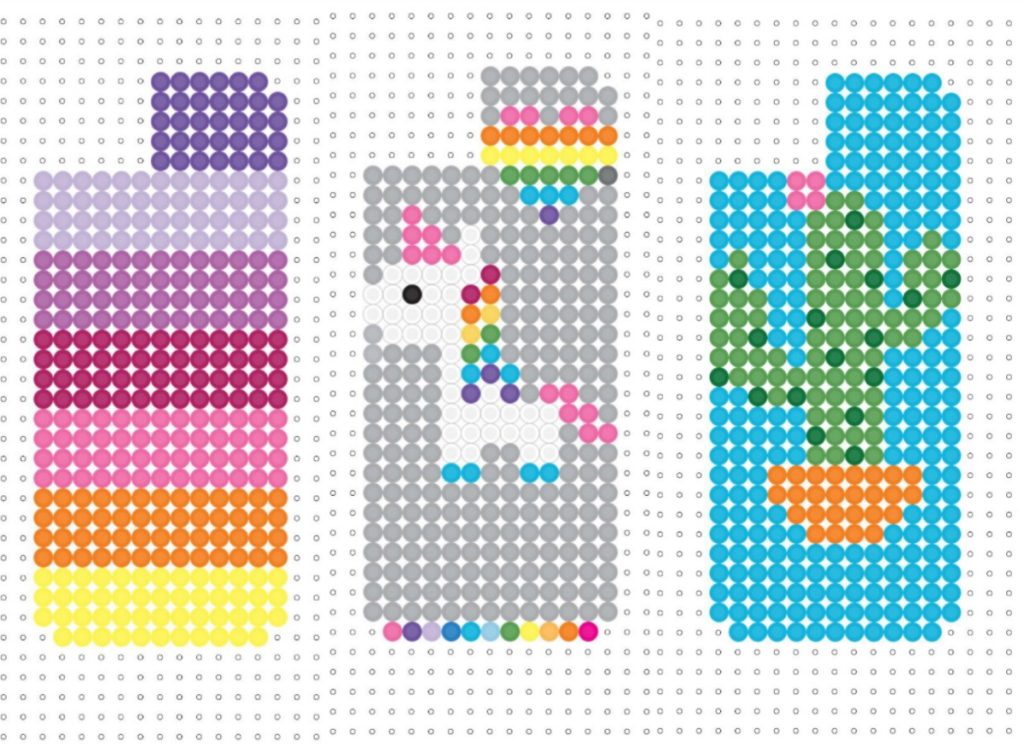
Step 1: Create your design on the peg board. Perler has a great iPad design app for laying out your own designs. If you have an iPhone 6 case see my finished designs for reference. If you have an iPhone 7 see the designs I created in the Perler app below. If you are doing your own design, I suggest creating your main image first and then filling the area and border around it.
Step 2: Once your design is finalized, cover your beads and board with the ironing paper. Preheat your iron to a medium setting. Keep the iron level and move it in circular motion for about 30 seconds while pressing the beads very gently. You may need to repeat again if needed. I try to keep the beads original shape without them melting too much.
Step 3: When you finish ironing one side, put something heavy on top of the paper and wait a minute to help flatten the beads. Once the beads are cool remove the book and gently flip the board over and remove the board. Add another piece of ironing or parchment paper and iron again using a circular motion. Remove paper and let cool.
Step 4: Spread E6000 glue to the top of your phone case and add your DIY iPhone case perler bead design. Add a heavy book on top to ensure the design is flat and securely in place.
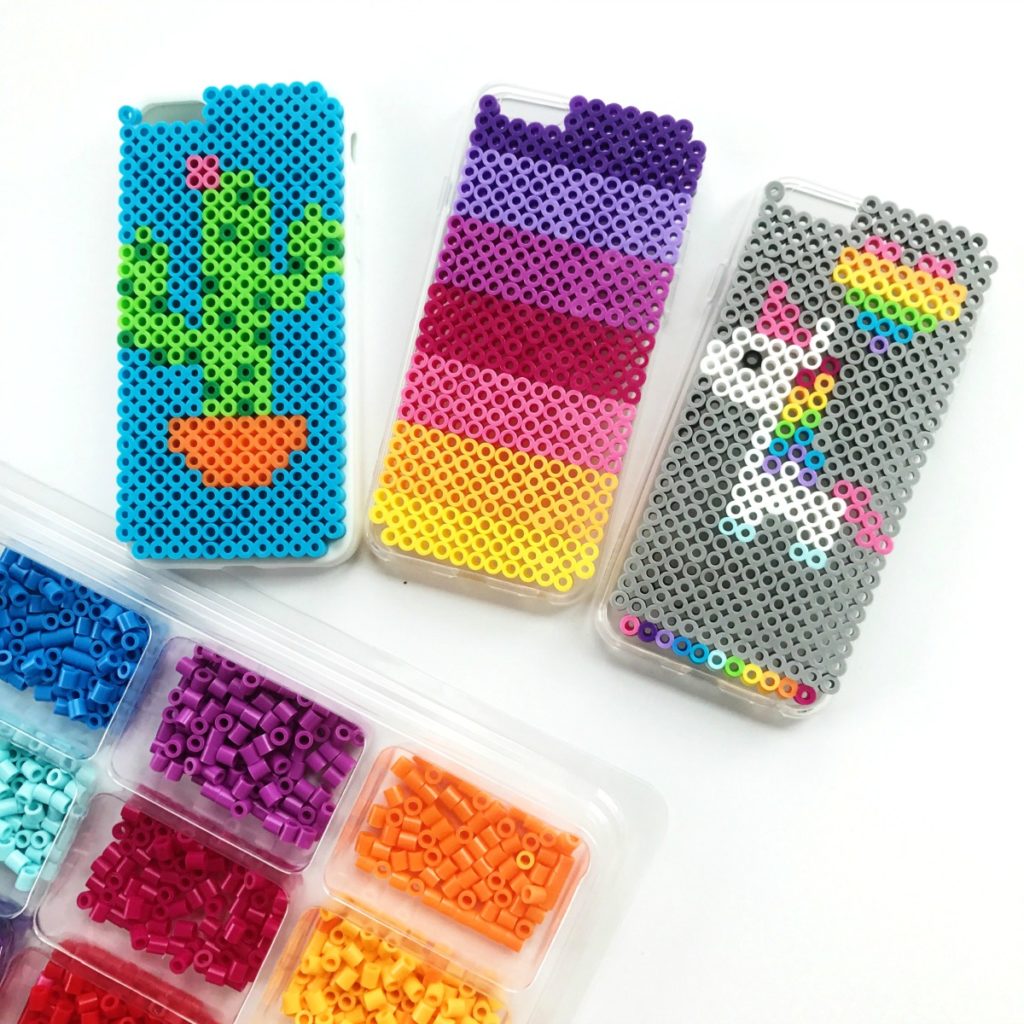
That’s it. Easy peasy. I’d love to see your bead-i-ful DIY iPhone case designs. Come find me or tag me on Instagram or Facebook so I can take a look.