Leaf Painting with Puffy Paint
As an Amazon Associate, I earn from qualifying purchases. This post may contain affiliate links. See our full disclosure here.

I love making leaf painting crafts, so this project with puffy paint is right up my alley. The colors come out beautifully and it’s a unique way to bring nature into your DIY projects. The best part is that it’s so easy to make!
Leaf Painting with Puffy Paint
I have pressed leaves that I have painted and doodled on that still look amazing years later. So don’t think leaf painting has to be temporary art. You can put your finished leaves in shadow boxes if you want to hang them on the wall or you can use them to create beautiful tablescapes for dinner parties.
Fall is such a great time for leaf painting crafts. Some of my other favorite leaf crafts are Watercolor Leaf Painting and Metallic Leaf Painting. The Best Ideas for Kids also has some great leaf painting tutorials for kids. The best part about painting leaves is that they actually last long after you paint them.
RELATED: Watercolor Leaf Painting, Metallic Leaf Painting

Leaf Painting Supplies (affiliate links provided for convenience)
- Leaves (see the directions below for how to press leaves)
- Tulip Dimensional Fabric Paints – I used this party pack of paints because of the color options but you can also use one of these smaller packs of fabric puffy paint.
- White Acrylic Paint
- Paint Brushes
Watch the video then see the step-by-step directions below:
Leaf Painting with Puffy Paints – Directions
1. Press the Leaves
Start by pressing your leaves. I typically leave mine under heavy books for several days before painting on them.

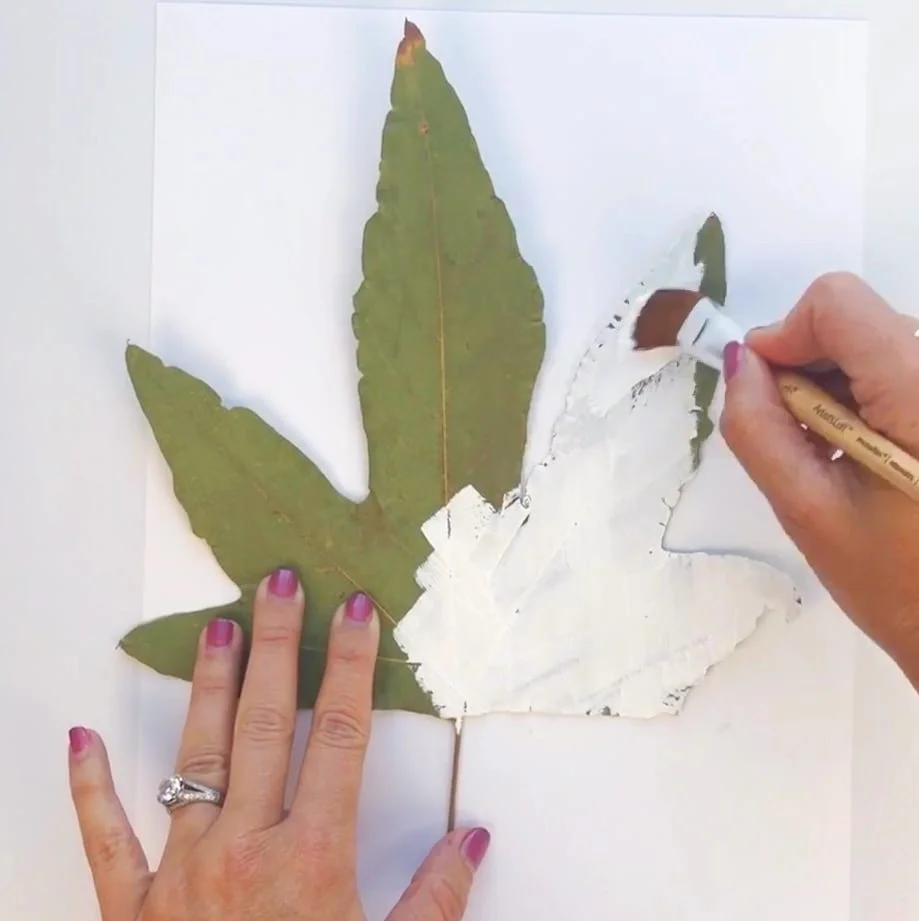
2. White Base Coat
Next, cover the entire leaf with white acrylic paint and let the leaf dry completely. It usually takes 15-20 mins to dry depending on how much paint you used.
3. Prepare Your Paints
Select the colors of puffy paint you want to use and add them to a paper plate or paint palette.

4. Paint Your Leaf
Using a paint brush, add the colors to the leaf in a design that you prefer. If you want the colors more opaque, wait for the first layer to dry and then add a second. For this leaf, I only added one layer.

5. Add Designs
Add designs to the leaf using the dimensional fabric paint direct from the bottle. I like to keep a piece of paper nearby when using the fabric paints. I always shake the paint bottles before using and then first test them on a separate piece of paper.

6. Let it Dry
The next step is the hardest…you have to let your leaf try! Puffy paint takes longer to dry than regular acrylic paint so try to let it be overnight until you handle it.

Tips for Making Your Puffy Paint Craft a Success
First of all, make sure you prep the leaf ahead of time. You’ll need to press them for several days before they’re ready to paint. You can easily turn finding the perfect leaf into part of the activity, though. Bigger ones work best for this craft!
Another thing to keep in mind is that, while you do need to press the leaf for a few days, leaves become more delicate over time. Make sure you’re not using a leaf’s crumbling or you won’t be able to paint it!
Finally, it’s really important you allow this project to dry completely before you handle it. Depending on the conditions in your space it could take several hours. It’s best to leave puffy paint overnight to dry.
Leaf Painting with Puffy Paint – Quick Step by Step Instructions
- Press a large leaf until it’s flat.
- Paint the entire leaf white with acrylic paint. Let it dry.
- Use puffy paint to cover the leaf with a base coat. I used multiple colors.
- Once that’s dried, draw your design on top with more puffy paint.
- Let it dry overnight.

Other Ideas
Don’t you think painted leaves would be so pretty for a place setting. Maybe even a Thanksgiving place setting! You could also use them as part of a centerpiece. So many possibilities.
Come share with a picture of your painted leaves on Instagram or Facebook! I love showing examples of my tutorials being made!