How to Make Nail Polish Marbled Ornaments
As an Amazon Associate, I earn from qualifying purchases. This post may contain affiliate links. See our full disclosure here.
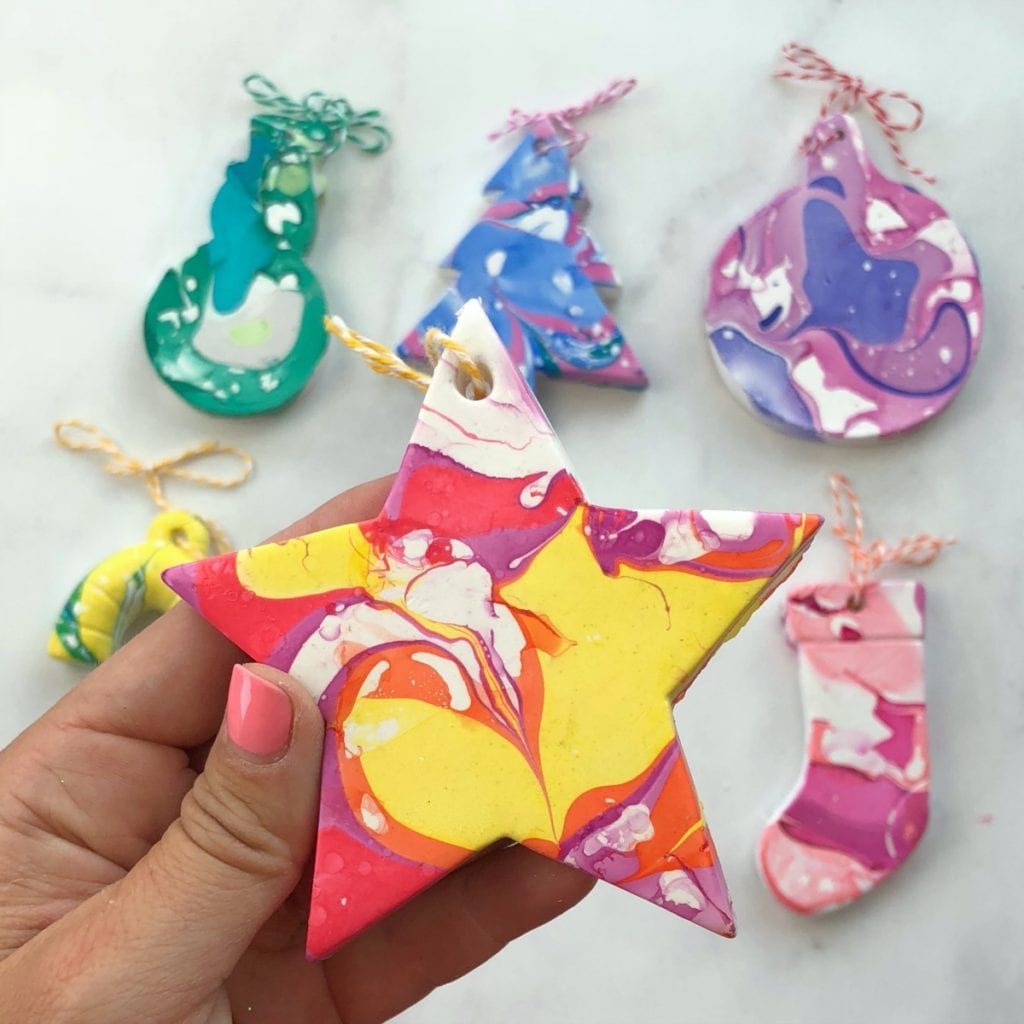
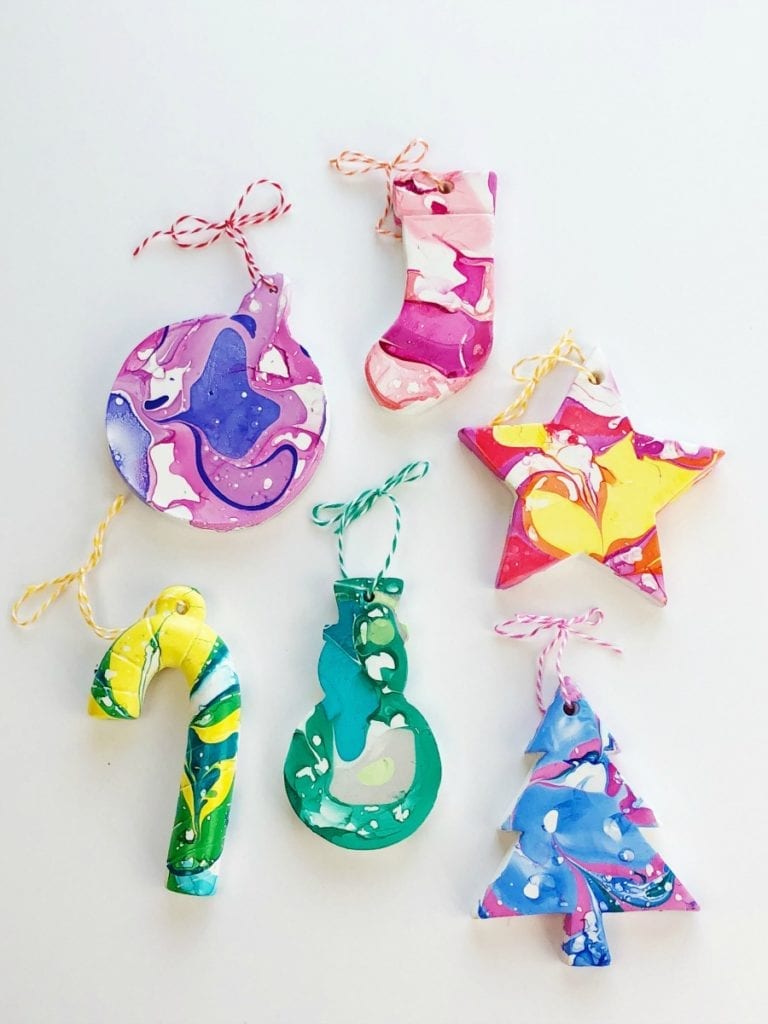
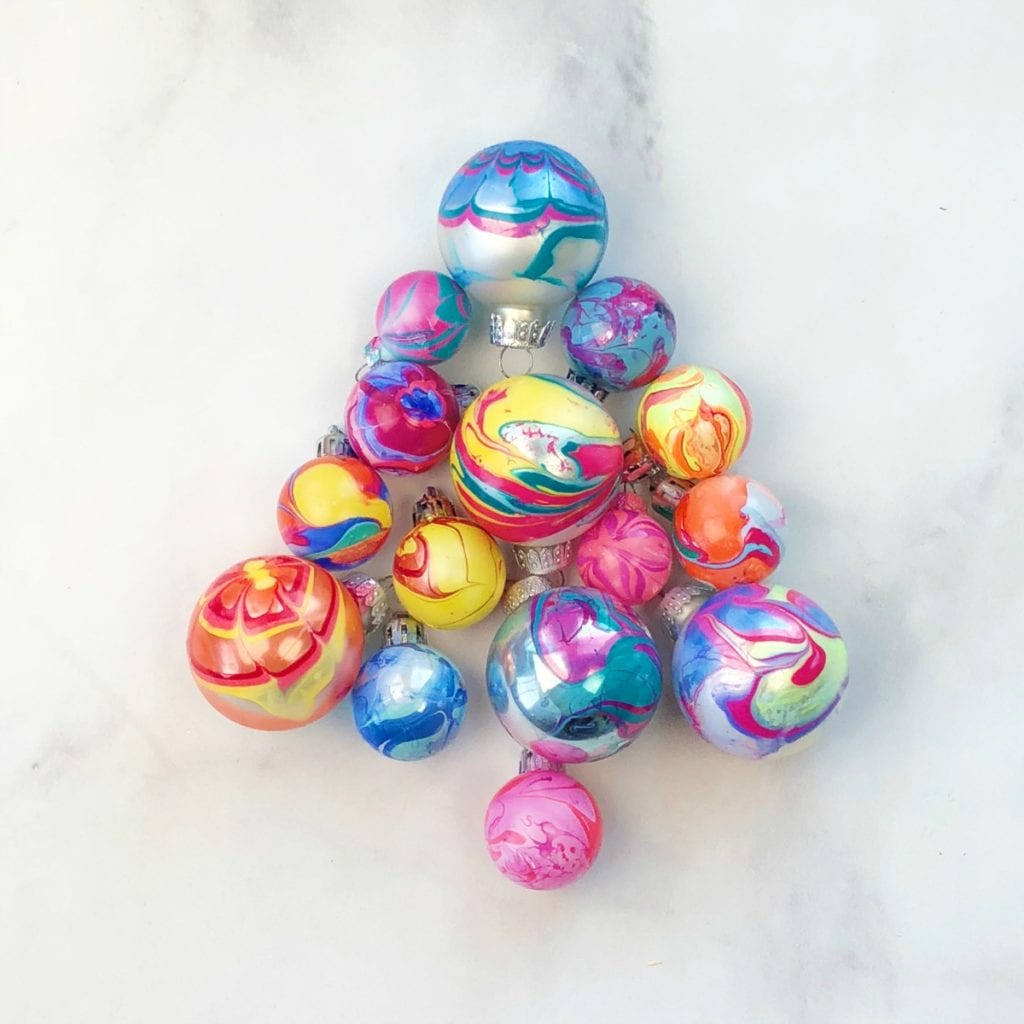
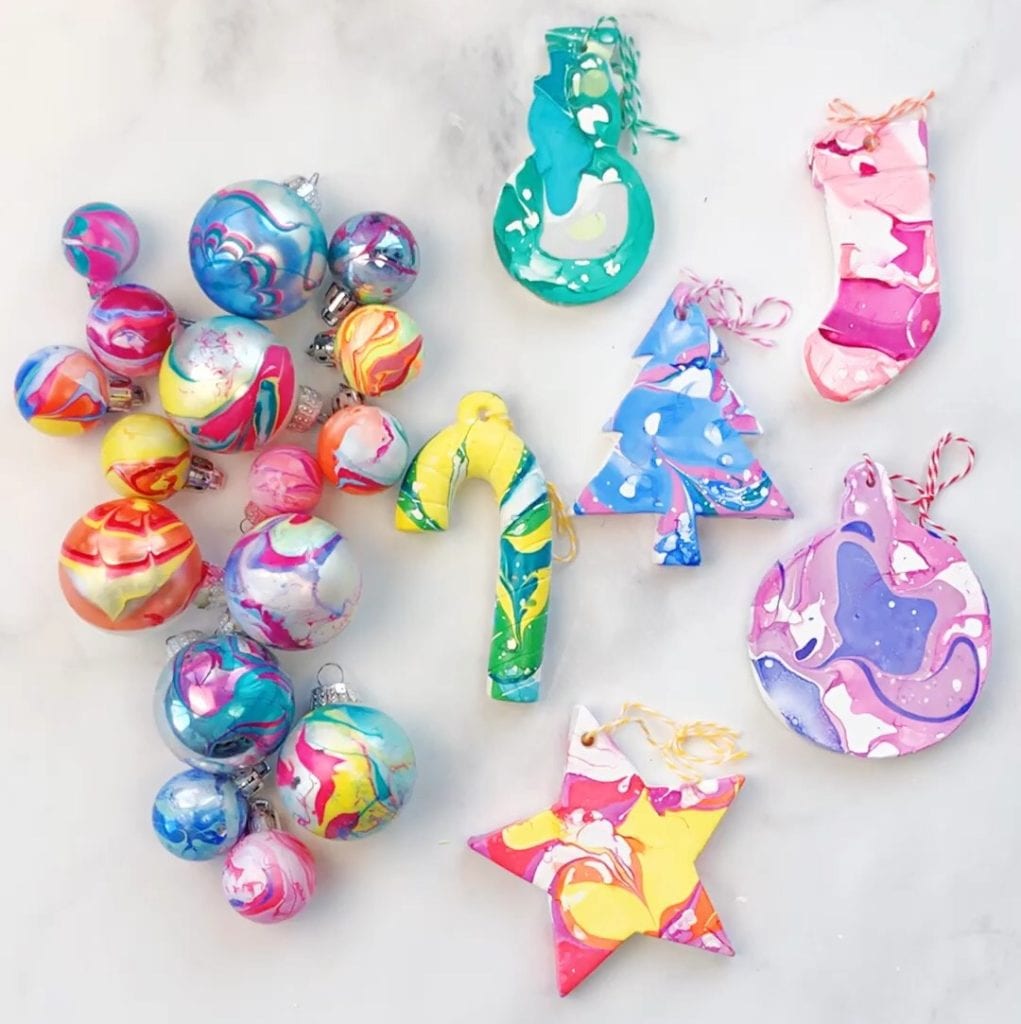 I have found that you can marble just about anything using nail polish once you know the right techniques. So far I’ve marbled mini pumpkins, ring dishes and rocks. And for Christmas I couldn’t wait to make nail polish marbled ornaments. I love that you can use nail polish marbling on all types of ornaments. I used not only round Christmas ornaments for marbling but I also use ceramic and porcelain ornaments as well.
Nail Polish Marbled Ornaments Supplies(affiliate links provided for convenience)
- Nail Polish – I have found several good nail polishes that work well for marbling. It seems that the cheaper polishes tend to work better. I like to use Sally Hansen Extreme Wear Nail Polish, Wet N Wild Shine Nail Polish, Sinful Colors Professional Nail Polish (you can also find Sinful Colors Nail polish here).
- Ornaments
- I used both mini white and silver ball ornaments. You could also use colored mini ornaments as well.
- Ceramic and Porcelain ornaments – There are some great options here, here and here
- Plastic container – Make sure to use something you don’t mind throwing away. I use cheap plastic storage containers.
- Disposable Gloves
- Toothpicks
- Q-Tips
- Room Temperature Water
Nail Polish Marbled Ornaments Directions
Watch the Video and then see the Step-by-Step Directions Below:
Important Tips for Nail Polish Marbling:
- Only use room temperature distilled or filtered water. If your water is too hot or too cold the technique will not work.
- Do not use old nail polishes as they won’t work if they are glumpy. Not all nail polishes will work. I found that the Sally Hansen Extreme Wear brand and the Sinful Colors Professional brand work great!
- Turn off any fans or air conditioning. This could cause the nail polish to dry too quickly when dropped into the water.
- Work quickly! If you take too long, the nail polish will dry in the water before you can create designs.
- You can do several ornaments in the same water, just use a Q-Tip in between each dip to clean excess nail polish from the top of the water.
- Work in a well ventilated area or outside. There is a strong odor while you are working, but the final marbled ornaments don’t smell.
- Where gloves unless you want to clean nail polish off your nails and hands :).
Nail Polish Marbling Directions for Porcelain or Ceramic Ornaments
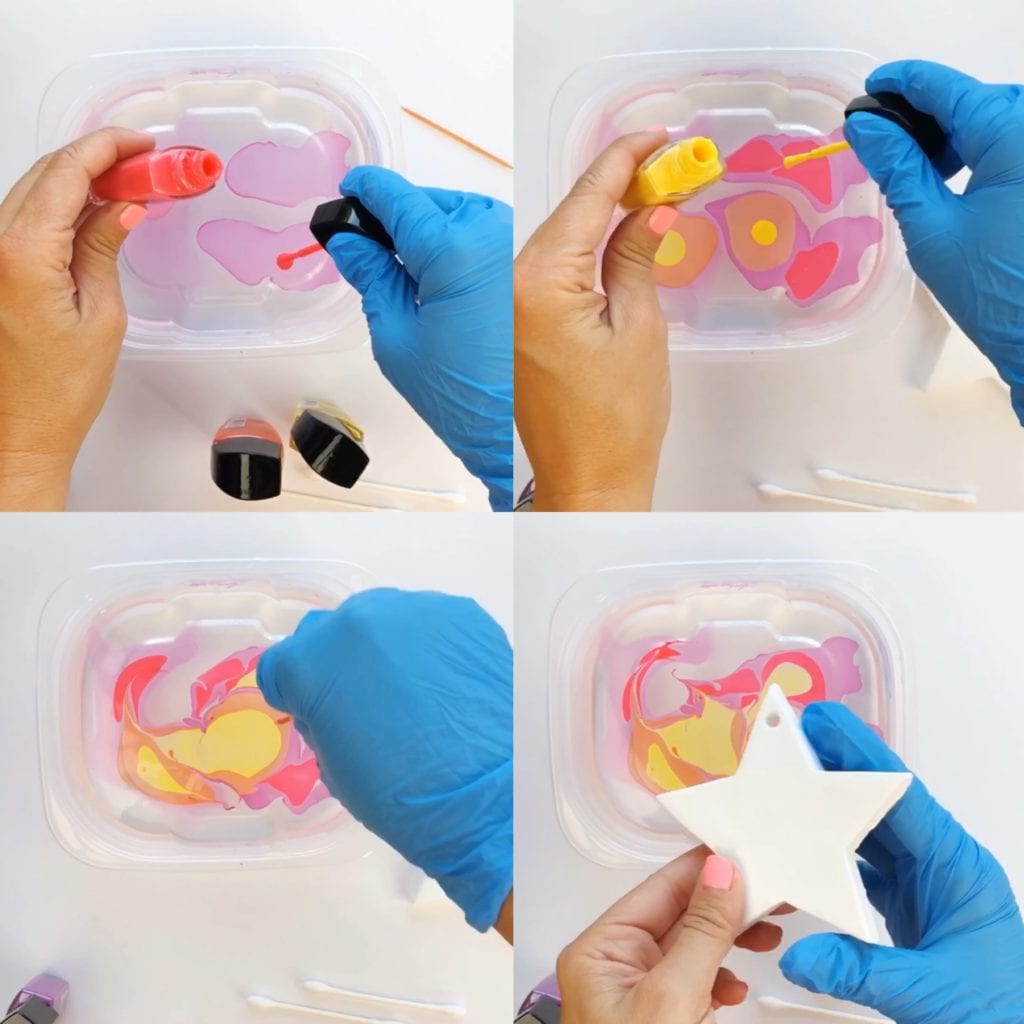
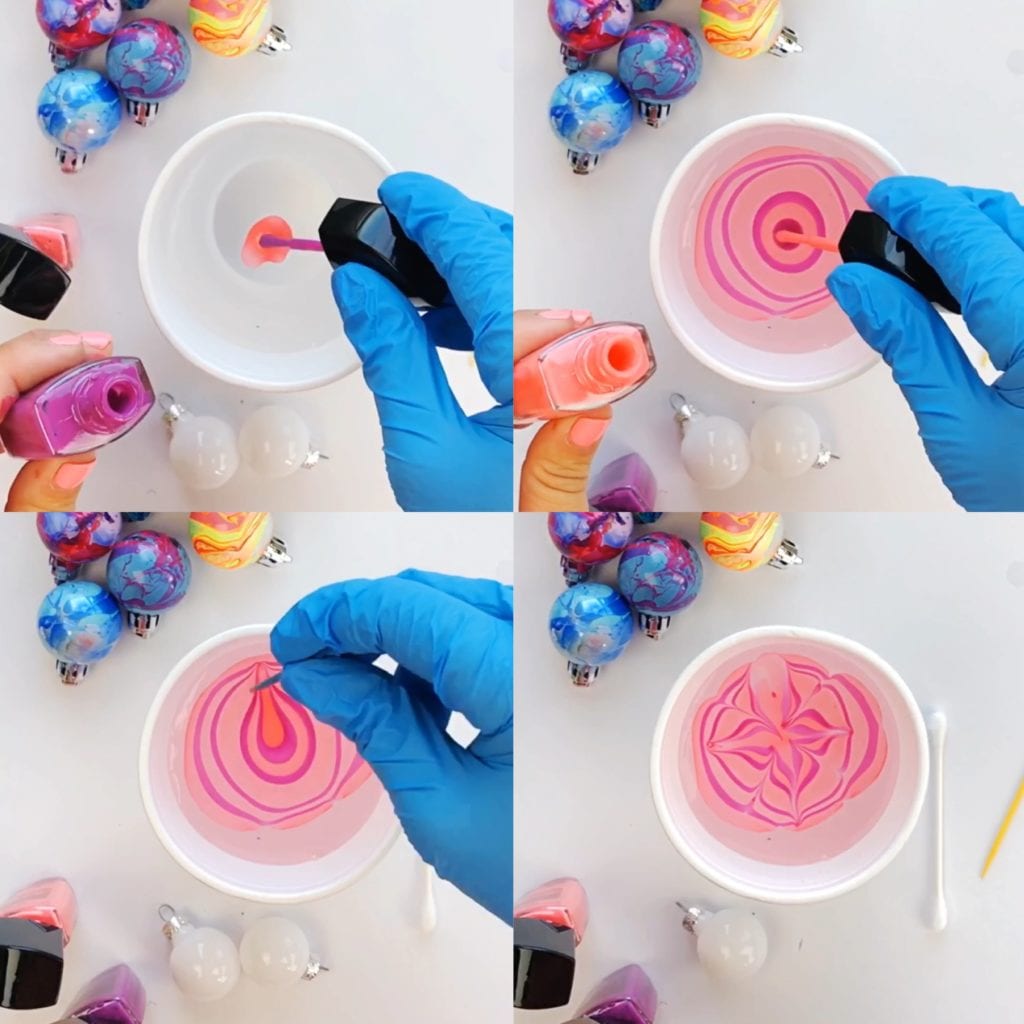
- Choose 2-3 colors of nail polish
- Add several drops of the first color from the brush of your nail polish into the water. Put the brush close to the water to help drop the polish. If the brush is too far away, the polish will sink to the bottom of your container. You’ll know right away if the polish will work. It should spread quickly in the water. If it drops to the bottom of the container without spreading it will not work.
- Next, add several drops of the second inside several of the dots already in the water.
- Add more drops with a third color, some inside the other colors and some outside. There’s no right or wrong way to do this! You can always just drop polish randomly into the water!
- Using a toothpick, quickly swirl a line or two through the nail polish.
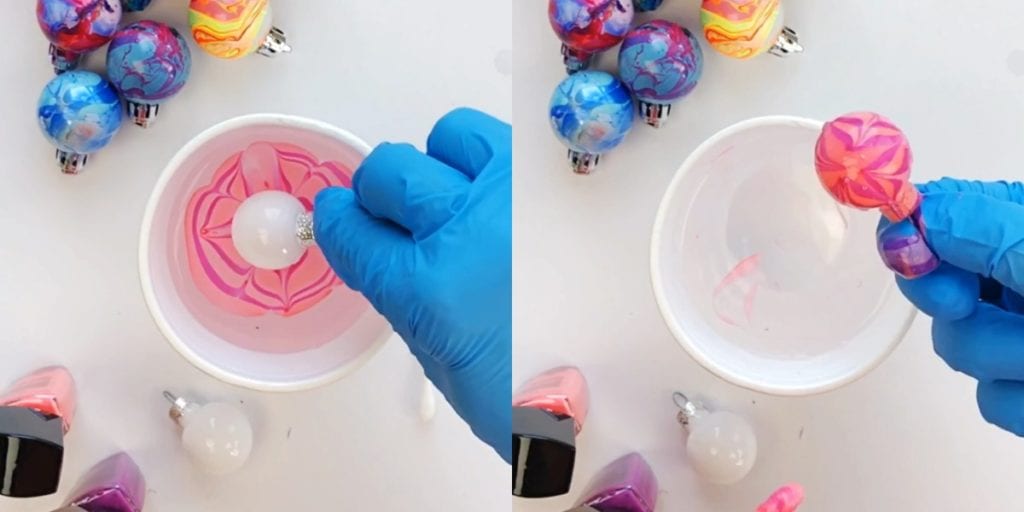
- Dip the ornament face down into the water. The polish will adhere immediately.
- Use a Q-Tip to remove any excess polish before lifting the ornament from the water.
- Place your ornament on wax paper or a drying rack.
Nail Polish Marbling Directions for Making Designs on Round Ornaments
- You can follow the same directions above for round ornaments or you can create different designs within the water instead of just a random swirl.
- Add a drop from the brush of your nail polish into the water. Make sure your brush is close to the water.
- Add 10-15 more drops of nail polish alternating between different colors to create a bullseye design.
- Create your design by using a toothpick. Start with the toothpick in the center and pull towards the outer ring. Try to only pull to the 3rd to last outer ring as the outer rings dry quickly and will adhere to your toothpick.
- Create four line pulls from the center and then do the reverse in between each line, always avoiding the outer 2-3 rings. Be sure to wipe your toothpick every few pulls or switch to a new one.
- Dip your ball ornament into the design, paying attention to where you want the design to end up on the ornament.
- Use a Q-Tip to remove any excess polish before lifting the dish from the water.
- See more design ideas you can create in this nail polish marbling post.
Once you try nail polish marbling I have a feeling you’ll want to marble just about everything! I’d love to see your finished marbled Christmas Ornaments if you try out the tutorial. Come share a picture of your ornaments with me on Instagram or Facebook! I love showing examples of my tutorials being made!