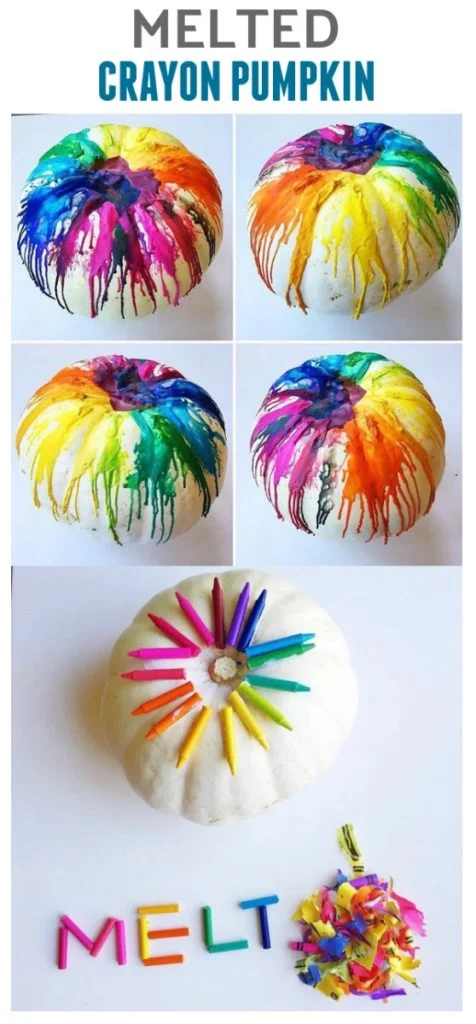
Melted Crayon Pumpkin Decorating Idea
As an Amazon Associate, I earn from qualifying purchases. This post may contain affiliate links. See our full disclosure here.
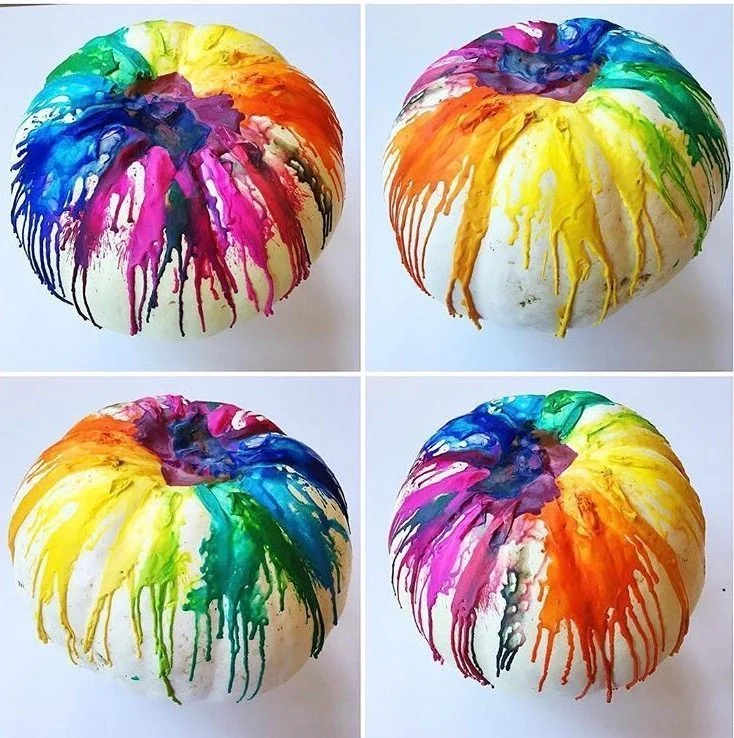
It’s SO easy to make a melted crayon pumpkin and it’s really fun. If you are looking for a fun no-carve pumpkin decorating idea, this melted crayon pumpkin is the perfect craft for you. It’s also a great pumpkin decorating idea for all ages. The hardest part is taking the paper off the crayons, but there’s an easy way to peel the paper off! I give you all the details below.
Supplies Needed to Make Melted Crayon Pumpkins
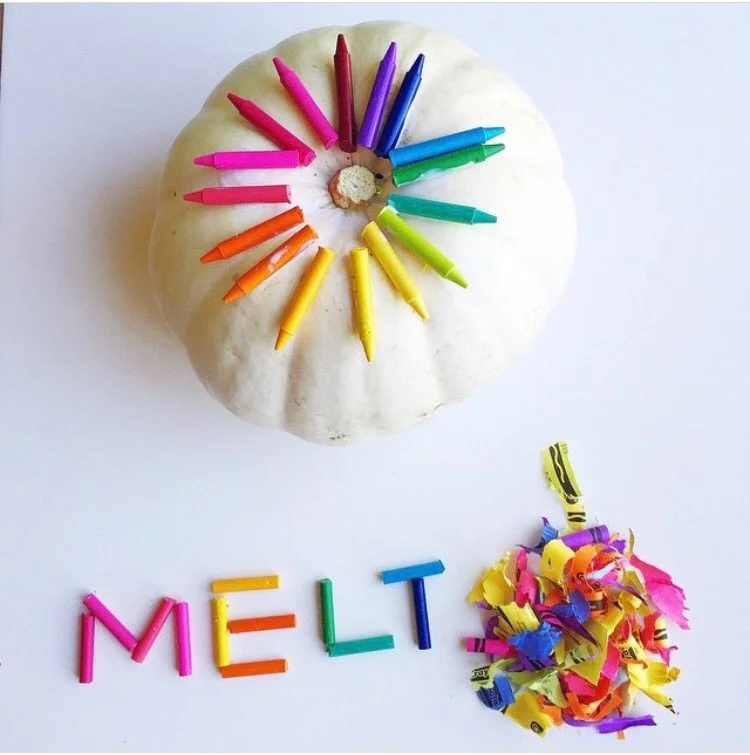
- Pumpkin – I used a real one
- Crayons
- Tacky glue
- Hair dryer
- Exacto knife (optional)
- Garbage bags or cardboard (optional)
How to Decorate Pumpkins With Melted Crayons: Step by Step Directions
- Unwrap the paper from your crayons. An easy way to do this is to use a small exacto knife (I don’t recommend kids do this part). I promise you…the exacto knife saves SOOO much time.
- Cut the unwrapped crayons in half.
- Glue the crayons around the pumpkin. I used 16 crayons.
- Let the glue dry completely.
- Place the pumpkin on top of cardboard or garbage bags.
- Use a hair dryer to melt the crayons. Start with a low setting, it will be easier to direct the flow of the crayons melting.
While it’s fun to make this melted crayon pumpkin in rainbow colors, try mixing up the color palette. Wouldn’t it be great to do an ombre version as well! Or see what happens when you make a melted crayon pumpkin using only 2-3 colors. There are so many different ways to make this fun no-carve pumpkin.
Can I Use Recycled Crayons for This Craft Project?
I’m a big fan of recycling! And who doesn’t have a bunch of broken crayons laying around the house anyway. This is a great way to use up some older crayons, but they won’t work if they’re too small.
Make sure your old crayons are big enough to sit on top of the pumpkin and not fall off while you’re melting it. Also, smaller crayons aren’t going to cover the pumpkin as far as fresh/bigger ones.
If you are looking for more colorful no-carve pumpkin decorating posts, also check out my other fun tutorials:

For more fun crafts, make sure you’re following me on me on Instagram @Colormadehappy and Facebook. And be sure to come share what if you’ve created if you’ve been inspired by one of my posts. I’d love to see it.