Kids Watercolor Painting With Markers
As an Amazon Associate, I earn from qualifying purchases. This post may contain affiliate links. See our full disclosure here.
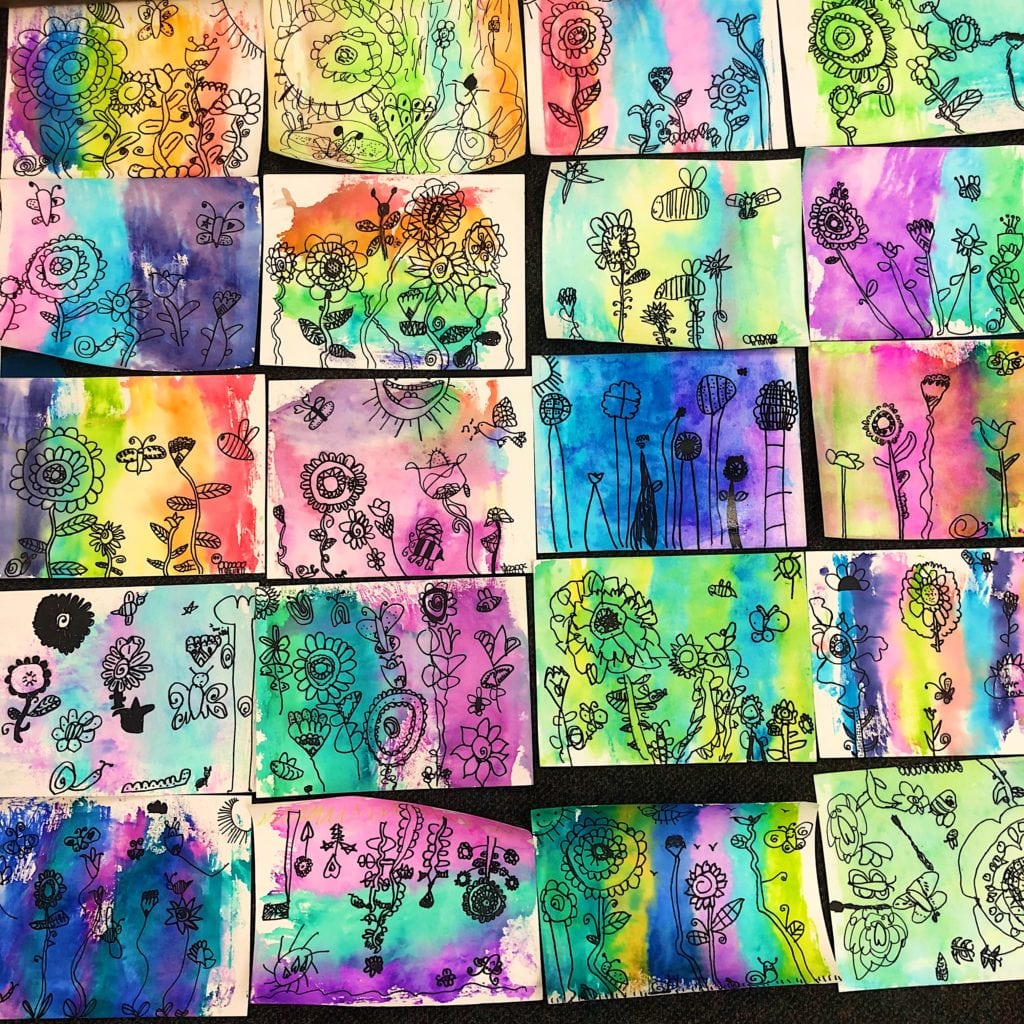 Last school year I had a lot of fun doing kid art projects with my son’s first grade class. The class loved the Halloween Picasso Frankenstein art project we did as well as our Jim Dine inspired liquid watercolor hearts. But I think the hands down favorite project was when I taught the kids watercolor painting using markers. The children oohed and aahed and literally started cheering when I demonstrated how the project would work. I was able to complete this art project for kids in a classroom of 27 first graders in under an hour! The original inspiration for this project came after I saw this picture on the 2art.chambers Instagram page. Below I’ll tell you exactly what you need and how to recreate this kid watercolor art project at home or in the classroom.
Kids Watercolor Painting With Markers Supplies (affiliate links provided for convenience)
- Sharpie Permanent Marker, Fine Tip
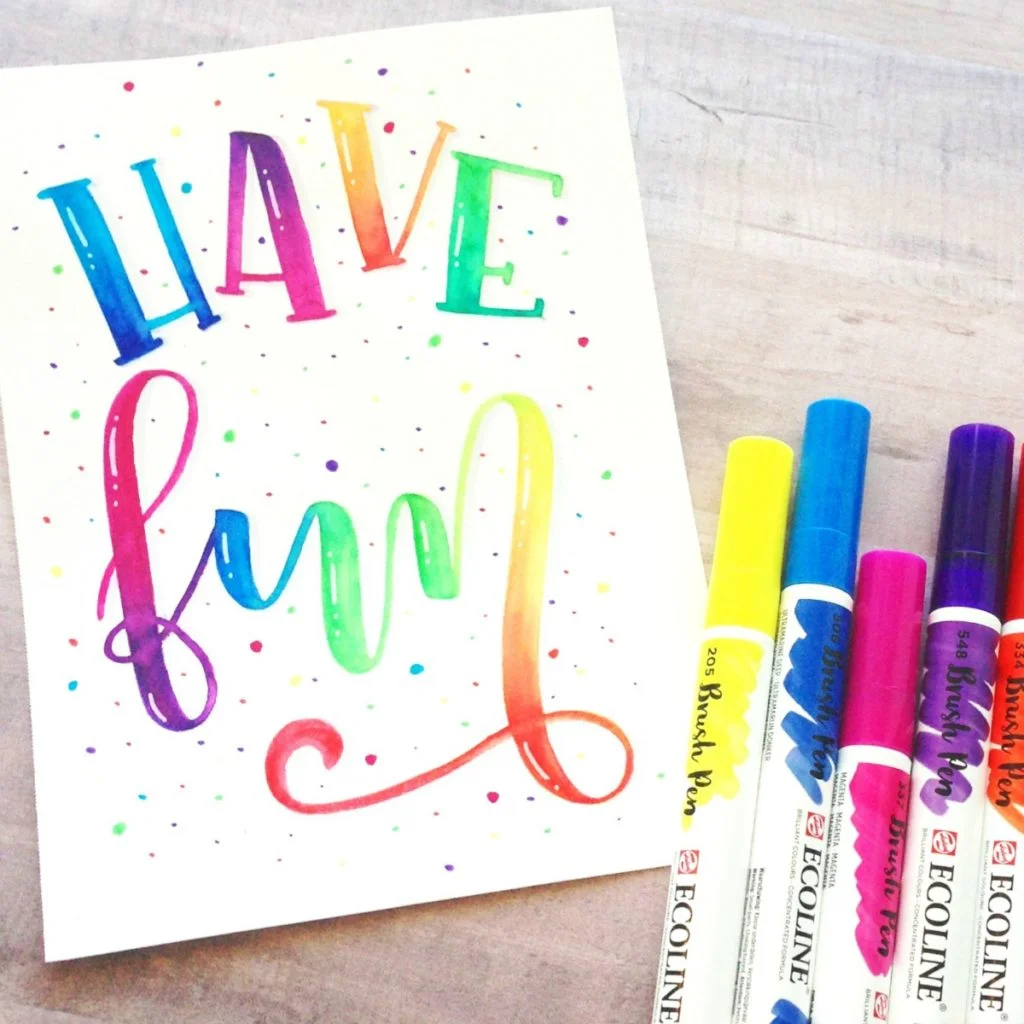
- Crayola Markers – I like this 40 count set because it has a TON of color options. I also like doing this same technique with Tombow dual brush pen art markers. See my watercolor mandala background project here.
- Watercolor Paper
- Ziploc Bags
- Plastic Spray Bottle
Watch the video here and see the step-by-step kids watercolor painting with markers directions below:
Kids Watercolor Painting With Markers Directions
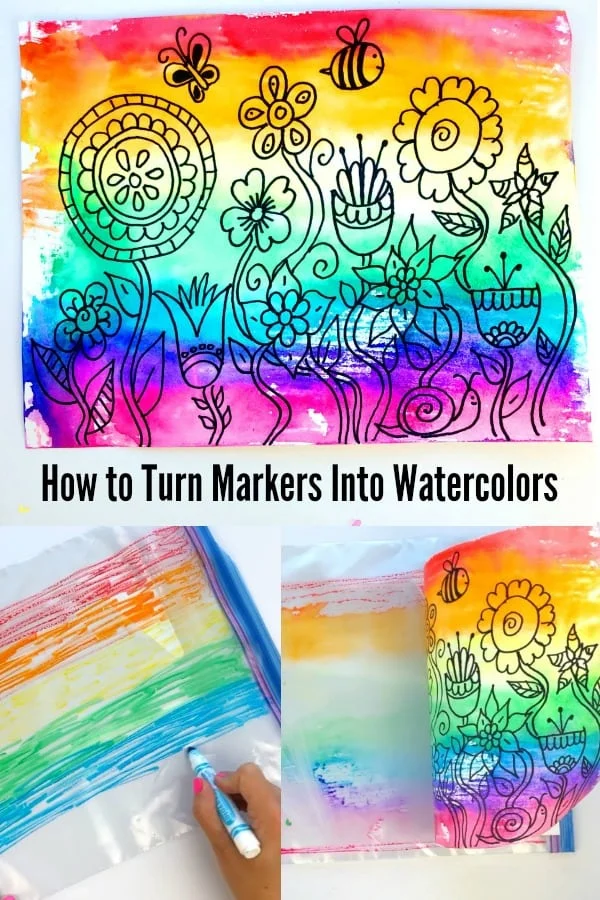
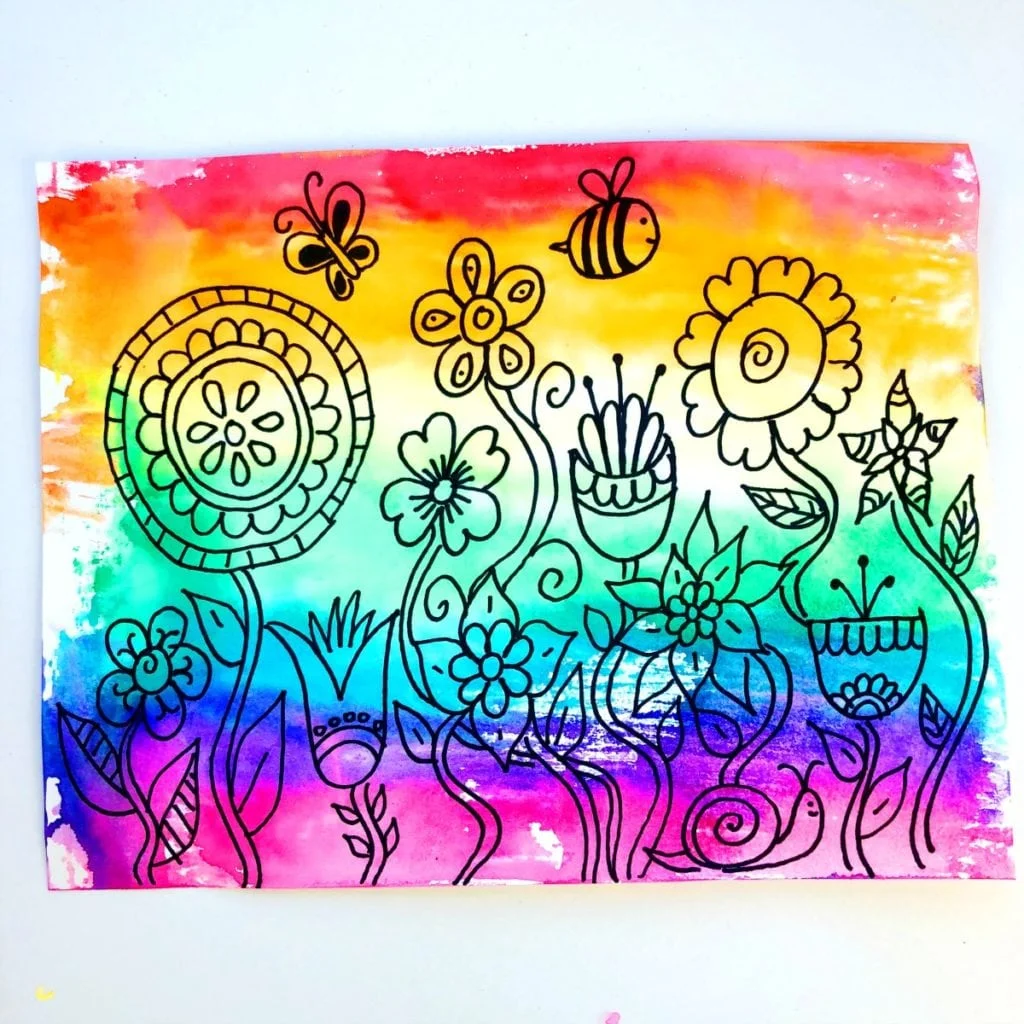
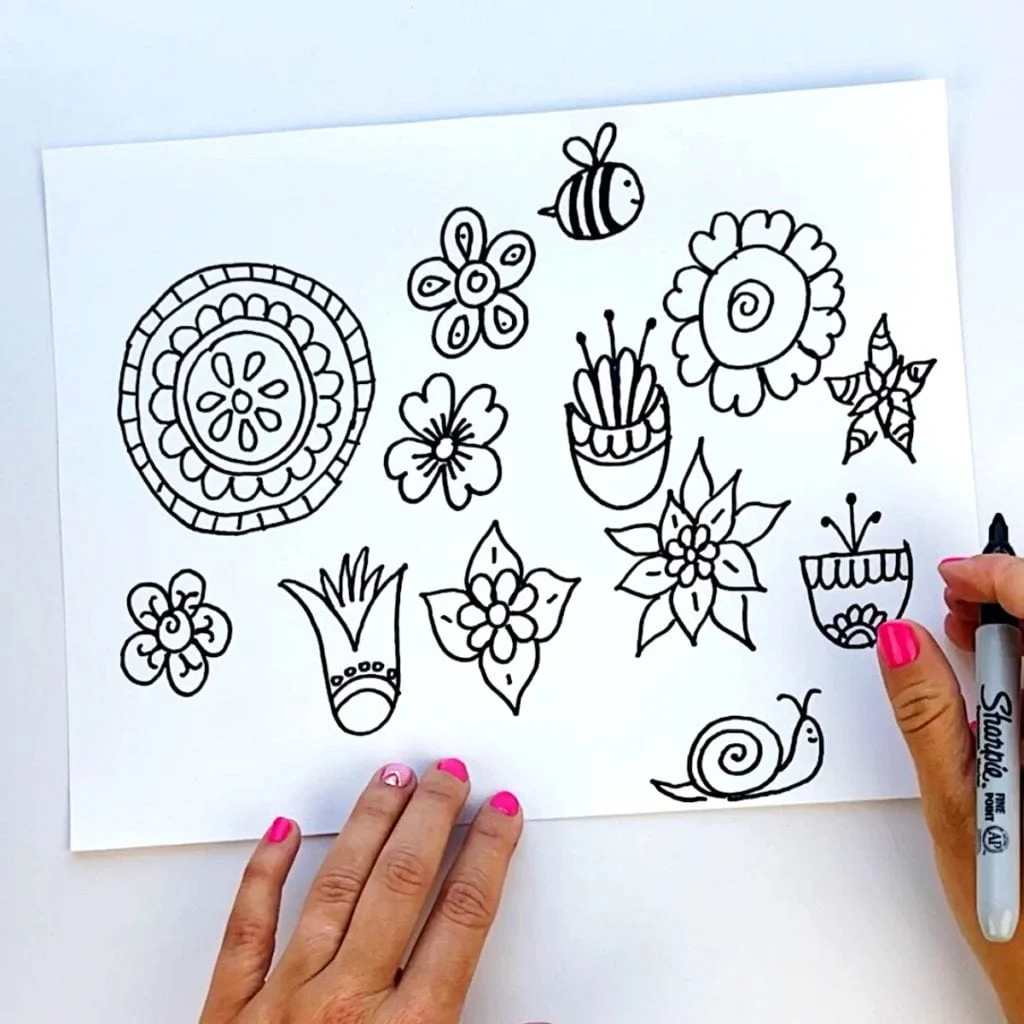
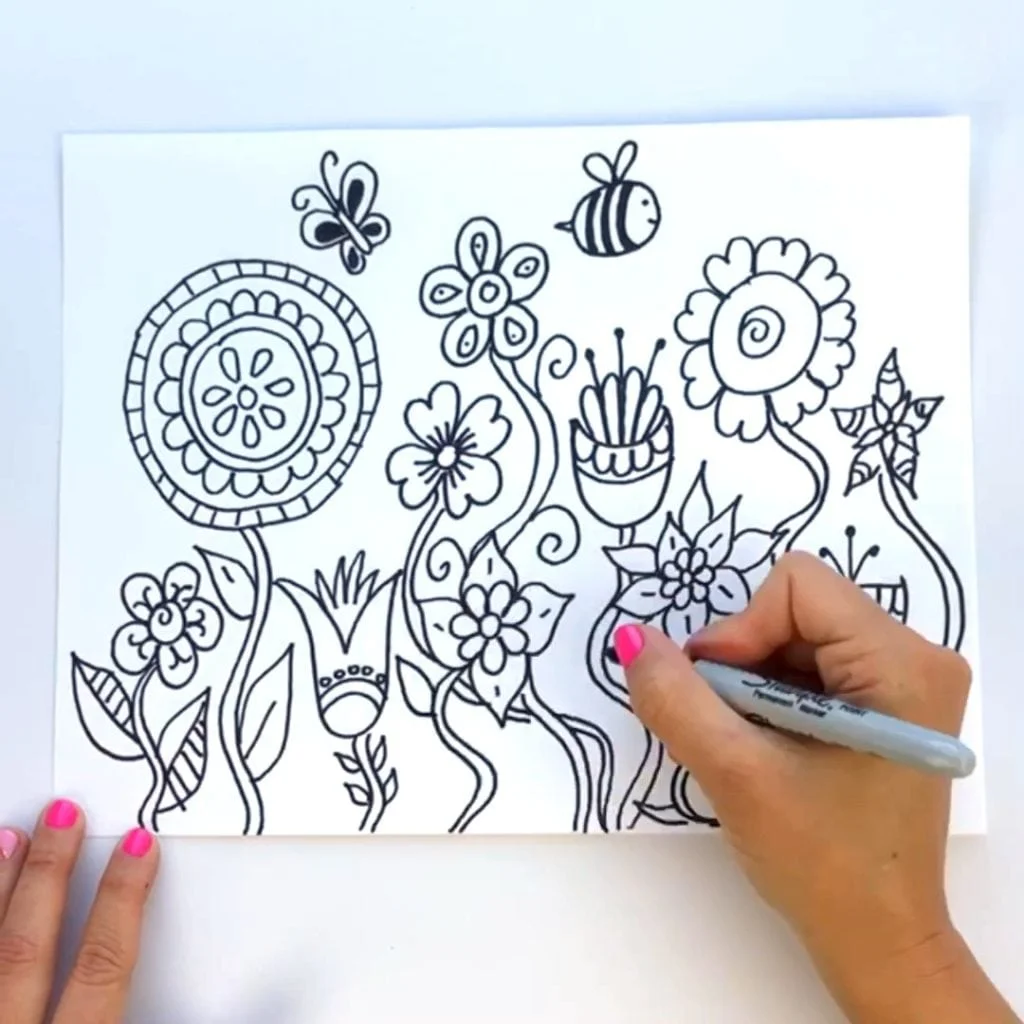
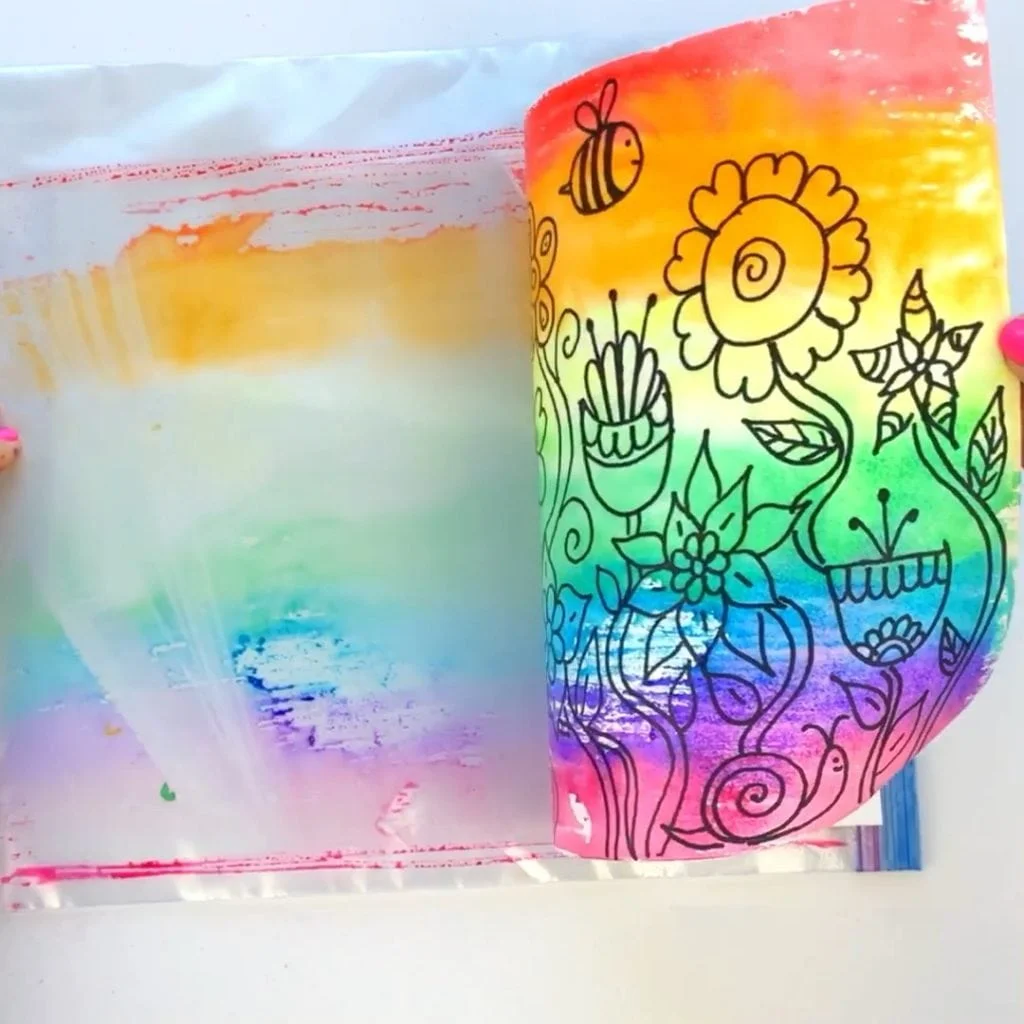
- Step 1: On watercolor paper, start by doodling different flower designs using a Sharpie Permanent Marker. I had the children doodle both large and smaller flowers. We talked about placement and created several of the first flower designs together with me at the board and the class following along. The class also wanted to know how to add a bee, snail, and butterfly to the picture.
- Step 2: Next add the stems and then leaves.
- Step 3: Take out a gallon-sized Ziploc bag and choose your color palette from a set of Crayola markers. With the class I talked about choosing their color palettes so that the colors didn’t mix together to make brown. We discussed warm vs. cool colors as well as creating a rainbow gradient.
- Step 4: Color directly on top of the Ziploc bag.
- Step 5. Using a spray bottle, mist the Ziploc bag with water.
- Step 6: Place the finished drawing facedown.
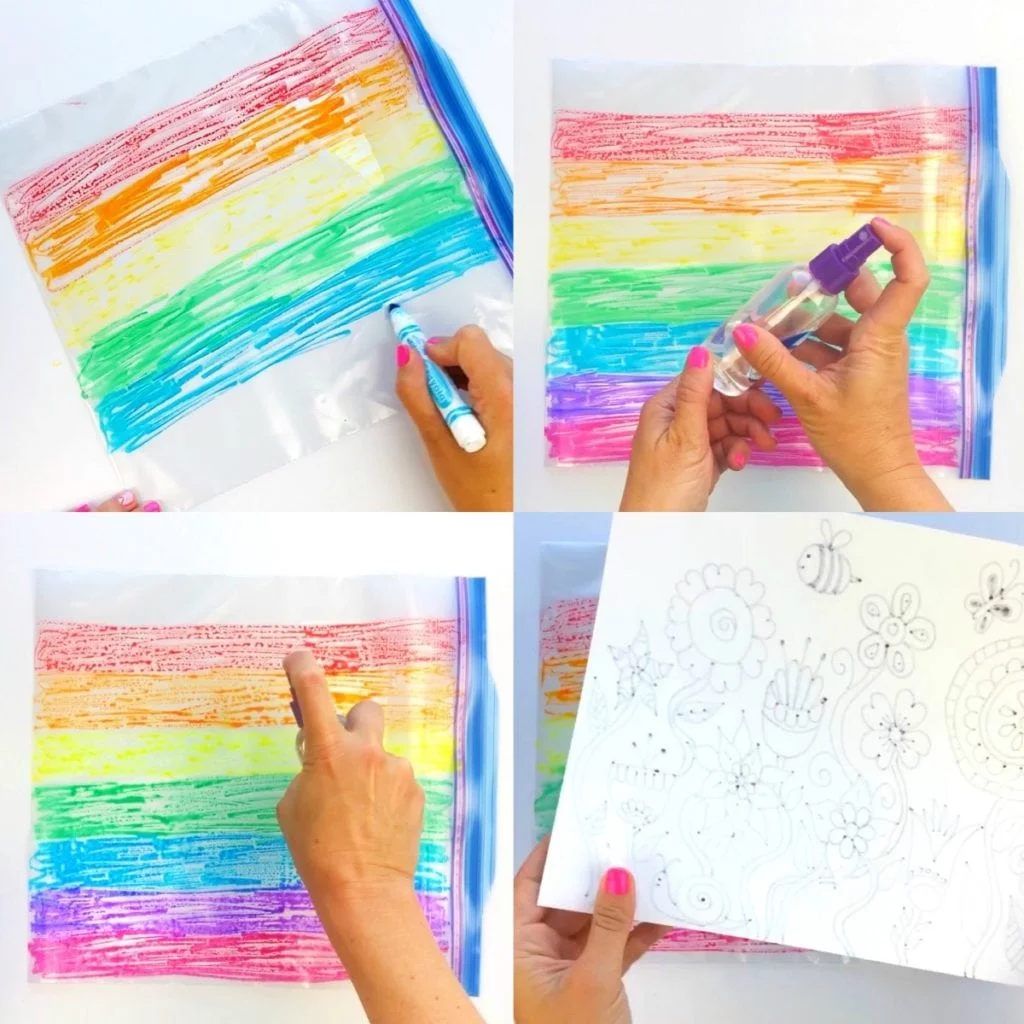
- Step 7: Gently peel the paper from the Ziploc bag starting from one side. The children thought this was total magic!
Doesn’t this project look fun! Not only is it the perfect art project for kids, but it’s just as much fun for adults too. I’d love to see what you create. Come show me on Instagram or Facebook! I love to share examples of my tutorials being made!