How to Draw An Owl
As an Amazon Associate, I earn from qualifying purchases. This post may contain affiliate links. See our full disclosure here.
Art projects are one of the best ways to spend time with your family, as well as to learn to try new things! Utilizing simple drawing tutorials is an easy way to gain confidence in your drawing skills. In this tutorial you’ll learn how to draw an owl with simple step-by-step directions.

With a little bit of practice, you will be drawing a realistic owl in no time! This is a great drawing project for beginners as no official drawing lessons are needed.
Materials Needed to Draw An Owl
You only need a few things to complete an easy owl drawing.
- Graphite pencil
- Drawing paper
- Eraser
- Pencil sharpener
- Black pen for outlining
- Coloring materials of your choice
- Flat drawing surface
Don’t forget to bring your creativity!
Getting Ready to Draw Your Owl
A great way to get ready to draw is to do a little bit of research on your inspiration, this can also be a lot of fun! For this one, you could look up different breeds of owls and see how they live in the natural world. From arctic owls to barn owls, they really are quite interesting creatures!
There are many different ways to draw cute owls with just a few simple steps!
Now, let’s get to the fun part!
Step-By-Step Guide on How to Draw An Owl
Take a look at our owl drawing guide, and then follow the step-by-step instructions to draw your first owl!
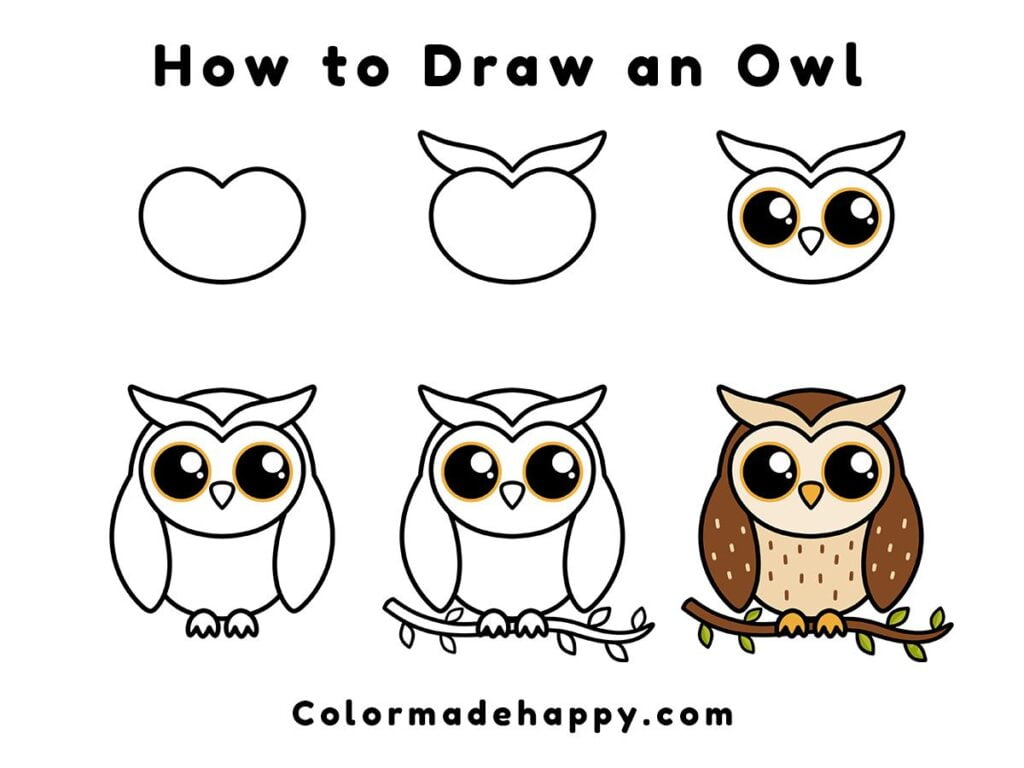
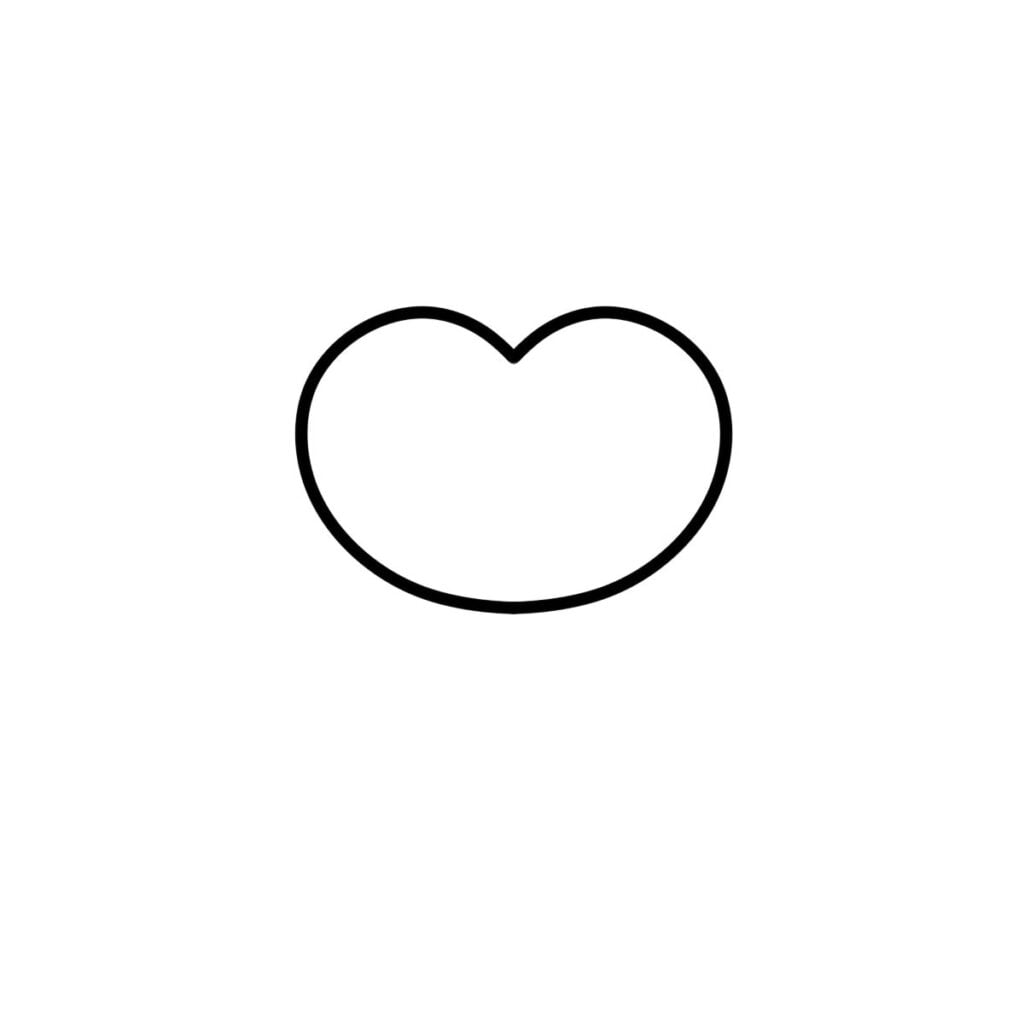
Step 1: Draw the Outline of Your Owl’s Face
The first step in drawing a simple owl is to draw the outline of your owl’s face. This will look like a short apple with two curved lines on the top and a rounded bottom.
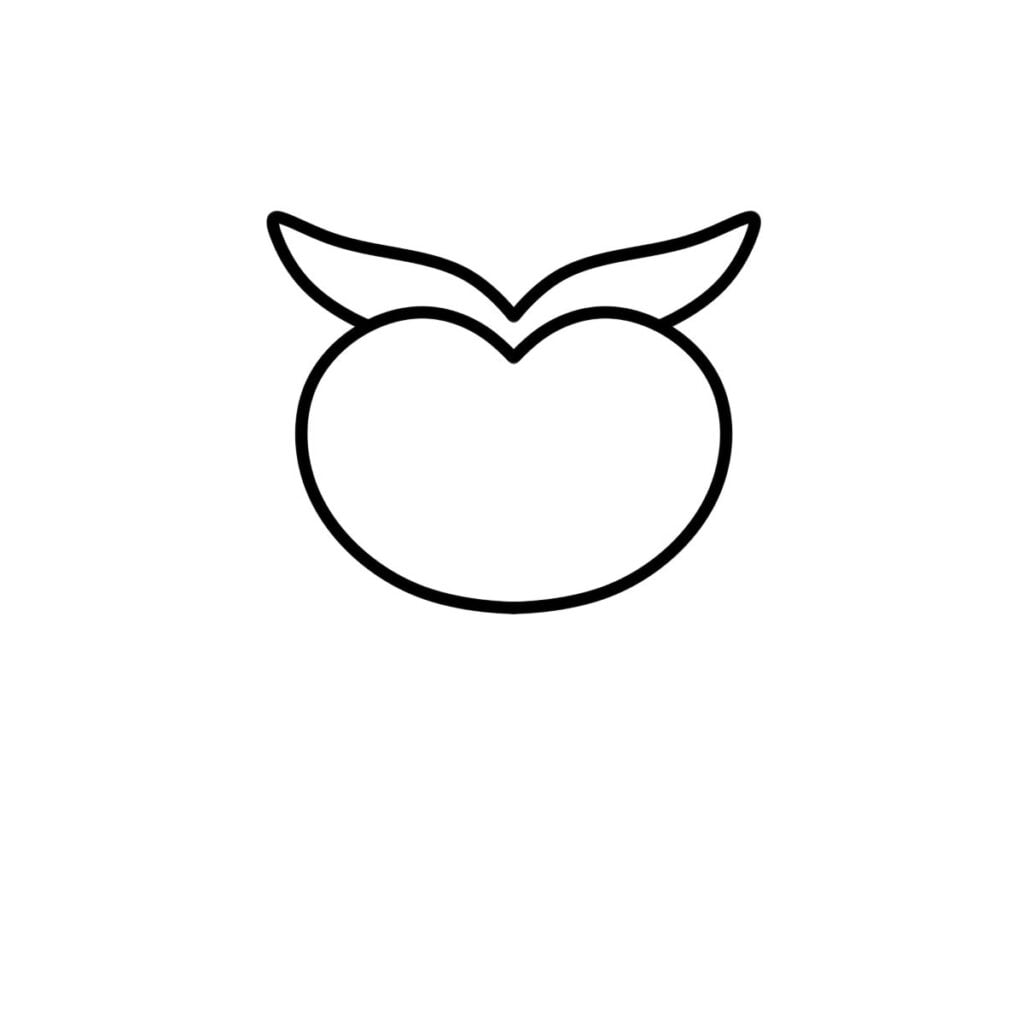
Step 2: Add the Owl’s Feathers That Appear as Eyebrows
The next step is to add the shape to resemble the signature feathers that make an owl appear to have eyebrows. You do this by adding a curved line both to the left and right of the center point with pointed ends on each side.
At the end of this step, your drawing will look similar to an apple with leaves on the top.
Step 3: Give the Owl Eyes and a Beak
This will be the step where you really begin to see your owl taking shape. Draw two large circles under each curved line of your apple shape that will become your owl’s eyes. You will then color those in with a black marker, crayon, or colored pencil leaving two smaller circles inside the bigger circles towards the upper right side.
From there, you will add an upside-down triangular shape for the beak in between the two eyes. Leave the base of your triangular shape slightly rounded.

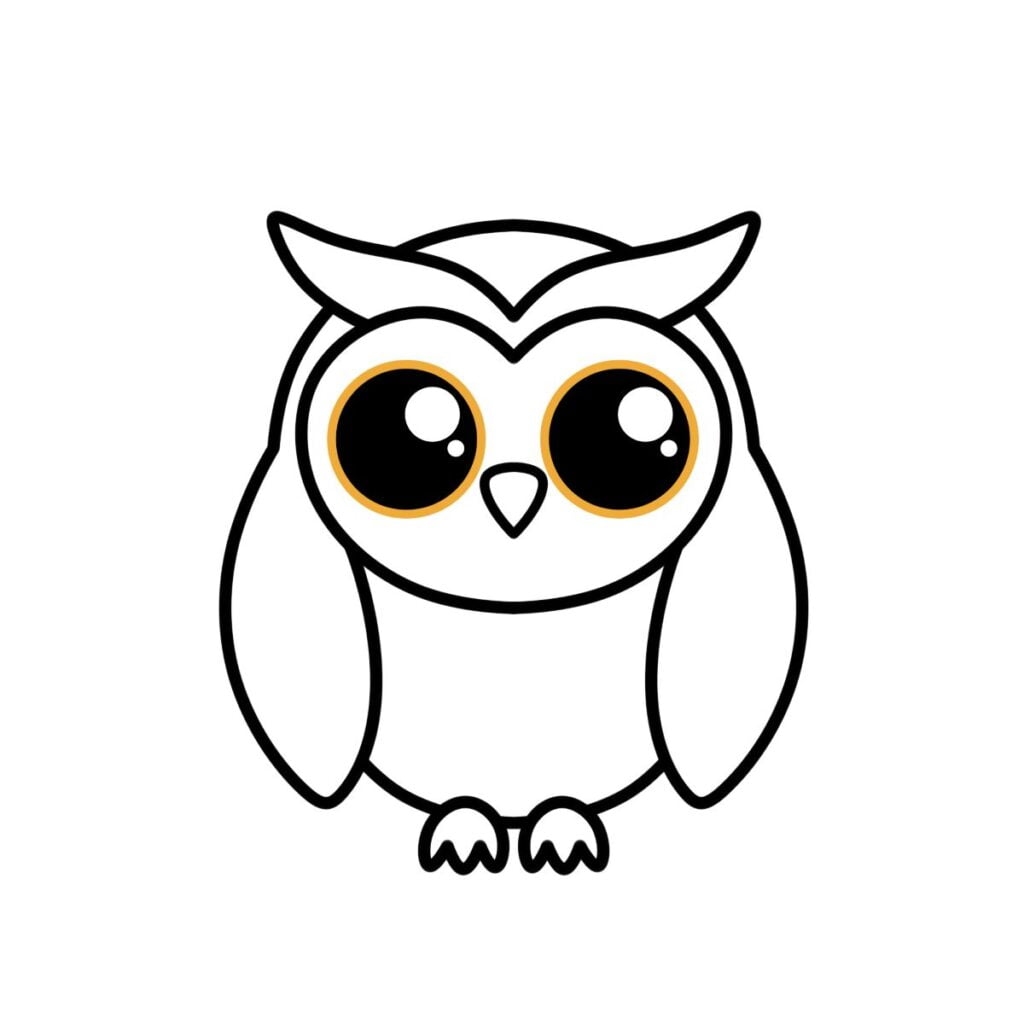
Step 4: Draw the Owl’s Body and Feet
It’s now time to work with different shapes to begin forming your owl’s body, the owl’s belly, and the owl’s wings. Your wings will be similar to a small oval on each side with a slightly pointed end.
Once your wings are drawn, you can use a curved line to connect them at the bottom of the body to form the owl’s belly. Add two small feet, and this step is complete!
Step 5: Add a Perching Stick for Your Owl
The previous step completed the actual owl part of your drawing, but adding a perching stick gives your simple owl drawing a little bit more character. We chose to use curved lines for the perching stick, but you could also use a straight line if you wanted to.

Step 6: Finish Your Owl with Coloring and Other Details
Now begins the really fun part of your owl drawing! Adding different colors and unique details!
You can add little dots on the body and wings to bring contrast to your owl’s coloring. You can also use this time to make sure each small circle inside the owl’s eyes is shining through to give it the look of wisdom owls are known for.

Takeaway
Remember that the art of drawing is meant to be fun! Once you finish your first cute owl drawing, you might find yourself doodling more of them in different sizes and colors. The best way to improve is to practice!
If you’re looking for more ways to practice drawing, as well as some of our favorite drawing materials, check out the links below!