How to Draw a Butterfly
As an Amazon Associate, I earn from qualifying purchases. This post may contain affiliate links. See our full disclosure here.
A simple butterfly is pretty easy to draw even without a tutorial, but how about a pretty butterfly with a little bit more detail? That’s where the real fun starts! Today I’m sharing how to draw a butterfly in two different ways: a front facing monarch butterfly and a side view of the butterfly flying.
Thankfully even with more details drawing a butterfly is still quite simple, especially if you break it down step by step.
Supplies Needed
Get your drawing supplies out! You don’t need much to start drawing but things will go a lot more smoothly if you have these on hand:
- Pencil
- Pencil sharpener
- Good quality eraser
- Paper
- A flat surface for drawing
- Thin-tipped marker (for outlining)
- Optional: coloring supplies
How to Draw a Butterfly: Step by Step

Once you master the basic drawing technique you’ll be able to customize your butterfly with different colors, wing patterns, and species.
1. Start With the Body
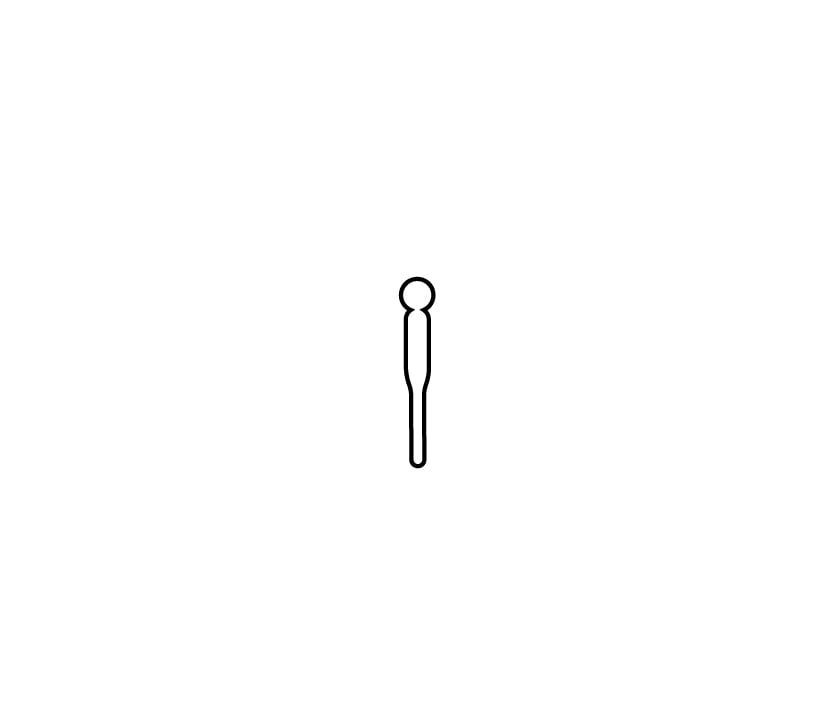
First we’re going to draw the butterfly’s body. This shape kind of looks like a peg-person. To make drawing this easier, I recommend first sketching out the three basic shapes. Start with the circle at the top, then an oval under it for the thorax, and finally a thinner rounded rectangle for the abdomen.
Once you’ve finished your basic shape you can erase the pencil marks in the middle of each or save it for the end after you’ve outlined.
2. Add the Antennae
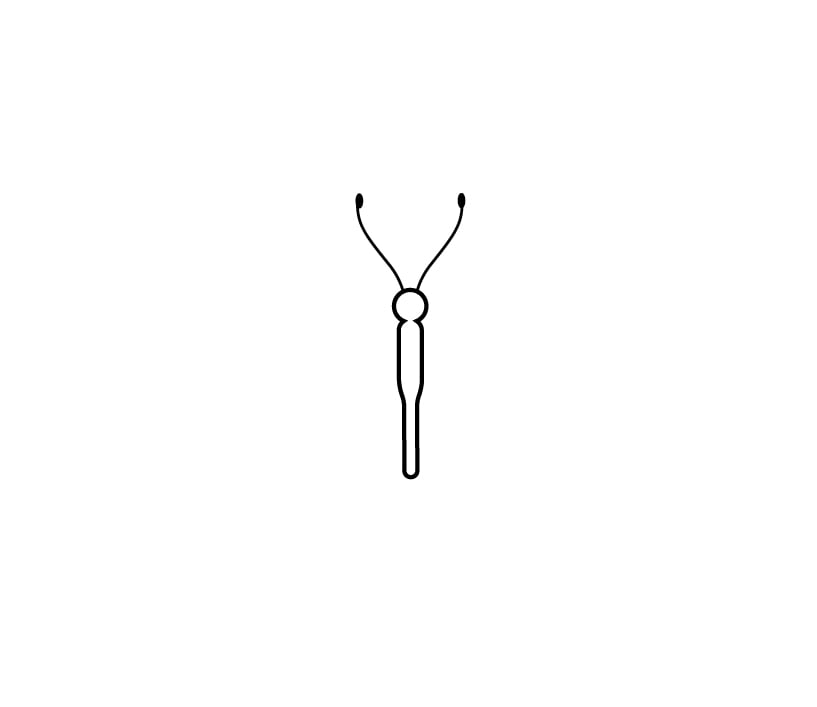
Rather than just straight lines, try making your butterfly’s antennae curved for a more realistic look. Add small balls to the ends.
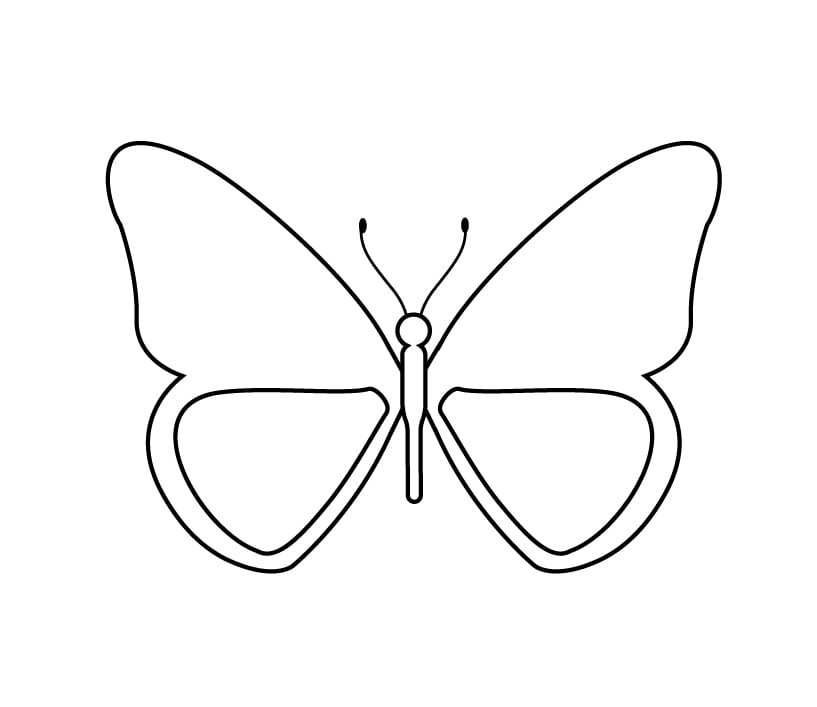
3. Draw the Left Wing

If you’re having a hard time copying this wing shape here’s a tip: start with a v-shape. Then once you have the angles down correctly in your v add the outer part of the wing and connect it, erasing any mistakes as you go.
Make sure the outer part of your wings have some curves like the picture and don’t forget to add the indent.
4. Add the Right Wing
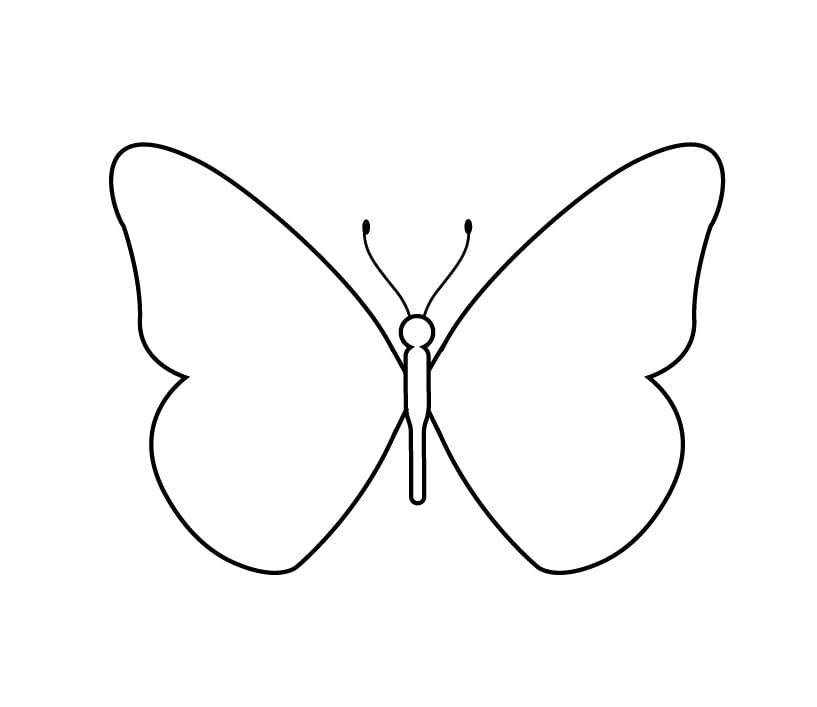
This is where things get tricky – a butterfly’s wings are symmetrical! Try your best to recreate the same shape as the other wing, this time on the right side of your butterfly’s body. It might help to use a ruler or other flat object to line up your starting points on the thorax to match the other side.
Another way to get your wing symmetrical is to fold your paper in half and trace your first wing. The downside to this is that you’ll have a crease in your paper but it does help! If you can’t see your pencil line while tracing, go over it with your marker first to make it more visible.
5. Wing Details (Bottom)
This next step is simple: add two rounded triangle shapes to the bottom of the wings, leaving a gap between them and the edge of the butterfly’s wings. Make them come up just to the indents so they cover a little less than half of the wings.
6. Wing Details (Top)

Now we’ll add some elongated teardrop shapes to the top of the wings. Make sure the top one is bigger than the bottom one, and again, that things are mostly symmetrical. Don’t be afraid to erase and try again until you’re happy with your drawing!
These shouldn’t go as far into the wings as the bottom details; make sure you leave space on the right and left parts of upper wings.
7. Wing Details (Inner Bottom)
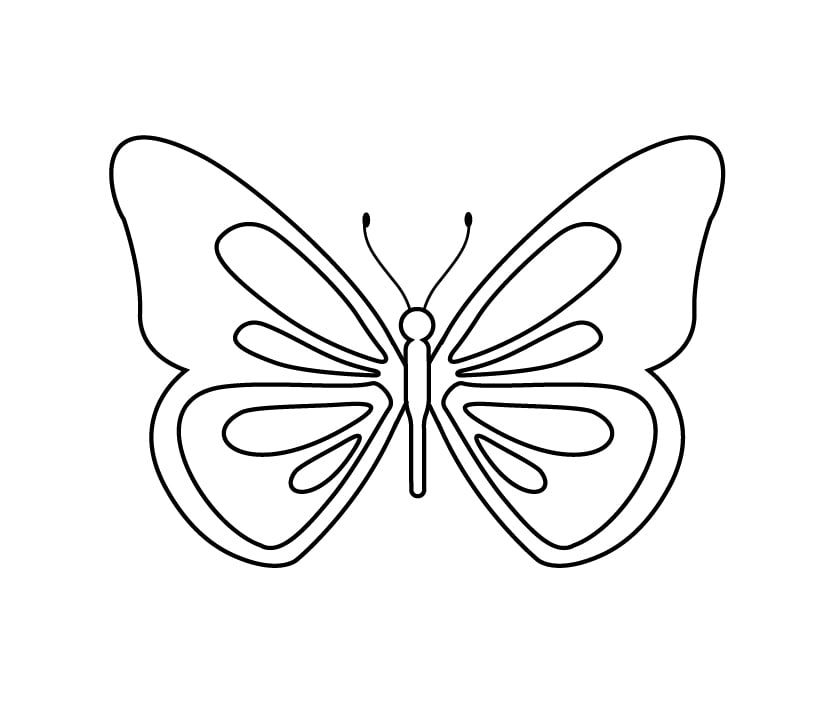
Add some more tear drop shapes to the inside of the triangle shapes you draw on the bottom of the butterfly’s wings easier. These should be smaller than the other ones and not touch any of the sides.
Again, leave a space to the right and left; don’t fill up the entire area.
8. Add Spots to the Wings

This is our final wing detail and the reason we left all that space! In the empty space on the top of the wings, add circles of various sizes to the right and left sides of the wings.
Then add oval shapes evenly spaced next to the teardrop shapes on the bottom of the wings. Make sure these are inside the inner triangle shape and not touching the sides.
9. Outline and Color in Your Butterfly Drawing

You’re done! Now it’s time to outline and color your butterfly drawing. Since we copied the monarch butterfly that’s the colors we used in our example illustration, but you can get creative.
Before you start coloring I recommend you outline all the “good” lines in your drawing. This is especially important if you did a lot of erasing or have extra lines that you left from previous steps.
To outline, simply go over all the lines you want to keep with your felt tipped marker. Once it has a couple of seconds to dry (to avoid smudging) use your eraser to erase over the whole picture. You’ll just be left with the lines you want!
After that coloring will be easy.
How to Draw a Sideways Butterfly That’s Flying

Now that you’ve mastered a basic butterfly let’s draw a sideways one. This one might actually be easier than the front facing butterfly because you don’t have to make the wings as symmetrical.
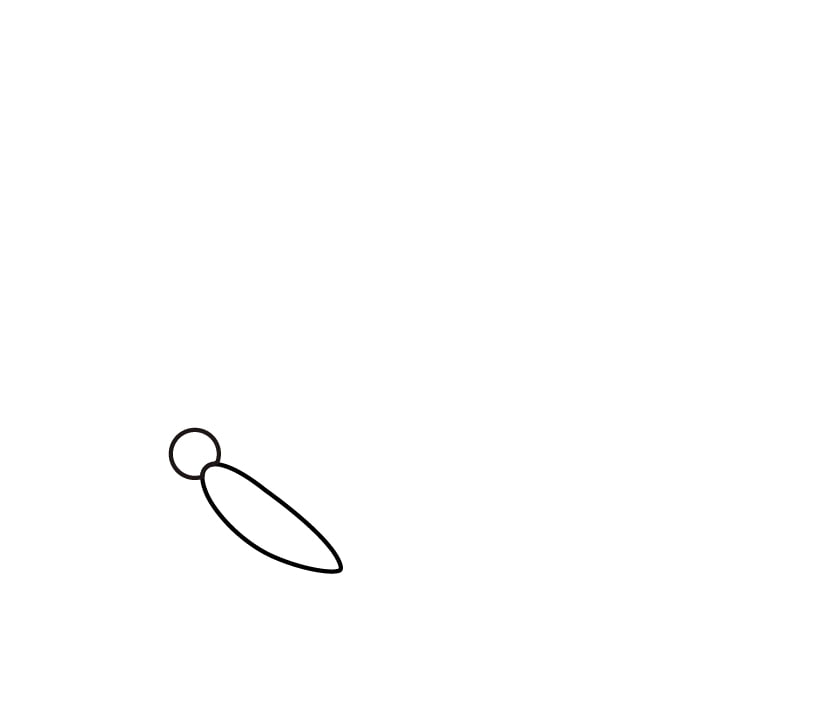
- Draw an oval for the body. Make it at a slight angle, this will help the butterfly look like it’s flying.

- Add a circle to the top for the head.
- Draw stripes along the body and add two curved antennas to the top of your butterfly’s head.

- To draw the butterfly’s upper wing, start a little way into the body and go up and out towards its head. Then about ¾ of the way up start curving back towards the body. The top will be a narrower bump, then you’ll come down and out again (giving it another bump about ½ way down) and then back into the butterfly’s body. It might be tricky to get this right at first so don’t be afraid to erase and try again!

- Now add a lower shape connecting to the first part of the wing you drew. I find it easiest to start at the top (a little bit into the upper wing) and come out and down before curving back into the butterfly’s lower body.
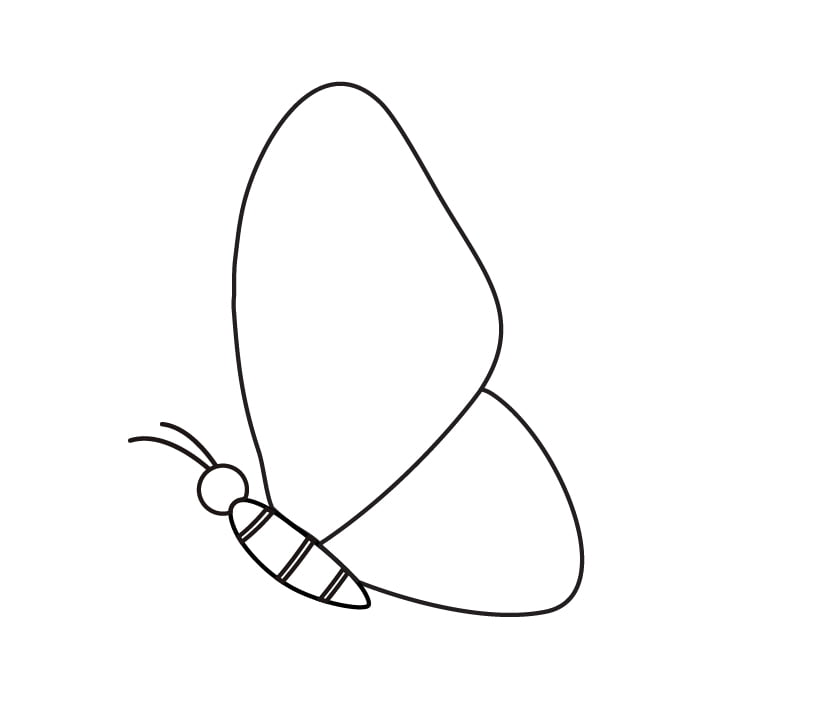
- To do the second wing, recreate your first wing but a little bit lower down and at a slightly different angle (see picture).

- Add details to the first wing by drawing some long teardrop shapes on both the upper and lower wings, then adding some circles to the top.

- Repeat the details on the second wing, only drawing a little bit of each (since it’s hidden behind the other wing).
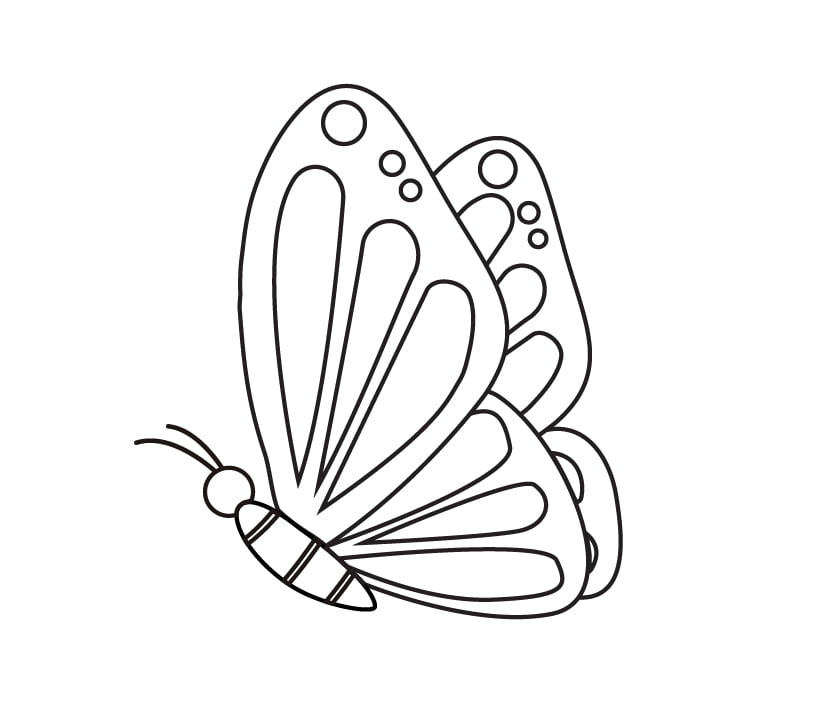
- Outline your drawing and color it in!

Butterfly Drawing FAQs and Tips
You can draw any species of butterfly you want or even create your own unique butterfly creation! Here’s 10 butterflies for beginners to check out if you need inspiration.
There’s so many things you can do with your drawing but here’s some fun ideas: add it to your doodles for fun, draw butterflies for spring decorations, or create a butterfly themed craft.
Not exactly – it’s just for fun. If you want to add more details to your butterfly, check out this handy butterfly anatomy reference guide. Incorporate these details into the side flying butterfly drawing tutorial for a more accurate butterfly drawing.