How to Draw a Fish: An Easy Fish Drawing Tutorial
As an Amazon Associate, I earn from qualifying purchases. This post may contain affiliate links. See our full disclosure here.
This fish drawing tutorial is easy for beginners and kids to complete and is super fun. Become a master at drawing a fish by following the simple steps below. Realistic fish come with lots of scales, so be prepared to draw plenty, but don’t forget to have fun.

Materials Needed to Create an Easy Fish Drawing
To begin your fish, you will need paper and pencil. I also recommend grabbing fine-tipped markets for the finishing touches. Try my favorite markers for drawing and coloring.
Getting Started
I always start my drawing projects using softer pencil marks for sketching and then I outline them with marker or colored pencil to add detail and color. This just makes it easier to fix mistakes with an eraser instead of starting over. Nothing wrong with drawing with a pen or marker if that’s your preferred method though.
How to Draw a Cute Fish
Below is a step-by-step beginner tutorial to complete a fish drawing. It’s very simple to do and only requires a few simple curved lines and basic shapes. Follow the easy directions below to create your own cute fish.

Step by Step Instructions to Draw a Fish
- Begin by drawing a horizontal oval with the mouth of the fish on the left side. This will be your fish body and all of the other steps will build off of it. In the next steps, we will complete the rest of the body.

- Add a curved line from the top of the fish to the bottom. Draw this line on the left side of the body. This will mark where you begin drawing the scales in later steps.Then, add a side fin that has three little bumps on it. This serves as the fish’s pectoral fin.

- This is the step where you add the tail fin. I created my fish tail fin with 5 bumps on the right side of the body. Feel free to do as many or as few bumps as you want.If you look up different species of fish, you will see they all have different tails.

- Using your pencil, draw the top fin and the bottom fin of the fish. I made the dorsal fin nice and smooth to look like it’s flowing through the water. The fin on the bottom of the fish is more oval in shape. This is the pelvic fin. I started in the center of the belly of the fish and ended close to the tail fin.Again, feel free to customize your fish fins however you would like.

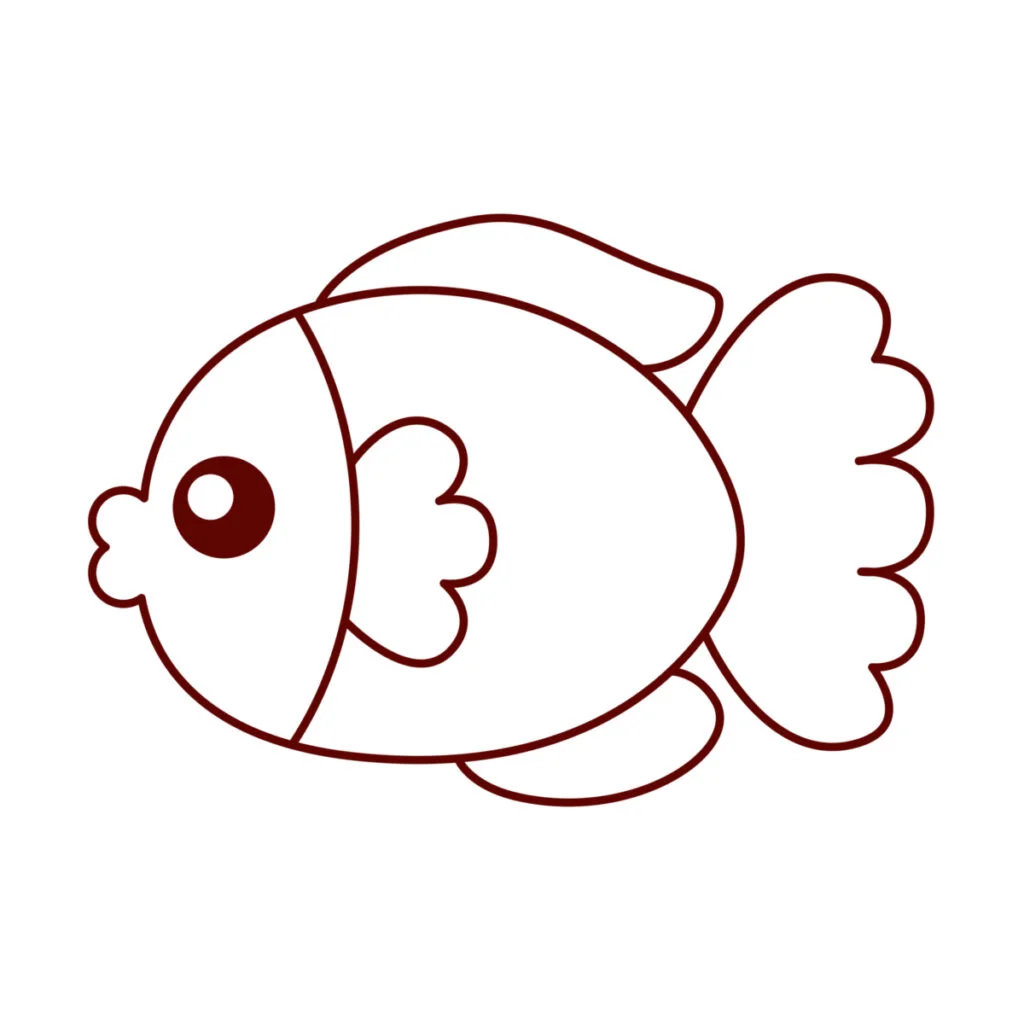
- Add the eye by drawing a small circle to the right of the fish lips. Then, draw a smaller circle inside the first circle. This will create the pupil of the fish’s eye.
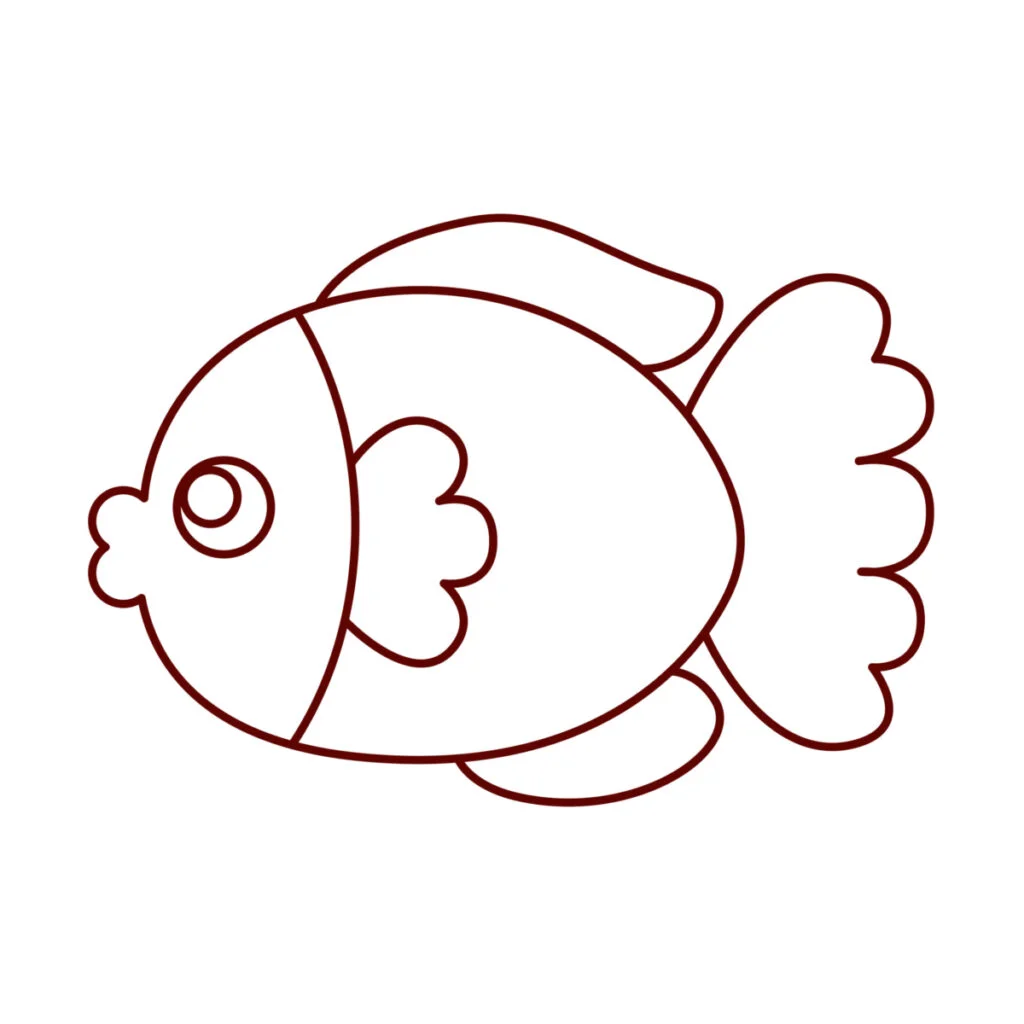
- Color the larger circle black, leaving the small circle white.
- In this step, you will be adding detail to each of the fins. Draw straight lines on the top fin, side fin, bottom fin, and tail fin. On the top and bottom fin, add as many lines as you would like. These lines can be straight or wiggly. I chose straight just for simplicity.On the side and tail fin, I draw a line connecting the body to each bump in the fin. Don’t connect the line all the way to give the fins a little dimension.

- This step will most likely be the most time-consuming. Begin by drawing half circles attached to the curved line you created in step 2. Once you have one column of semi-circles, draw another set directly next to the first. Continue this pattern until you have reached the tail.

- Color your fish drawing with any colors you would like. I used teal, purple, and pink in various shades. Tropical fish come in so many different colors, so get creative with various colors and shading.

FAQs
What are the best drawing supplies?
It’s best to lightly sketch your drawing in pencil so that it’s easy to erase mistakes. Once the fish drawing is to your liking, then you can fill in the details with colored markers or colored pencils and finally outline your drawing with a black fine liner pen.
- Markers for coloring in your drawing.
- Colored pencils for filling in design details.
- Fine liner pens for details and outlining
- Watercolors are a great option for coloring in your finished drawing. Just be sure to draw your design on watercolor paper first.
- Crayons are a great option for younger artists!
What can I do with my fished fish drawing?
- Make a card! Use the simple fish drawing to decorate cards for loved ones or a sweet gift to say, “I’m thinking of you!” You can even turn your fish into a Christmas fish drawing by adding a cute Santa hat.
- Frame a picture. Put a frame around your finished cute fish drawing and now you have a piece of art to hang on the wall.
- Create stickers. There are lots of online options for turning your drawings into stickers.
What can I do to make my fish drawing unique?
Use your creativity to add a personal touch to your finished fish drawing.
- Add some bubbles, aquatic plants, water, other sea creatures, and anything else you can think of. It makes a cute water scene with a funny fish.
- Create a your own unique pattern to the body of the fish instead of just drawing fish scales. You can even draw zentangle designs on your fish outline.
- Draw a fish bowl around your finished fish.
Takeaway
There’s no right or wrong time to draw a fish. I love to use drawing as a form of relaxation. Some people like to journal or craft, I like to draw to let my mind decompress.
If you want more doodling ideas, try some of these easy step drawing activities.
I hope you enjoy this fish sketch tutorial and find some relaxation as you draw your fishy friend.