DIY Festive Wrapping Paper
As an Amazon Associate, I earn from qualifying purchases. This post may contain affiliate links. See our full disclosure here.
Tired of boring wrapping paper? Well, you’ve come to the right place! I partnered with Arteza to bring you this fun and creative way to make a DIY Festive Wrapping Paper (AD). This project only requires a few materials and is so easy to do!
Try This Easy DIY Wrapping Paper Craft
This craft centers around using using paint pens to make your designs on the wrapping paper. I love using paint pens because it’s no fuss, easy clean-up, and it’s even easy for kids to use.
Related: 15 Easy DIY Christmas Ornaments
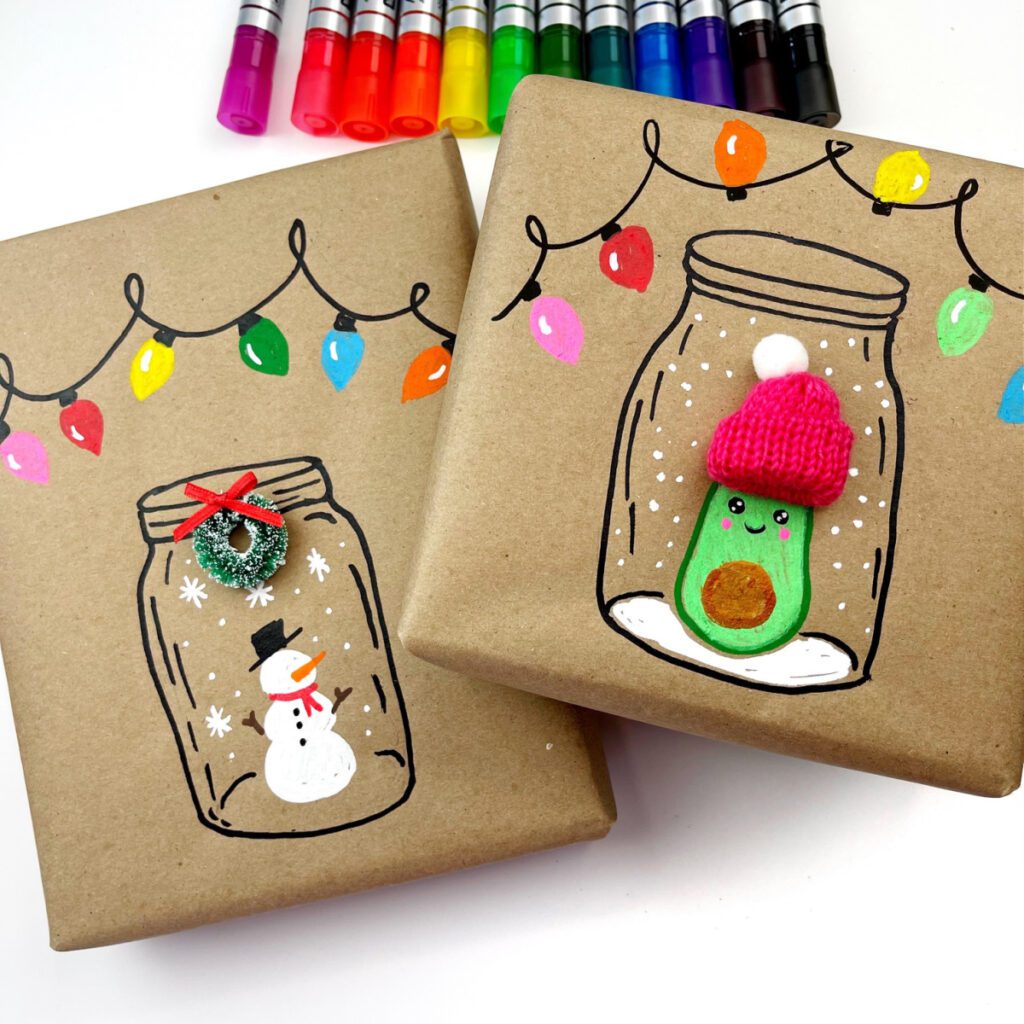
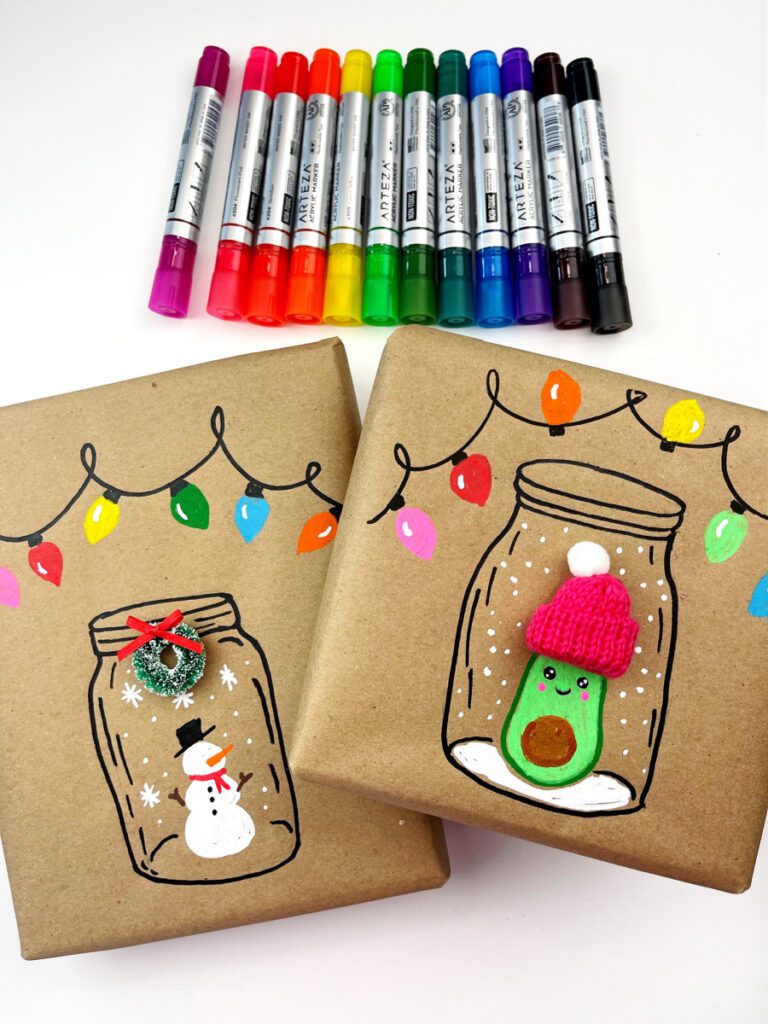
One of my favorite things about Christmas is the fun crafts that come with the season! Doing something like making DIY Festive Wrapping Paper adds a little extra touch to that perfect gift you’ve purchased for the loved ones in your life. Whether you’re giving a little something to your children’s teachers, wrapping a present for a work party, or getting ready to wrap up presents for your littles, this festive wrapping paper adds a personal touch. Deck the halls with this DIY Festive Wrapping Paper that will leave your gift recipients speechless!
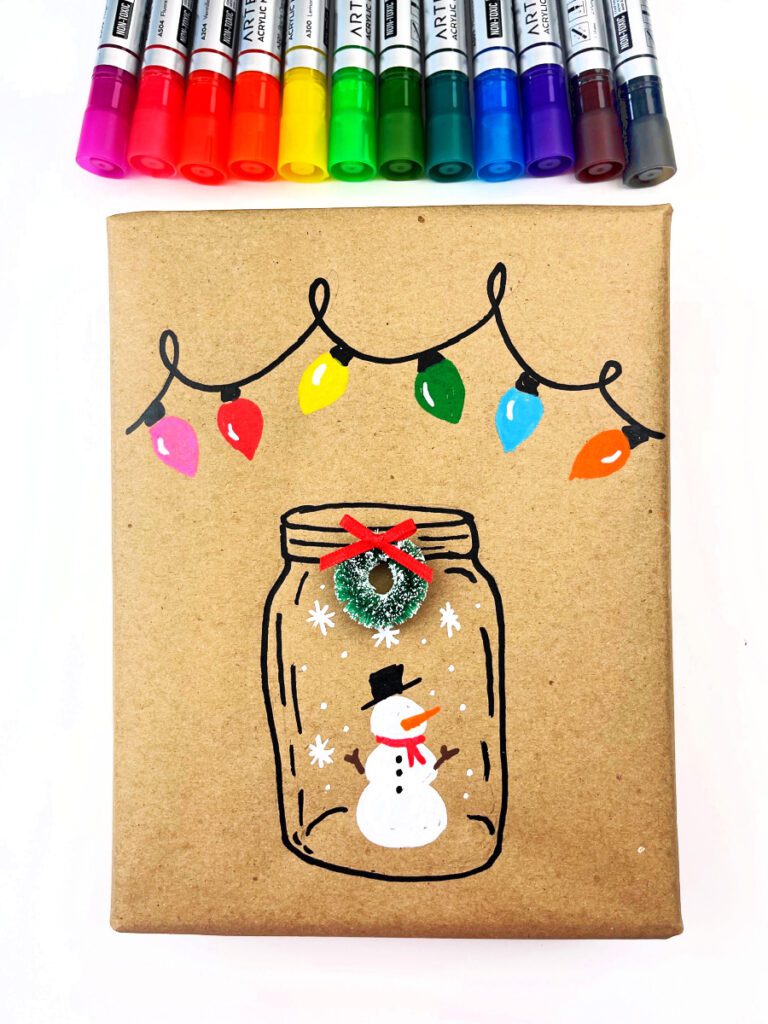
Supplies (affiliate links provided for convenience)
- Kraft Brown Wrapping Paper – You can use any type of paper that you’d like, but this is my favorite!
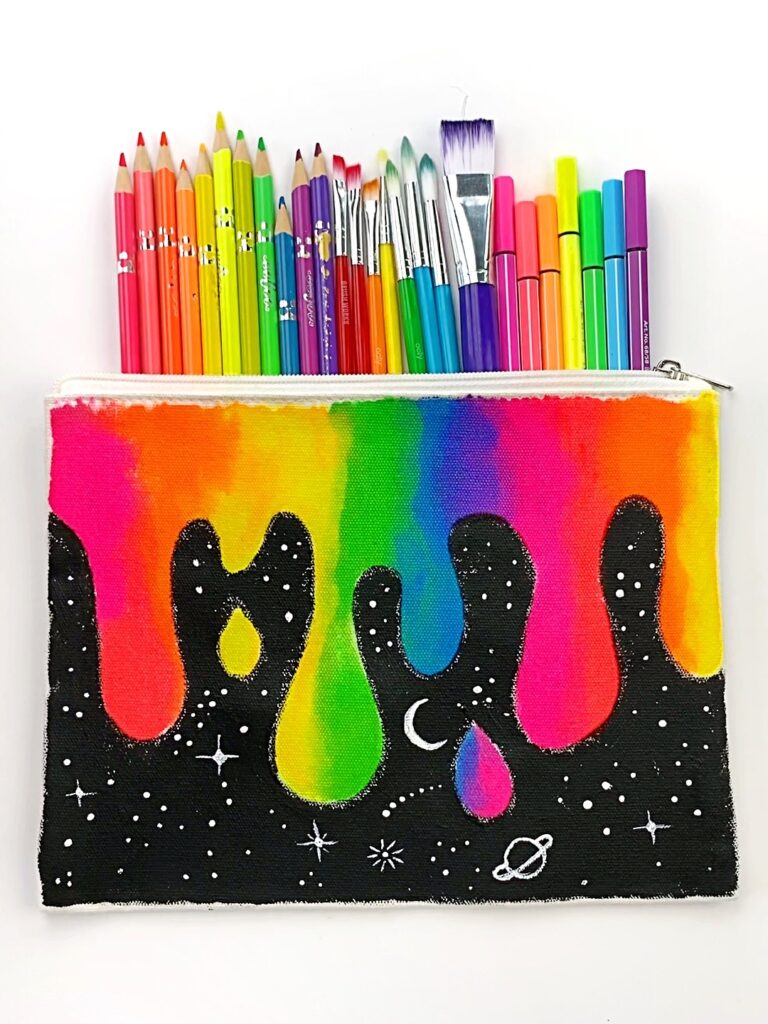
- Arteza Paint Pens fine point or medium point. I used the medium point but the fine point would work great too and be easier for details.
- Miniature Wreaths (optional)
- Miniature knit hats or here(optional)
How to Make your own DIY Wrapping Paper – Step by Step
1. Get Your Gift Ready
Grab the present of your choice to be wrapped.
2. Wrap the Gift
Take out the Kraft brown wrapping paper and lay it flat on the table. Wrap the gift, making sure to wrap the paper tightly and neatly around the present for maximum surface area to paint. (Tip: If you’re giving a gift that requires a bag, find a and do Kraft bag and do the same thing. Your family will love it!)
3. Start Outlining
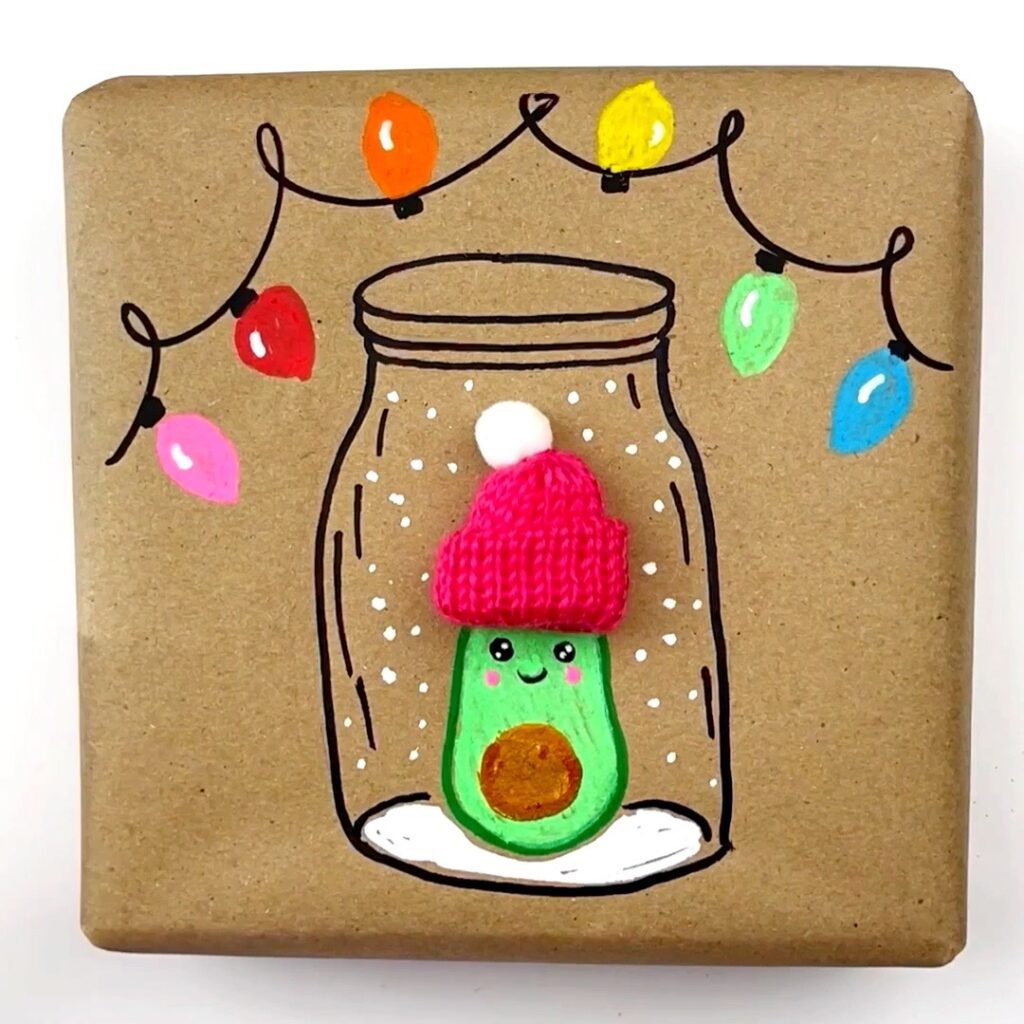
Start by drawing a mason jar outline with your paint pens. I drew mine first in pencil. Don’t worry about it being perfect. The idea is just to have fun with it.
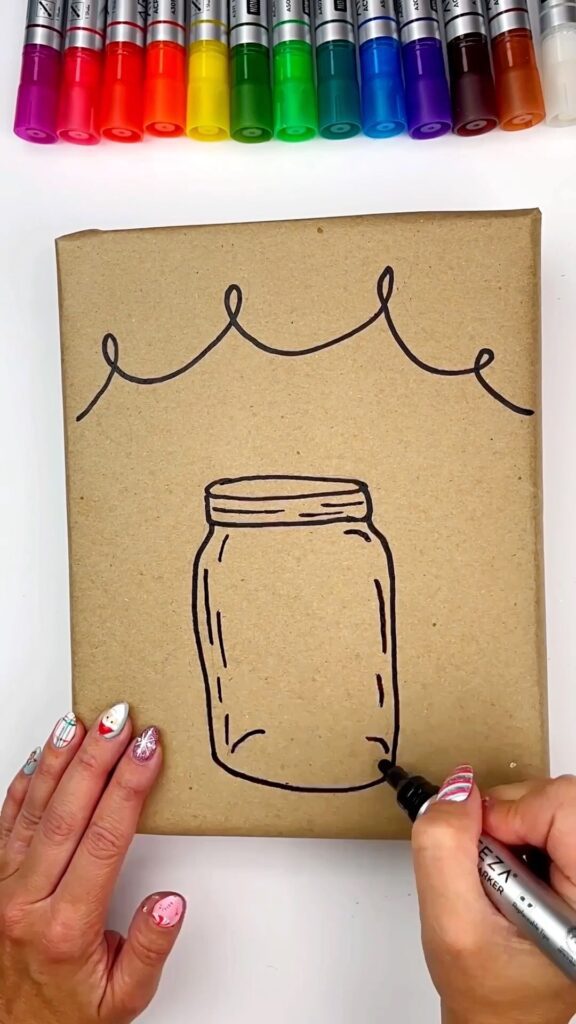
4. Draw the Lights
Next draw a string of lights. You can make the lightbulbs any color theme you like. They definitely help make the picture come together.
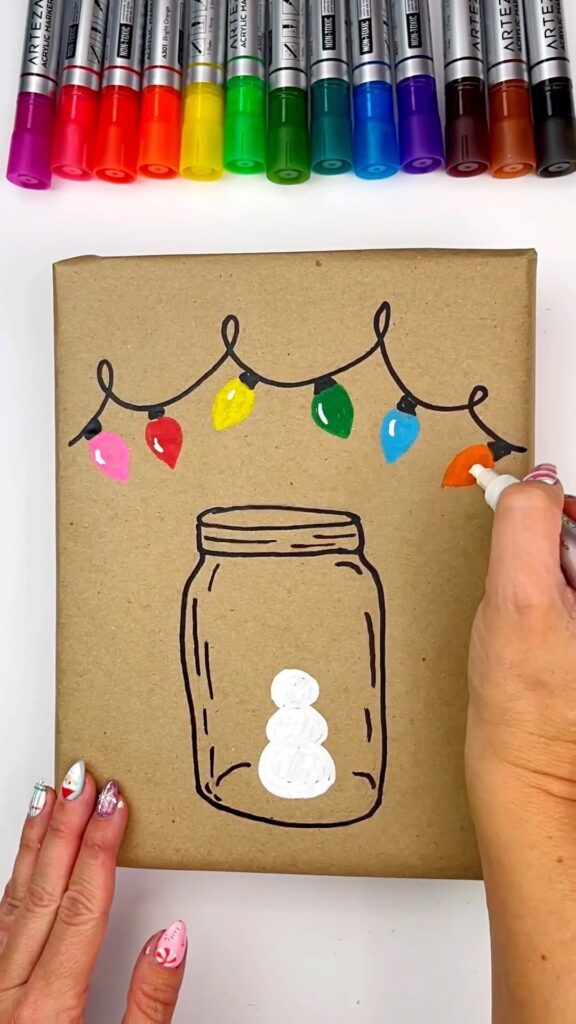
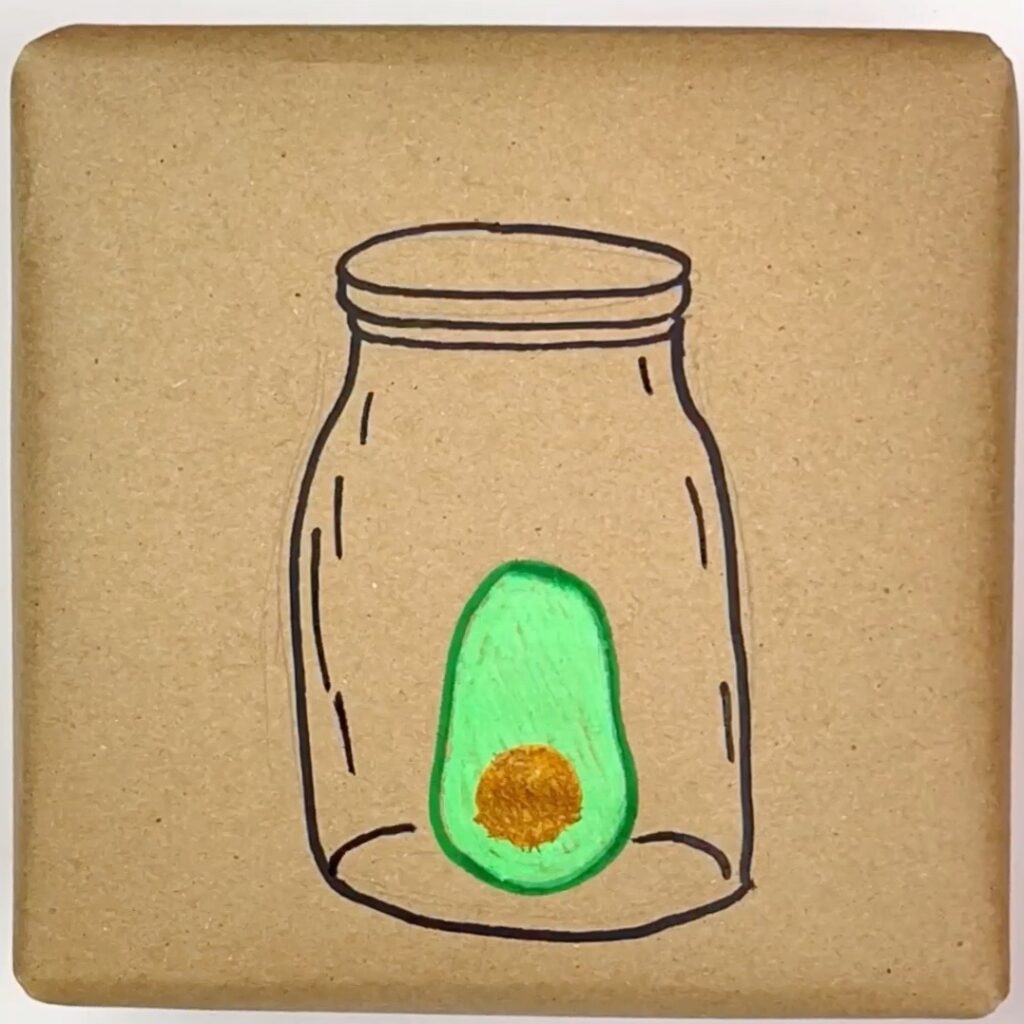
5. Fill the Jar
Draw your favorite character or item inside the mason jar. The snowman is a great and easy option. If you want something more fun, a Christmas avocado is a crowd-pleaser.

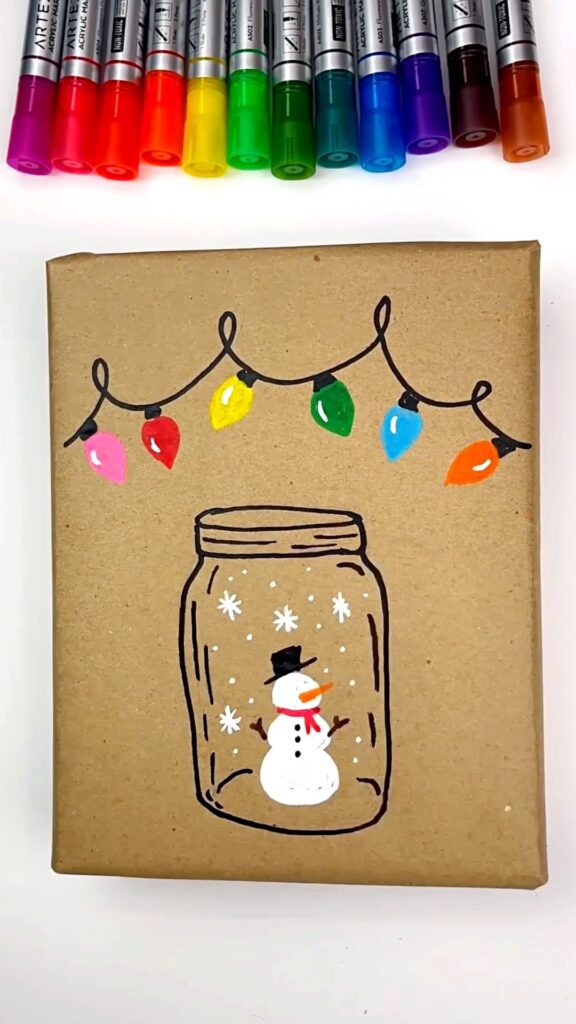
6. Add Details
Add snowflakes add any other fun details. You can even draw a Christmas gift tag. Draw whatever your heart desires so have fun with it!
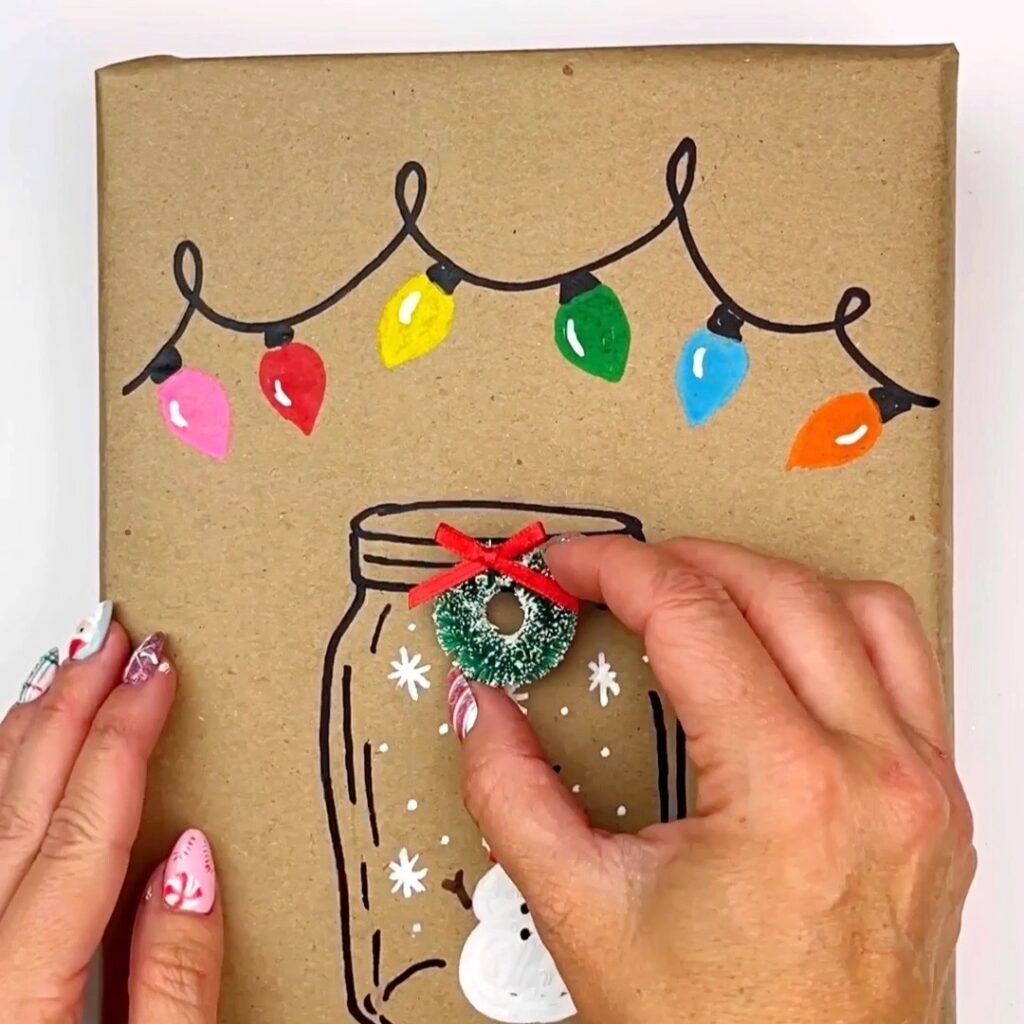
7. (Optional) Glue on Trimmings
For a little extra flair add a mini wreath or a mini knit or Santa hat. This is totally optional.
Quick Step by Step Instructions to Make Your Own DIY Festive Wrapping Paper
- Find a gift to be wrapped – solid gifts are easier.
- Wrap the gift in kraft paper. If your gift is an odd shape, do this with a gift bag instead.
- Draw the outlines of the jar and light string with black marker.
- Fill in the colored lights.
- Add the base colors for the drawing that will go inside the jar.
- Add details to your drawings.
- Optional: Glue on small 3rd accessories to make the drawing “pop”.
Why Make Your Own Wrapping Paper?
I love doing DIY crafts like these because they show you put extra thought into the gift without breaking the bank or spending too much time. It also puts a fun, creative twist on traditional wrapping paper.
If you find yourself doing this DIY festive wrapping paper, tag me on social media so I can see what you came up with! One of my favorite things about Color Made Happy is getting to see the fun twists you take on my crafts. I love seeing your creations so keep crafting and stay colorful!