Alcohol Ink Gems
As an Amazon Associate, I earn from qualifying purchases. This post may contain affiliate links. See our full disclosure here.

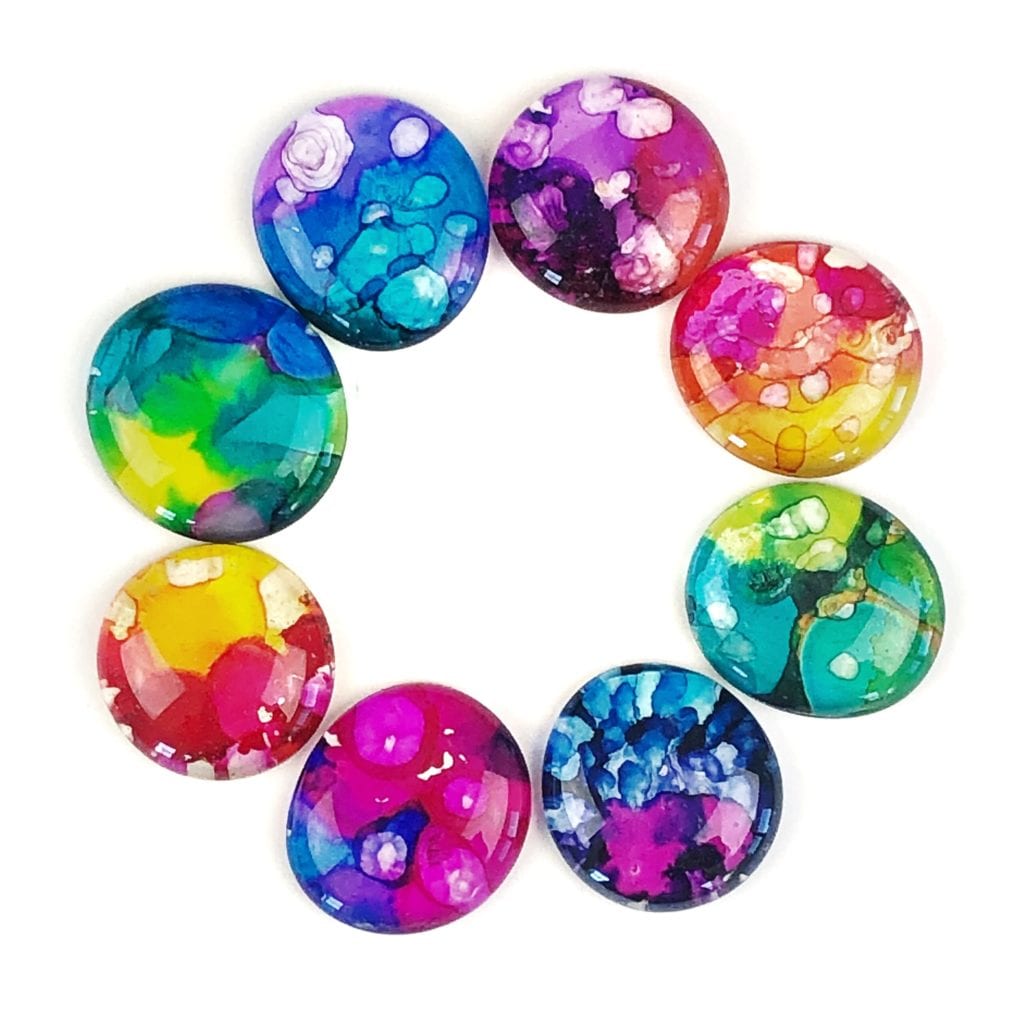
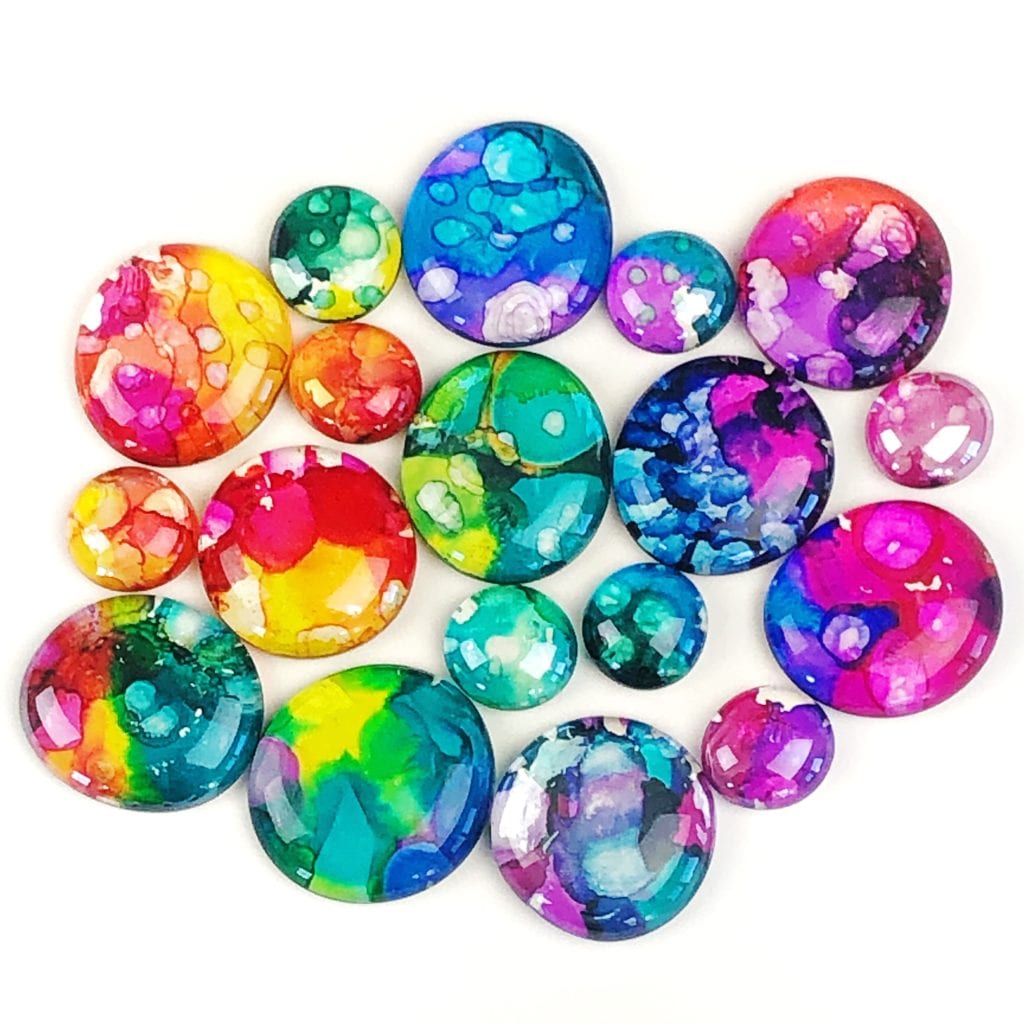
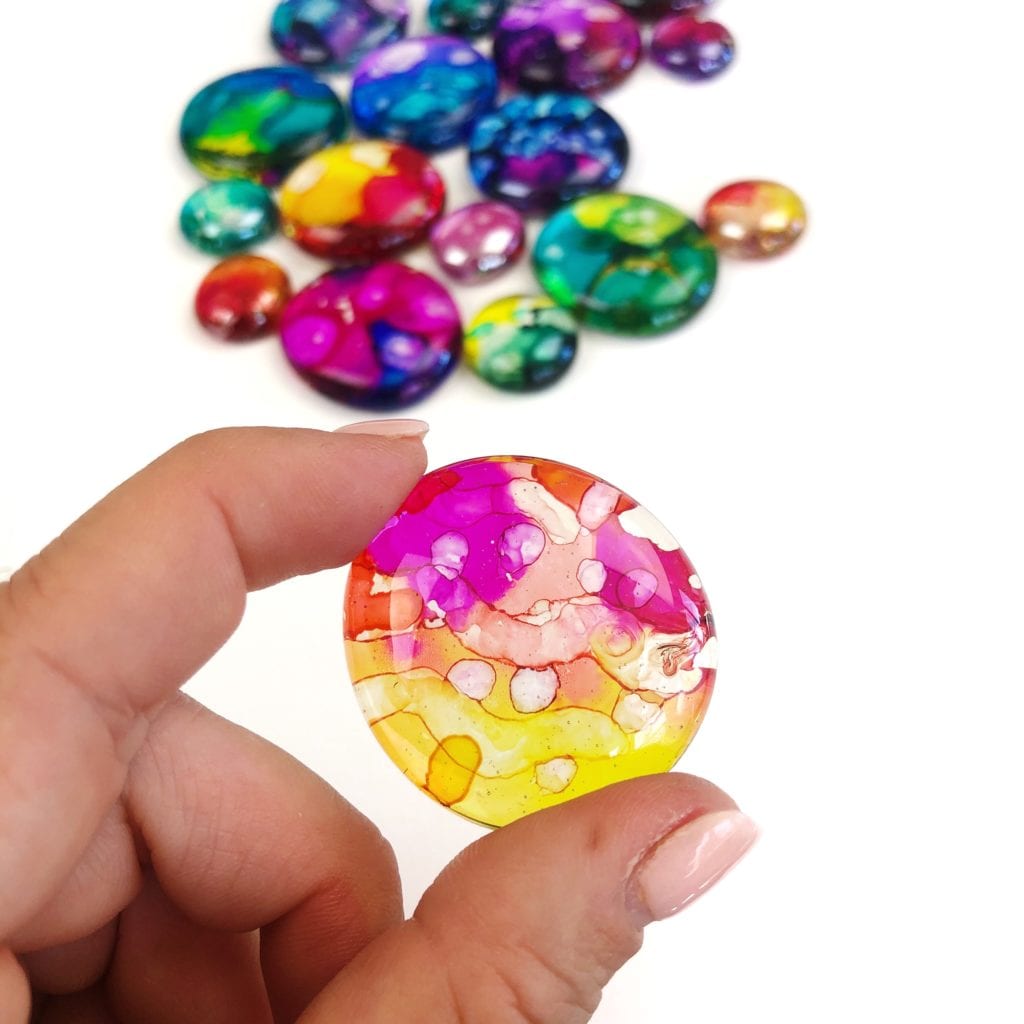
There are about a million different ways to decorate those clear flat back glass gems that are often used as vase filler. I’ve made both glitter gems and crackle gems and I couldn’t wait to try alcohol ink. These little gems can be used for a ton of different crafting purposes and they also make great DIY gifts. 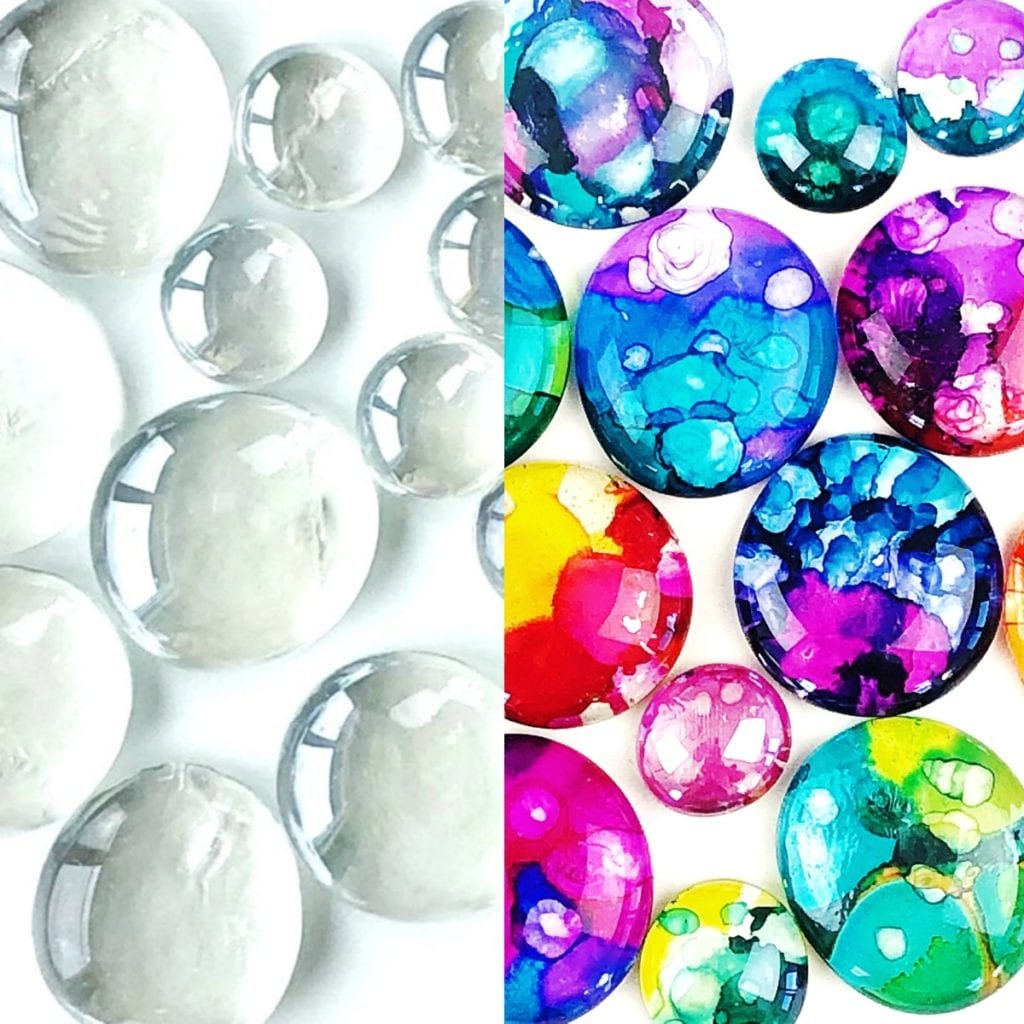
Supplies for Alcohol Ink Gems (affiliate links provided for convenience)
- Clear, flat backed glass gems size large and size small.
- You can also find these gems at craft stores and the dollar store.
- Alcohol Inks – I used this full set of alcohol inks and I also used Ranger Alcohol Inks and really liked this color combination for Ranger Inks.

- Alcohol Blending Solution OR 91% Isopropyl Alcohol
- Small paint brush
- White cardstock
- Disposable gloves – trust me you don’t want a lot of alcohol ink on your hands!
- Necklace cord (optional)
- Pendant hanger (optional)
- Magnets (optional)
- Ring blanks for jewelry making (optional)
- E6000 glue (optional)
NOTE: One thing you want to be sure you do when using alcohol inks is have a work surface that is ok to get stained. I like to use large foam craft boards or cardboard underneath my alcohol ink projects so that I don’t worry about alcohol ink staining my crafting table. Also, be sure to use protective disposable gloves so that you don’t stain your hands!
Directions for Alcohol Ink Gems
Step 1. I used 2-3 alcohol ink colors for each gem and used colors that are near each other on the color wheel. On the flat side of each gem, start with just 1-2 drips of the first color. You have to very easily drip the alcohol ink so that not too much comes out at once. If you are having a hard time, you can first drip the alcohol ink into a plastic palette or small cup and then use a paint brush to apply it to the gem.


Step 2. Once the colors are to your liking, let the alcohol ink dry for a few minutes before adding alcohol blending solution OR the 91% Isopropyl Alcohol for a layered effect. To add the blending solution or the 91% alcohol, dip a small paintbrush directly into the alcohol or solution and then lightly touch the gem in different spot. You’ll see small circles start to appear. If you add too much alcohol and dilute the alcohol ink, you can always add more alcohol ink back to the gem. 
Step 3. Most alcohol inks are tacky dry within a few hours and fully dry within 24 hours. If some of your alcohol ink gets onto the dome part of your gem, you can wipe it away using a cloth or Q-Tip dipped in alcohol. 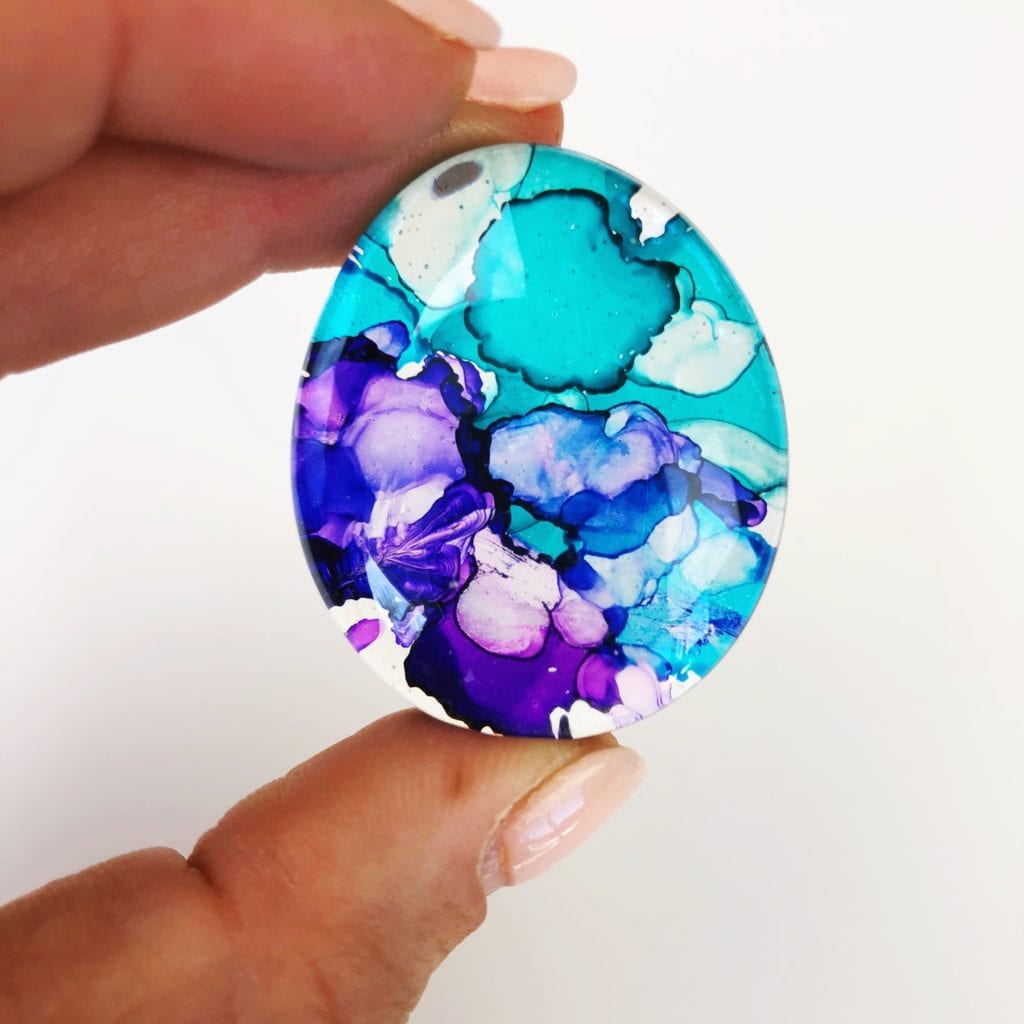
Step 4. I wanted to really have the color pop on my gems so I glued a piece of white card stock onto the back of each gem using a light layer of Mod Podge applied directly to the card stock. You can also experiment with tinfoil on the back and other card stock colors. 
 What to do with Finished Glass Gems
There are a lot of different ways to use your finished alcohol ink gems.
- You can turn your mini gems into decorative thumbtacks or magnets! Simply glue a thumbtack or magnet directly onto the back. I like to use E6000 glue.
- To create jewelry glue a finished alcohol ink glass gem onto to a ring blank or for necklaces, glue to a pendant hanger and add to a necklace cord.
- You can also just use the gems on their own as decoration for other craft projects. Glue them to the top of a wooden box, on a canvas, to wooden structures like birdhouses or use them as glass filler or in a decorative dish.


 For more crafty and colorful projects visit my Instagram page or Facebook page. And if you make some alcohol ink glass gems, come share your finished project. I love featuring crafts that were inspired by my tutorials with my followers.