How to Draw a House
As an Amazon Associate, I earn from qualifying purchases. This post may contain affiliate links. See our full disclosure here.
Do your house drawings need an upgrade? Or maybe you just want a simple doodle idea that’s fun for kids and adults to learn. Either way, here’s how to draw a house that’s easy for beginners and full of details.
If you’ve been drawing houses by adding a triangle on top of a square this tutorial is for you!
Once you master this basic house drawing technique you’ll be able to get creative and try different styles and buildings.

Supplies Needed to Draw a House
It’s a lot easier to draw when you have everything in front of you, trust me. Grab these supplies before you get started so you can focus on your art.
- Graphite pencil
- Drawing paper
- Eraser
- Pencil sharpener
- Black pen for outlining
- Coloring supplies of your choice
- Flat drawing surface
- How to draw a snail instructions
- Optional: Ruler
How to Draw a House: Step by Step Instructions
The best part about this drawing tutorial is that it uses a lot of basic shapes. If you want to get it perfect you could use a ruler to help with your drawing, but it’s not required. Whatever you like best!

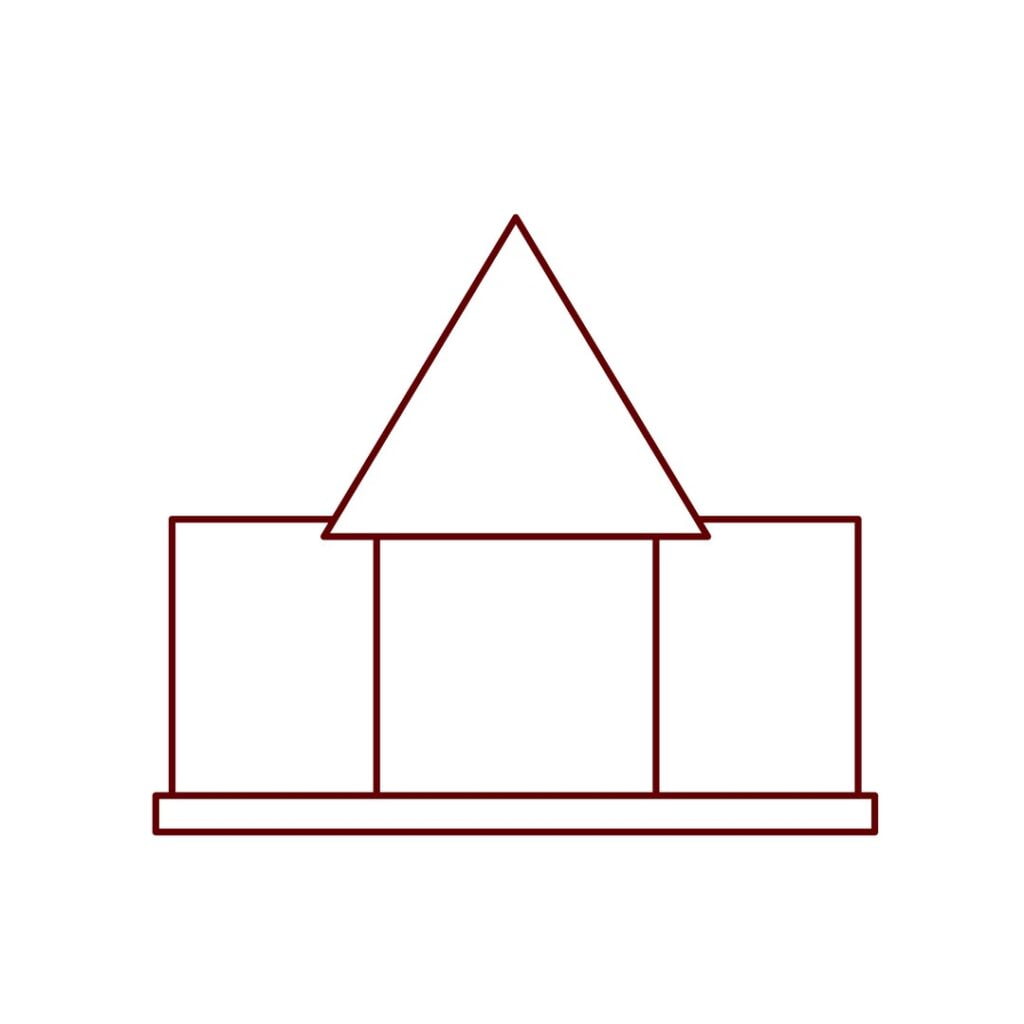
Step 1: The Foundation
Any sturdy house starts with the foundation! This is just a simple rectangle but make sure you make it as wide as you want your house to be.

Step 2: Inner Square
We’ll start with the middle part first. Draw a square right in the middle of the foundation. It should be wider than the outer parts, but not too wide that you won’t have room to draw your windows when you add the sides later.

Step 3: Inner Roof
Now add a triangle to the top of your inner square making sure the sides overhang slightly and evenly.

Step 4: Add the Sides
Now we’ll add the other two sides where the windows are going to sit. These are just rectangles – but the trick here is to join them just above the points of the inner roof (triangle).
This will give the effect of the middle part sticking out in front of the sides.
Step 5: Finish the Roof
Now that you have your sides drawn in you can add the side parts of the roof. To do this, start near the top of the inner roof, but leave the point of the triangle sticking out higher. Then take your line out until it’s parallel to the outer edge of the side part’s rectangle.
From there, come down on a slant so the line is sitting slightly to the left or right of (depending on your side), but parallel to the edge of your side rectangle. Finally, join those lower parts together into a straight line.

Step 6: Add the Chimney
The last part was tricky so this is a nice break. To draw a chimney, first add a square to either of the flat roof parts, then add a small rectangle on top. Make sure the rectangle overhangs on each side of the square to give it more definition.

Step 7: Door and Columns
To draw the door, start with a rectangle that’s centered in the middle part of your house. Leave space on either side and slightly less space over top of the rectangle. Then add your details.
You can also create a column effect around the door/porch by adding a second line next to your existing ones on either side of the door.

Step 8: Add Square Windows
If you’re struggling to recreate the square windows in this house drawing tutorial here’s an easy trick. First, lightly sketch squares in the middle of each side. Don’t worry about the flower box for now.
Now you can do the next part of this in two different ways. The first is to erase part of the window and fill in your window boxes in pencil. The second, which is usually easier, is to draw your window boxes and details over top.
Then, once you’re done your sketch go over the lines you want to keep with a black pen then erase your pencil lines.
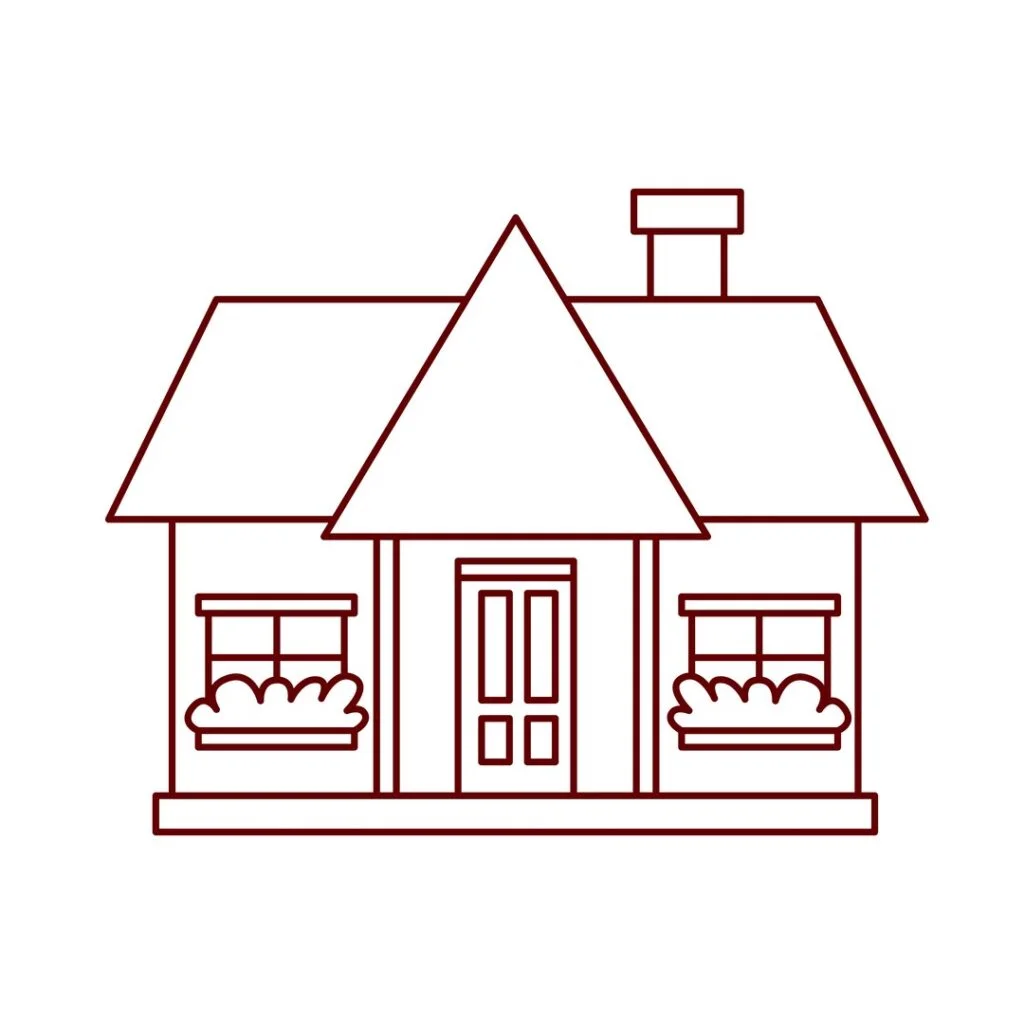
Step 9: Draw Round Upper Window & Add Details
To draw the round window in the attic start with the outer circle then add the inner one and a cross for the panes.
You can also add a second set of lines on the left and right of the inner roof portion (triangle) for extra details.

Step 10: Roof Details
Add stripes to your house’s roof to make it look more detailed. This is a great time to bring out that ruler to get them even!

Step 11: Color Your Drawing
Once I’m done drawing I like to use a pen or marker to go over my lines. Not only will this add definition, but it will make coloring a lot easier.
Color your house however you like! If you want to get really fancy, try adding some shading for the shadows or glass details on the windows.

Expanding on Your House Drawing
Once you’ve mastered a basic house you can start getting creative with your homes. Try different shapes, styles, and details to change things up. Another fun idea is to try decorating your house for different holidays. Add snow and Christmas lights, make it a haunted house, replace the plants with flowers for spring, etc.
You could also try adding more details around the house, too. Are there some trees? How about some cute animals in the yard? Have fun with it!