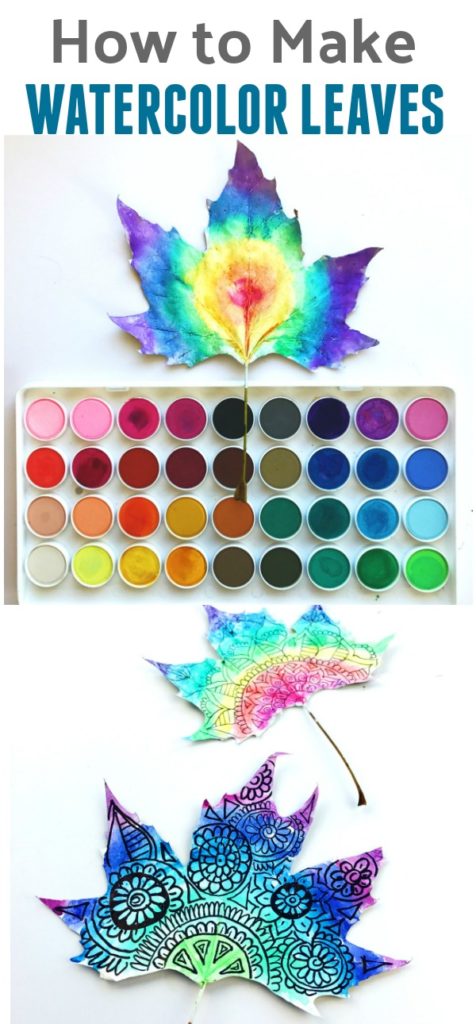
How to Make Watercolor Leaf Art
As an Amazon Associate, I earn from qualifying purchases. This post may contain affiliate links. See our full disclosure here.
The best part of fall is the leaves! Well, really the leaves would be even better if I didn’t live in San Diego, California, but fortunately we still get a few leaves that are perfect for creating leaf art. One of my favorite leaf art activities is making watercolor leaves.
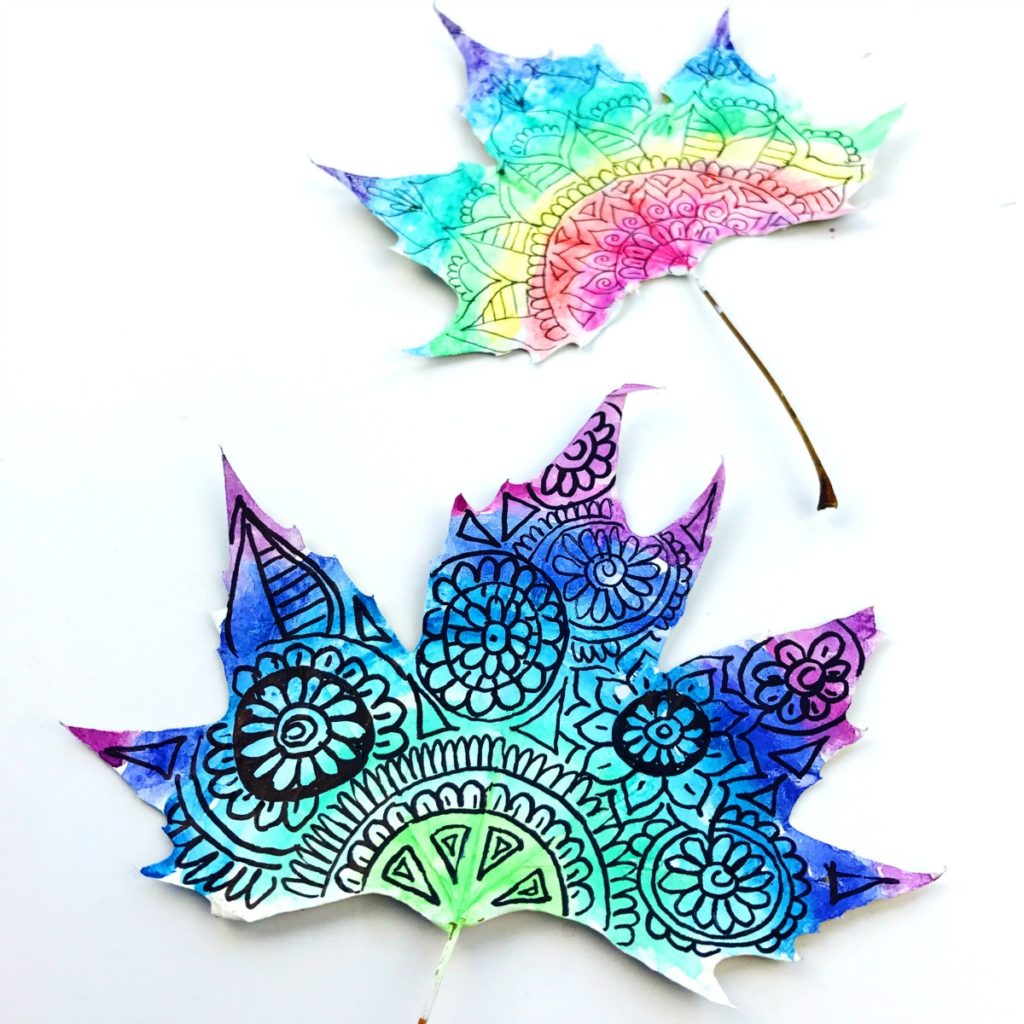
Watercolor leaves have an almost tie-dye look to them. They make a perfect canvas for fun doodles and zentangle designs. If you’re looking for some doodling ideas check out my post here that has lots of fun doodle designs. Follow the simple steps below and create your own beautiful watercolor leaf art that can be used for dream catchers, mobiles, wall hangings etc.
And if you don’t have leaves to paint, don’t worry, just cut a few of your own out of watercolor paper and you can still make them using the directions below!
Supplies Needed to Make This Watercolor Leaf Craft
- Leaves – You don’t want your leaves to be too dry when you select them or else they will crumble. I usually pick green leaves that have already fallen on the ground.
- Acrylic white paint – I used Martha Stewart Acrylic paint but any acrylic paint will work.
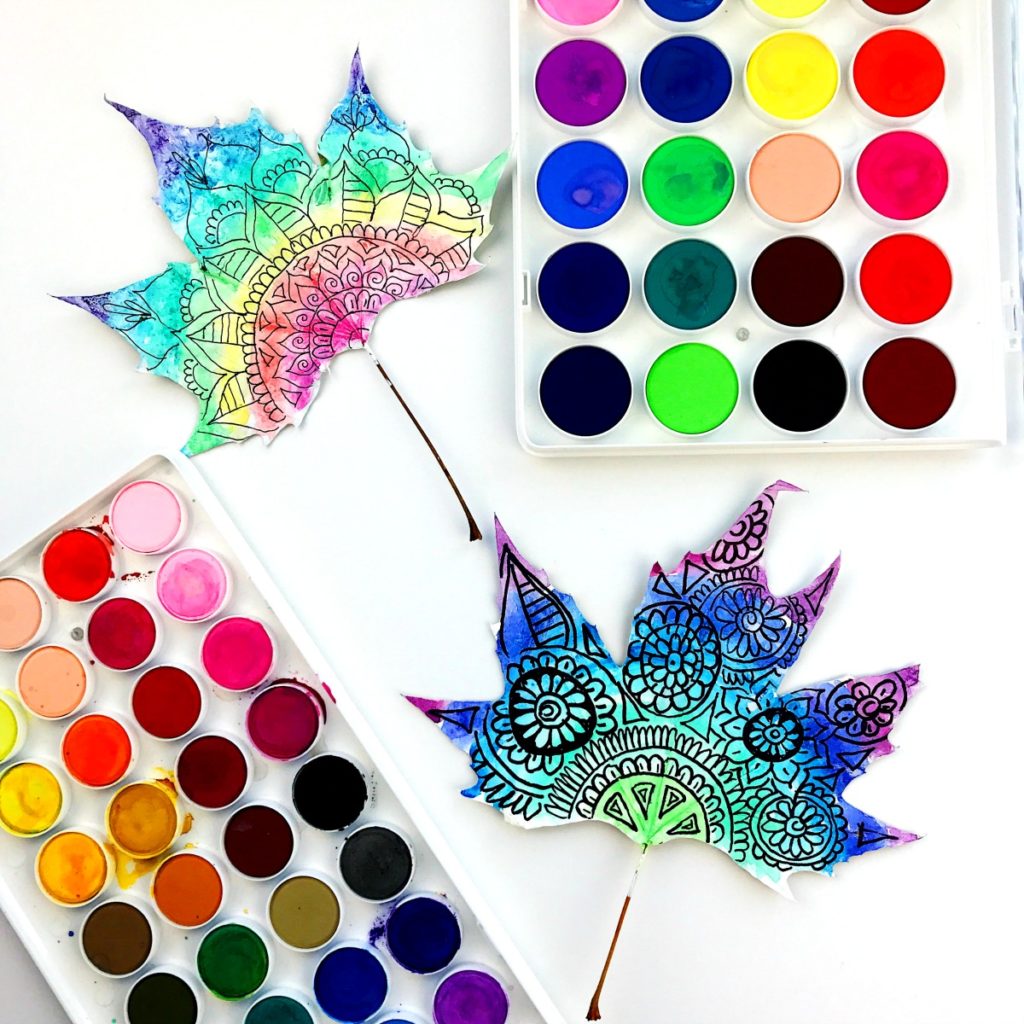
- Watercolors – I used both the Sargent Art 24 Count Watercolor Cakes set as well as the OOLY Watercolor Lil’ Pods watercolor set.
- Black pen – I used both a fine point Sharpie pen as well as a black Pitt Pigmented Faber-Castell pen.
- Paint brushes
Directions Make Your Own Watercolor Leaf Art
These directions are broken up into two parts. The first is tips to prep your leaves for art projects like this one. The second is the full tutorial on how to paint your own watercolor leaf art.
How to Press, Paint and Prep Your Leaves for Leaf Art
- Once you’ve selected your leaves you’ll want to press them under something heavy. I used several large books. See above under supplies for how to select the best leaves.
- Keep your leaves under something heavy at least overnight.
- Once pressed, paint the front of your leaf white using acrylic paint. Let your leaf dry completely and then press it again overnight as you did when prepping. Now that your leaf is white and pressed, it’s time to add watercolor.

How to Watercolor and Doodle on Your Leaves
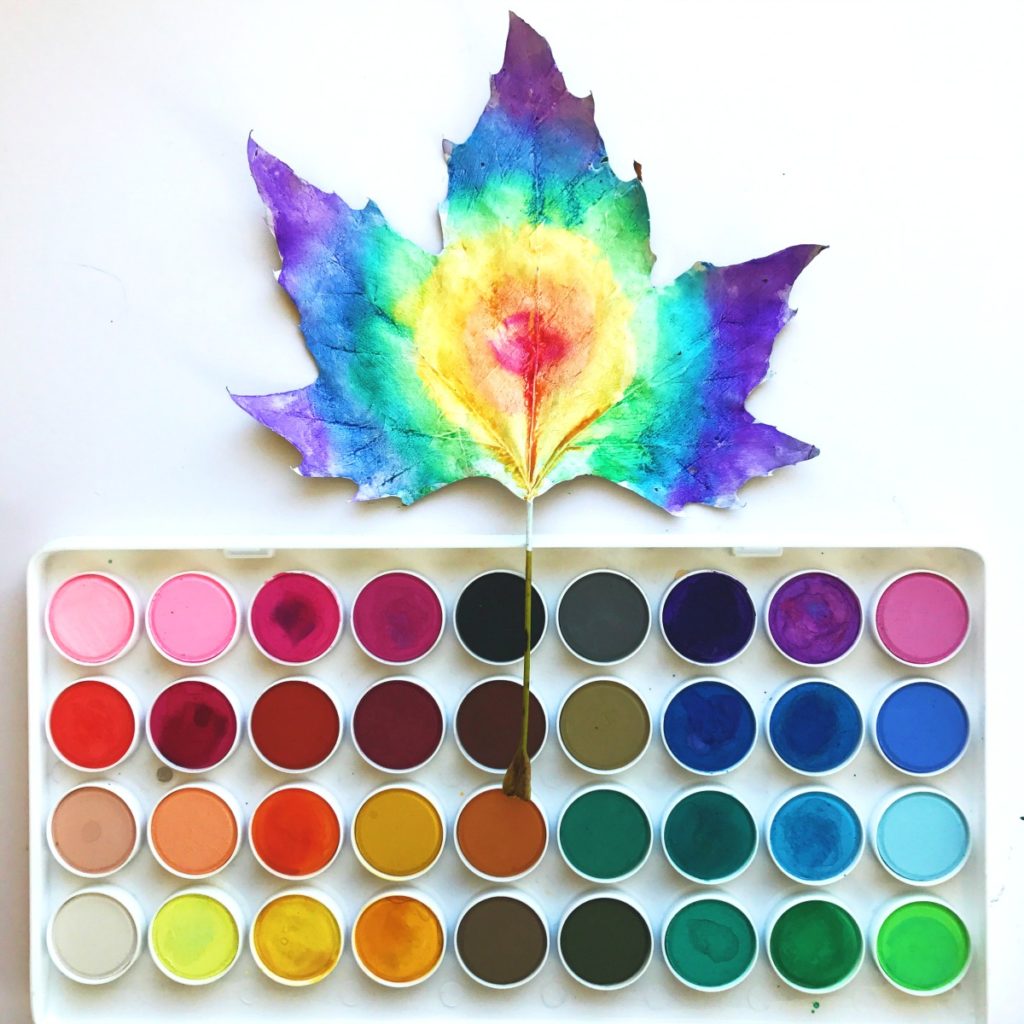
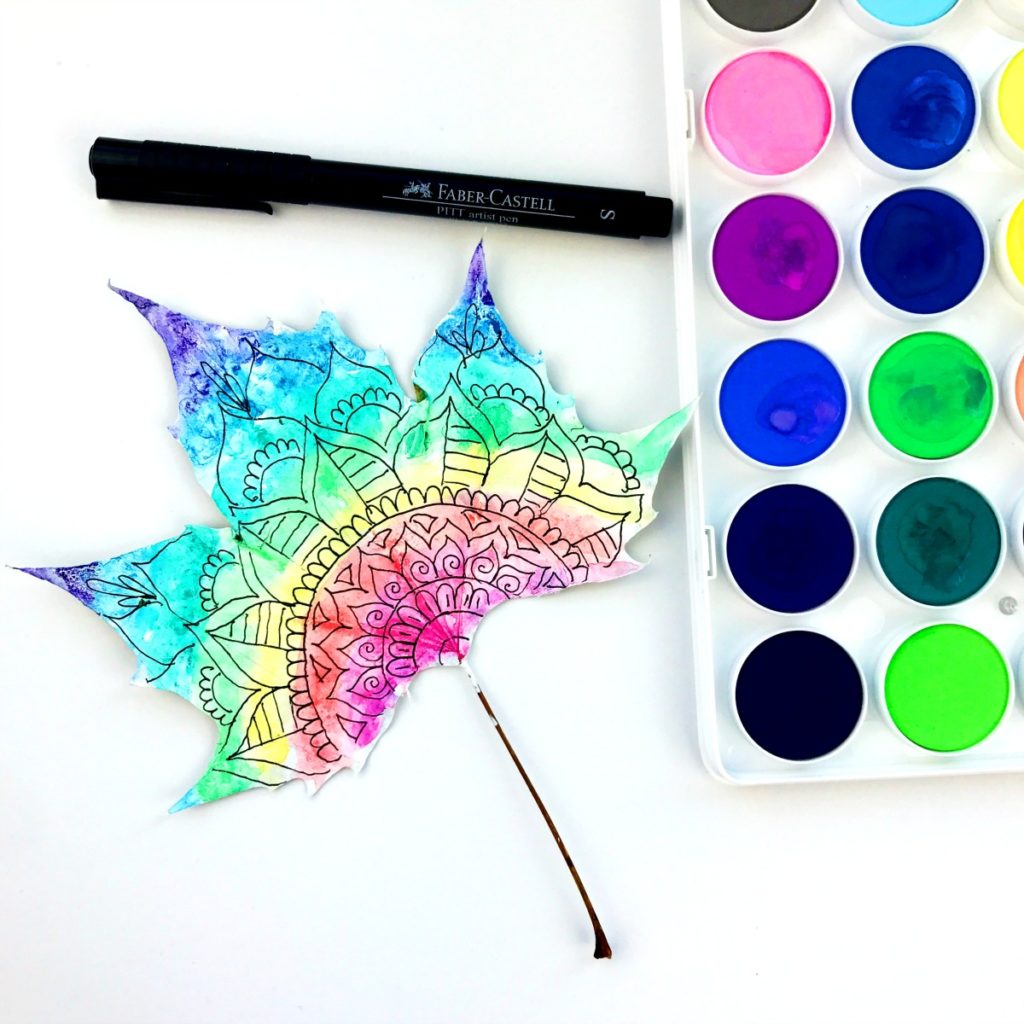
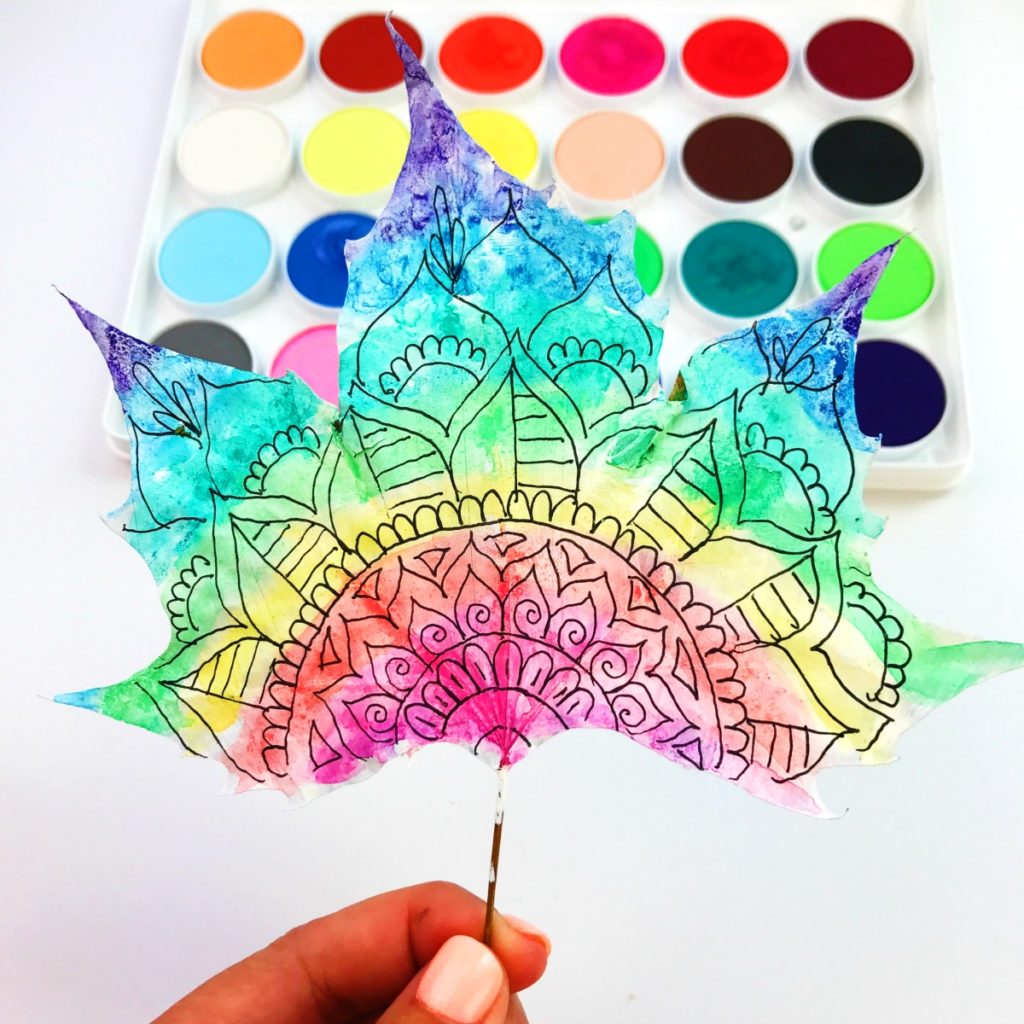
- Start by adding a single layer of watercolor to your leaves on top of the white acrylic paint. I love both of these watercolor palettes Sargent Art 24 Count Watercolor Cakes set and the OOLY Watercolor Lil’ Pods watercolor set.
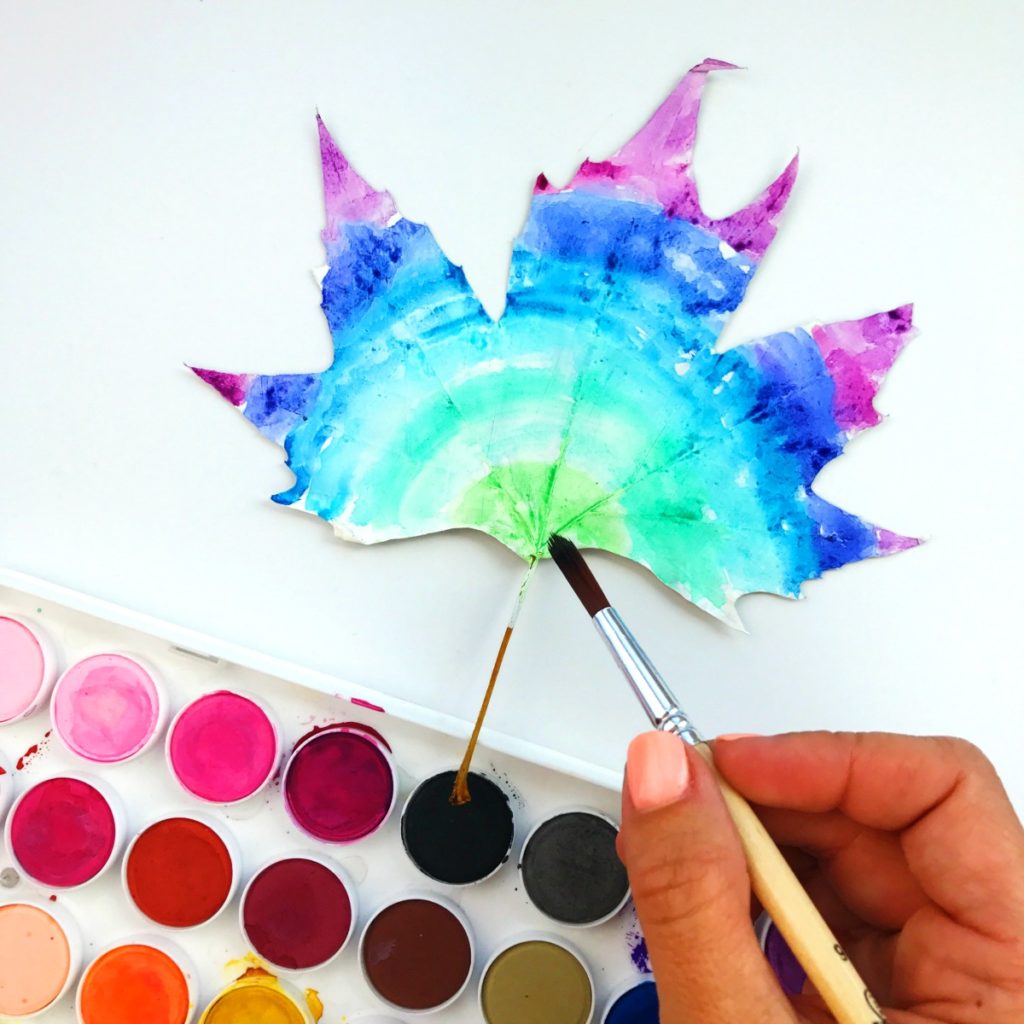
- Let the watercolor dry. Add another layer to increase the brightness.
- Press the leaf again overnight to keep it flat.
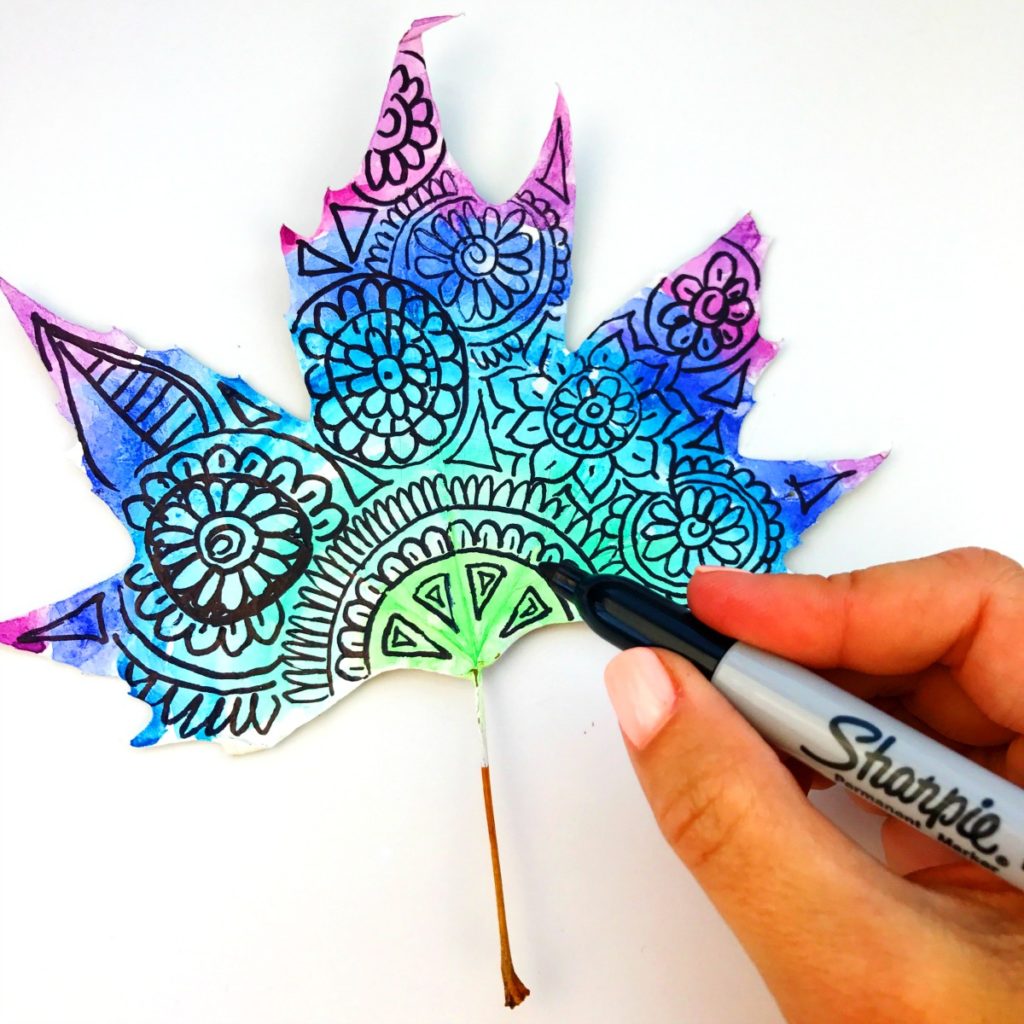
- Add doodles to your leaf using a black marker. I used both a fine point Sharpie pen for bolder lines and a black Pitt Pigmented Faber-Castell for thinner lines.
Watch my video to see to see the process!
How Long Do Watercolor Painted Leaves Last?
I didn’t seal my leaves with anything, but if you want you could use an acrylic sealant spray. The leaves that I painted last year are just as bright and beautiful a year later.
How to Decorate With Painted Leaves
Now that you have your leaves you can use them for different fall crafts. Add them to a table centerpiece. Hang them down from a single branch to create beautiful wall art or a mobile. Use them as decor for gift wrapping. Spread them over a table runner for beautiful table decoration. You get the idea.
For more fun fall crafts, make sure you’re following me on me on Instagram @Colormadehappy and Facebook. And be sure to come share what if you’ve created if you’ve been inspired by one of my posts. I’d love to see it.