The Best Way to Decoupage Napkins
As an Amazon Associate, I earn from qualifying purchases. This post may contain affiliate links. See our full disclosure here.
Learning how to decoupage napkins opens up so many different crafting opportunities. The best part of using paper napkins for decoupage is that there are so many beautiful decoupage napkins to choose from. This decoupage technique is great for all ages from kids to adults and with just a little practice you’ll have no trouble decoupaging a variety of surfaces with napkins.
What kind of napkins do you use for decoupage?
Paper napkins are what you’ll want to use for decoupage. They are typically 3 ply or 2 ply which means they are made up of 2 or 3 layers. The top layer of the napkin is the only one that is printed and will be the layer that you use for decoupage. You can find a variety of beautiful decoupage napkins at the dollar store, dollar tree, on Amazon and on Etsy.
Can you Mod Podge Napkins?
Mod Podge is a great decoupage glue to use when it comes to decoupaging. It comes in both a matte and glossy finish depending on the final look you want to create.
How to Decoupage Paper Napkins
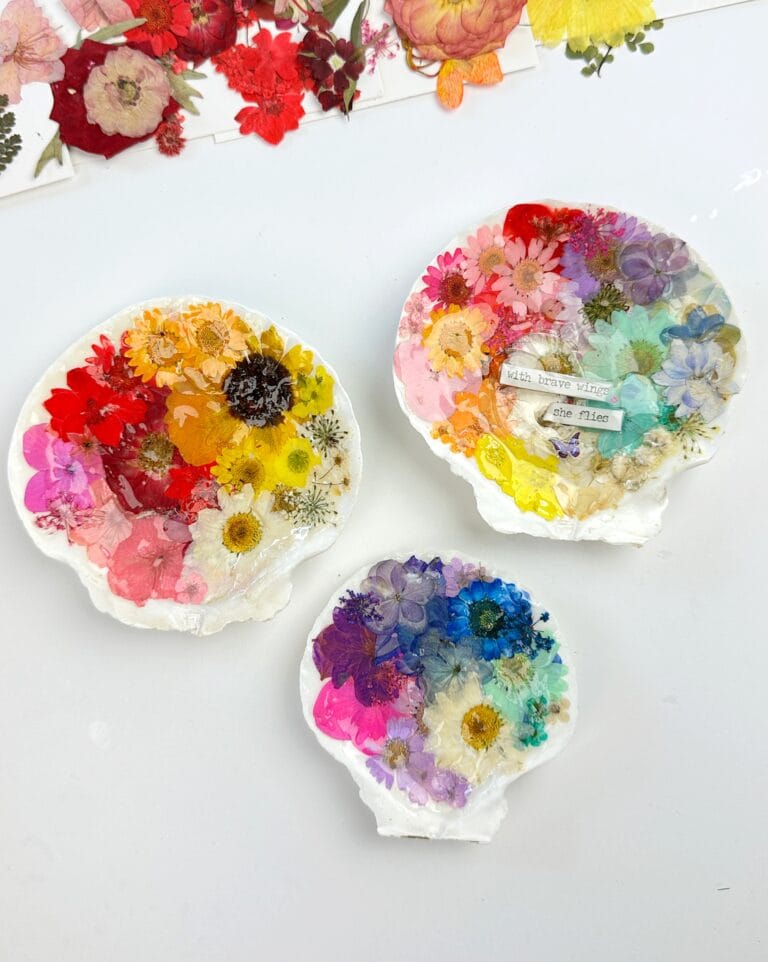
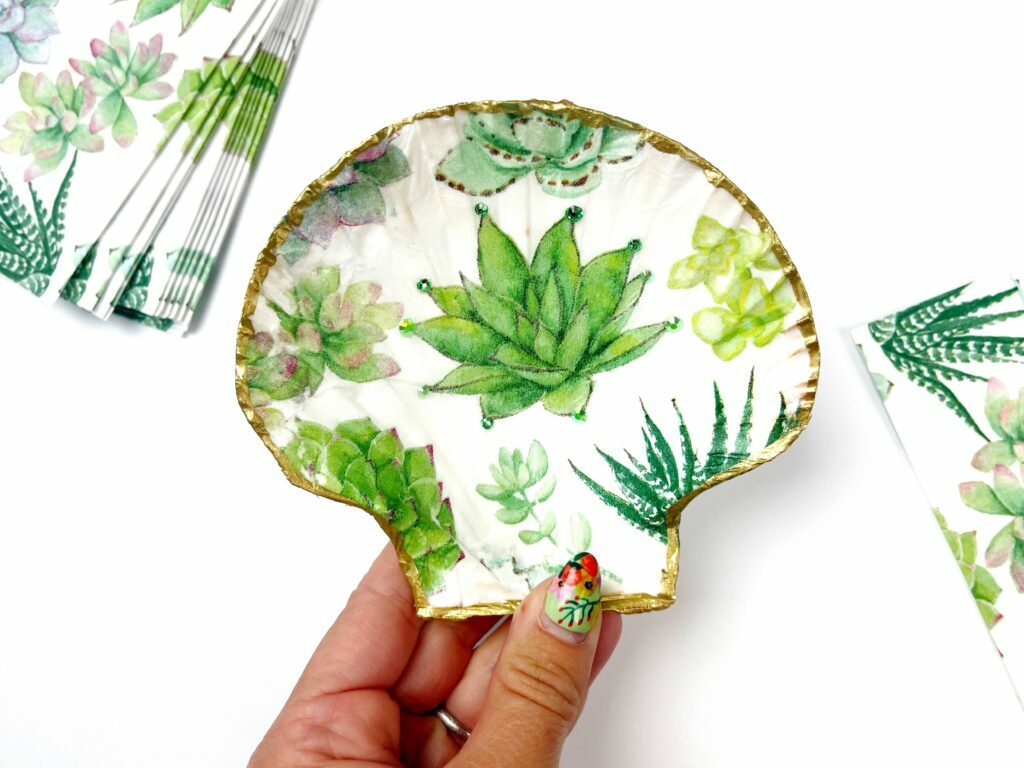
For this example I’m going to show you how to decoupage napkins onto a shell, but these same directions and techniques will work for any surface.
Step 1. Start by making sure the surface you will be decoupaging onto is white or light colored. Because the napkin is thin, the background will show through. If it’s not already white, you can paint white with acrylic paint. 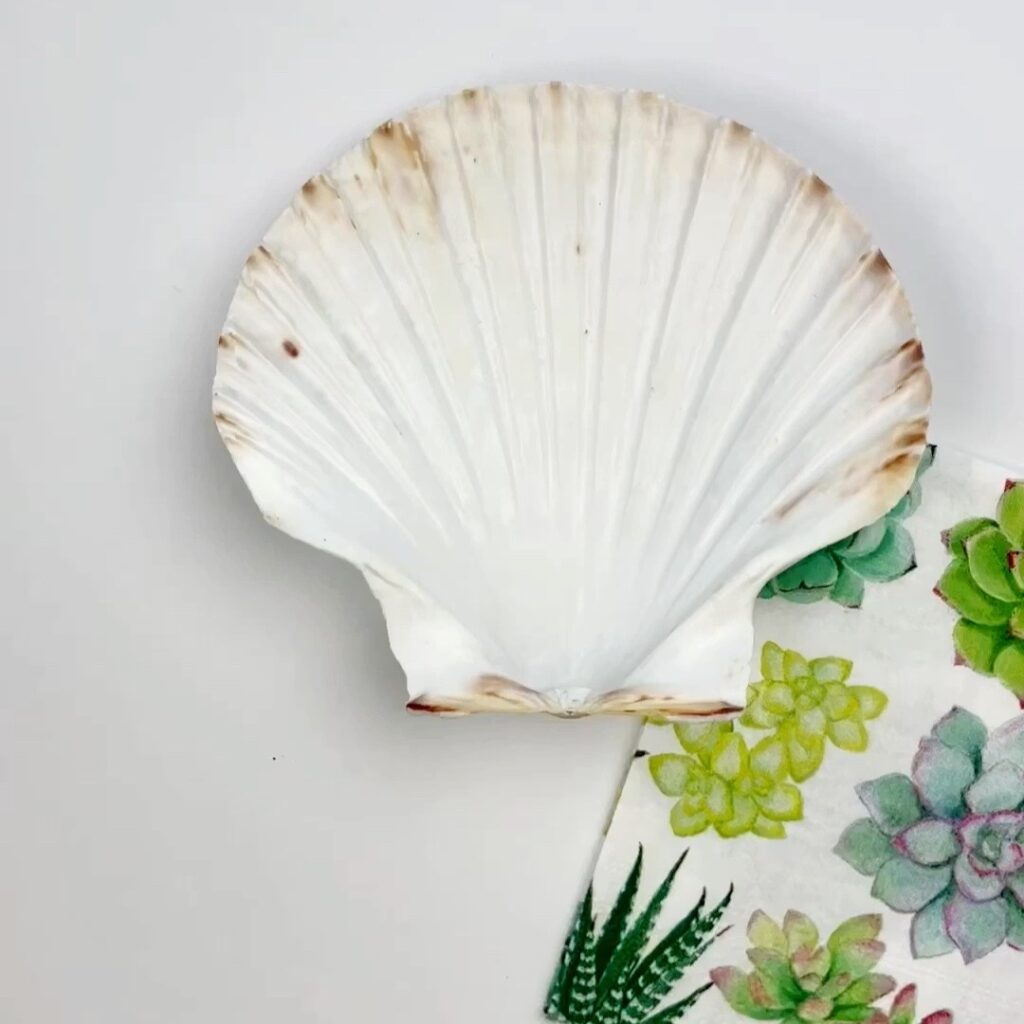
Step 2. Next you’ll want to separate your napkin to 1 ply. You’ll only be using the top ply which is the printed part of the top of the napkin. 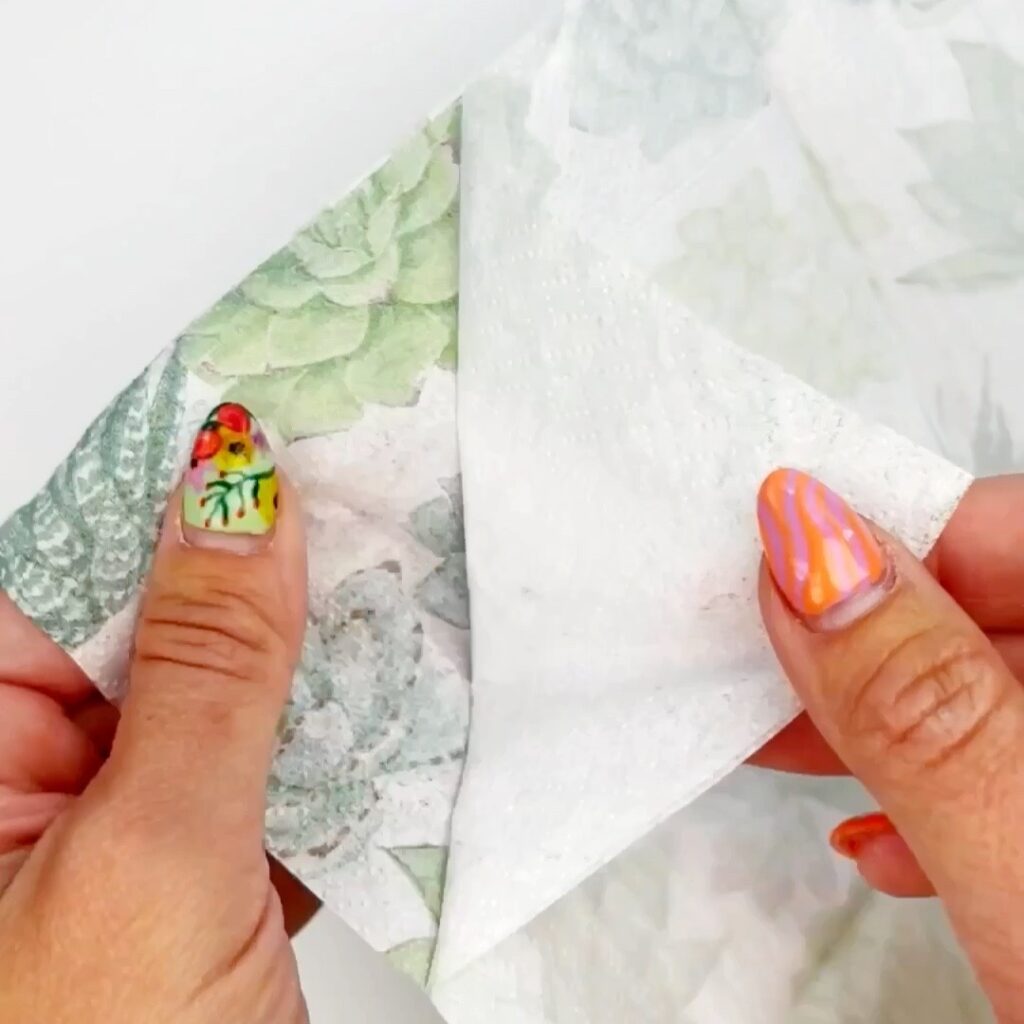
Step 3. Using a wet paintbrush that has been dipped in water, draw an outline around the image you want to use. This step makes it easier to tear the napkin without ruining the image. You can use one large image like I did in this example or use smaller napkin pieces to create your design.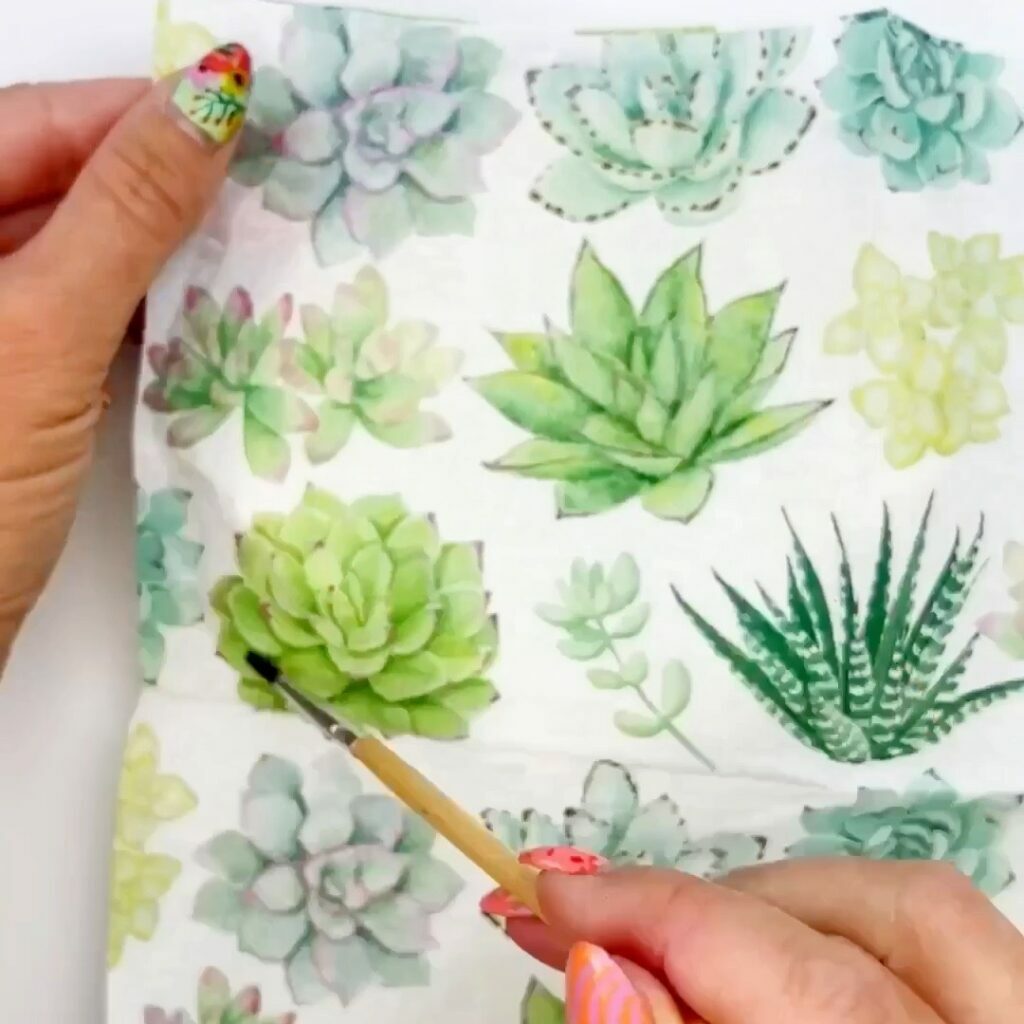
Step 4. Slowly tear the napkin along the outline you just made. Let the napkin dry completely. 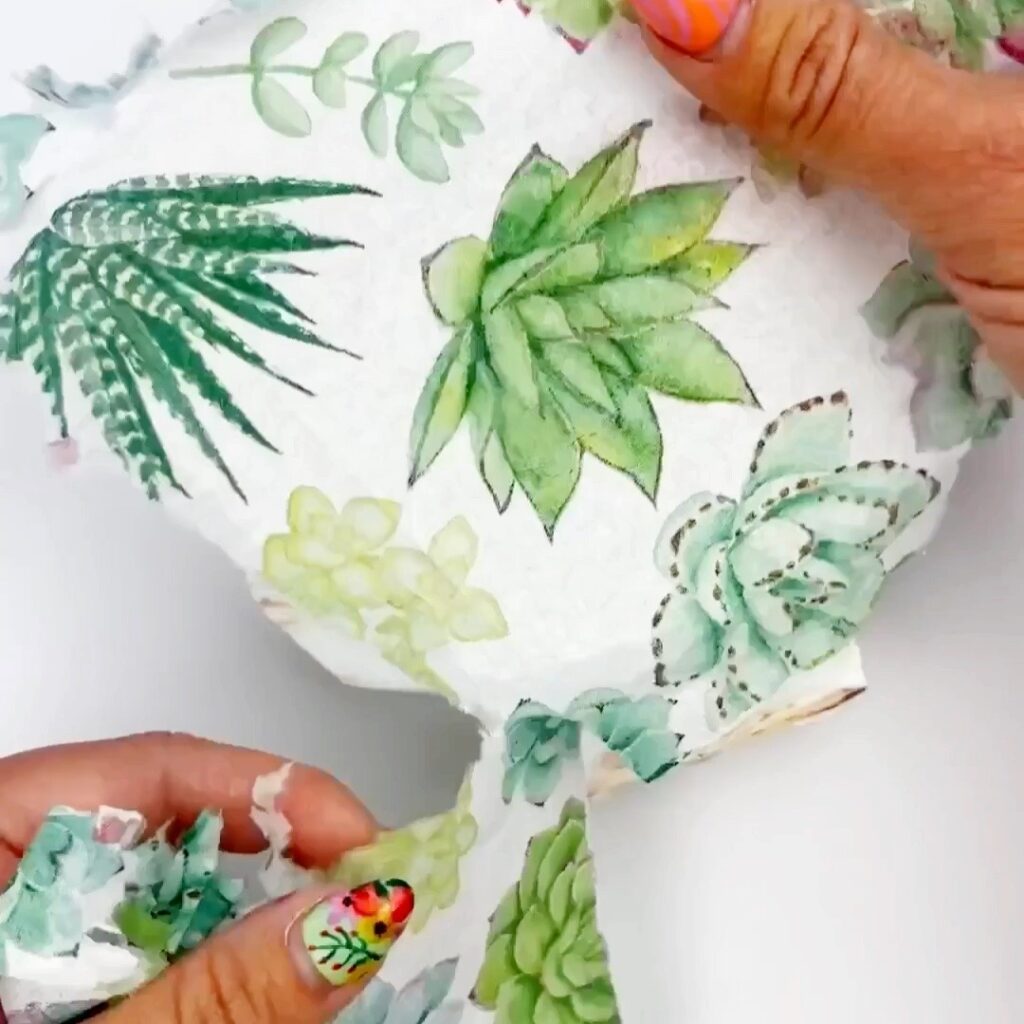
Step 5. Place the napkin printed side down on top of a piece of Saran wrap.
Step 6. Use a brush to apply a thin layer of decoupage glue, I used gloss Mod Podge, over the napkin. 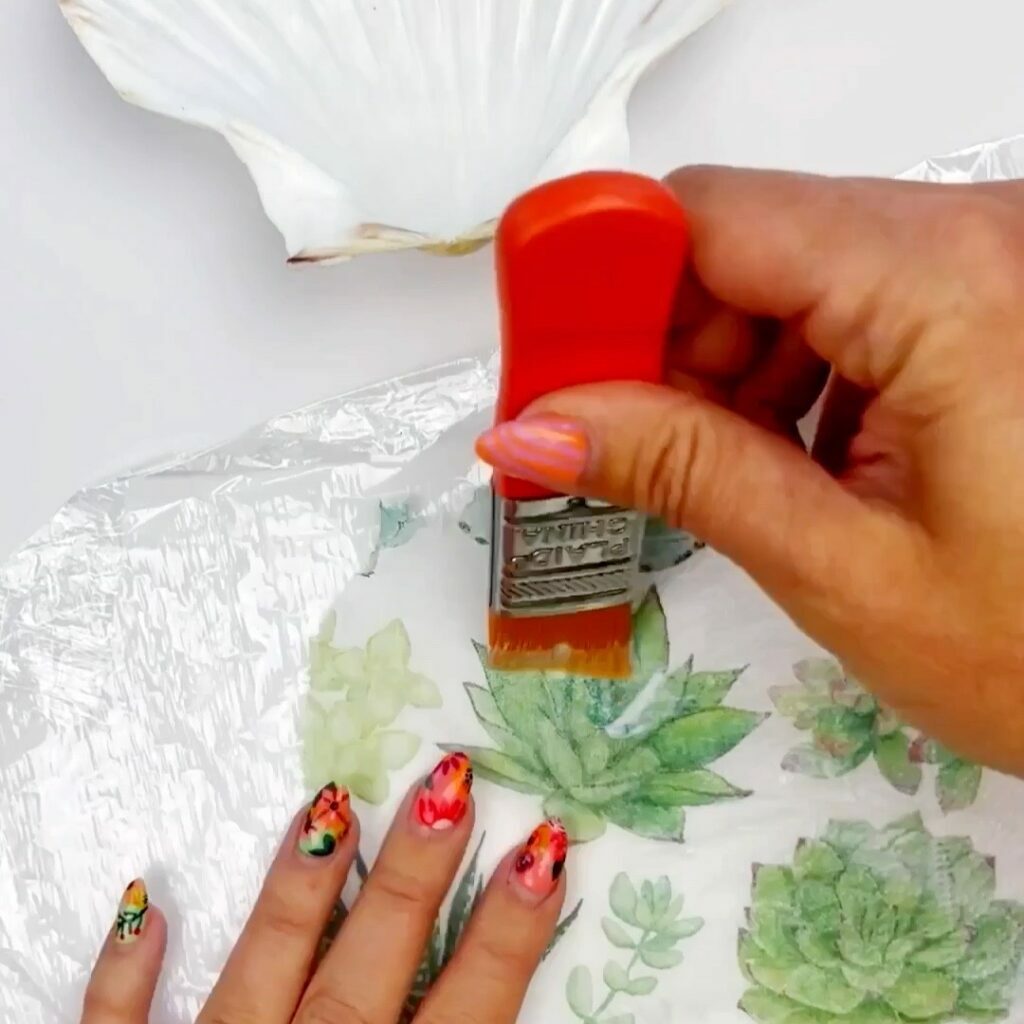
Step 7. Pick up the saran wrap and turn it over and place it directly onto the item you are decoupaging onto. 
Step 8. Once you are satisfied with the placement, gently pull on the sides of the saran wrap and smooth out the wrinkles and air bubbles, pressing down on the saran wrap and napkin with your fingers.
Step 9. Remove the saran wrap and you’ll find the napkin stays perfectly in place. 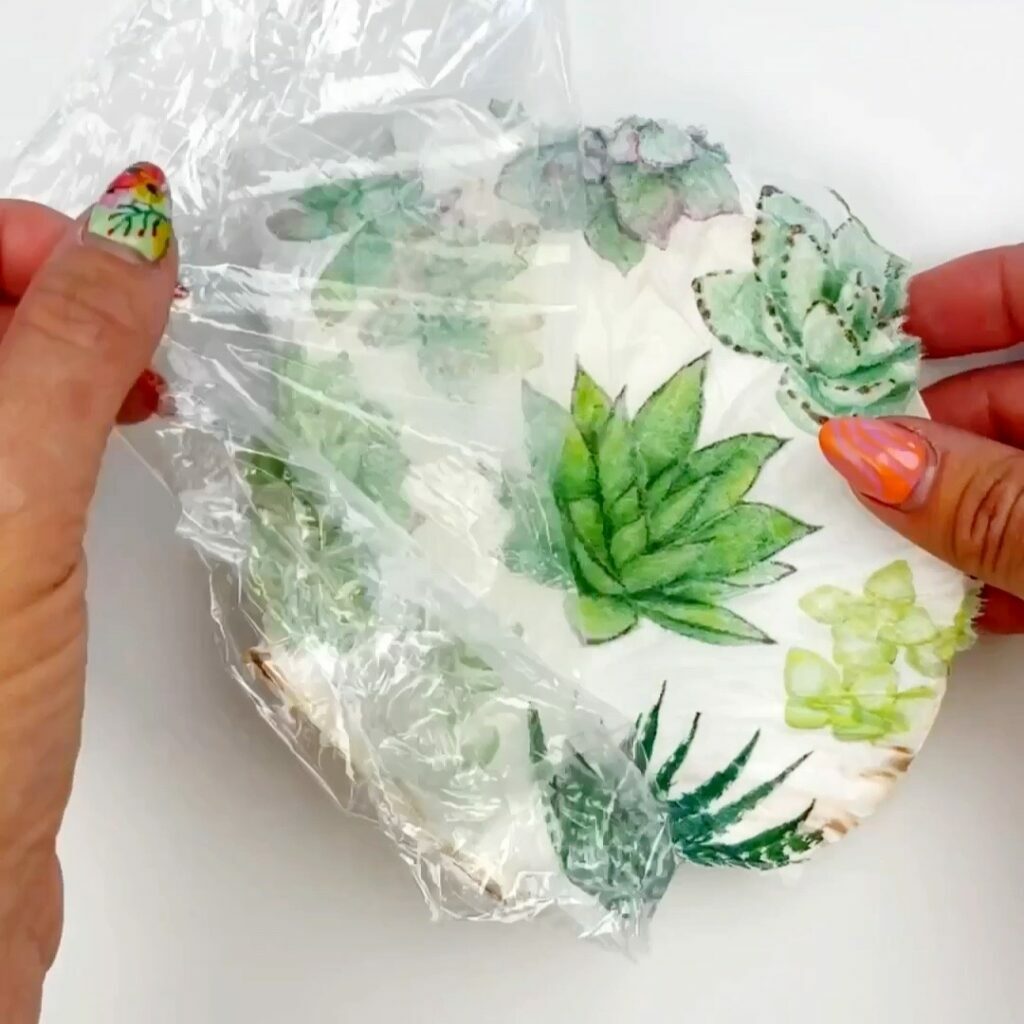
Step 10. For any leftover edges you can either wait for them to dry completely and use a nail file to file them off, or you can tuck them under any edges of the item you are working with while they are still wet with the glue.
Step. 11. Once the decoupage is dry, you can add details. I painted the outside of the shell with gold acrylic paint and added small mini rhinestones. 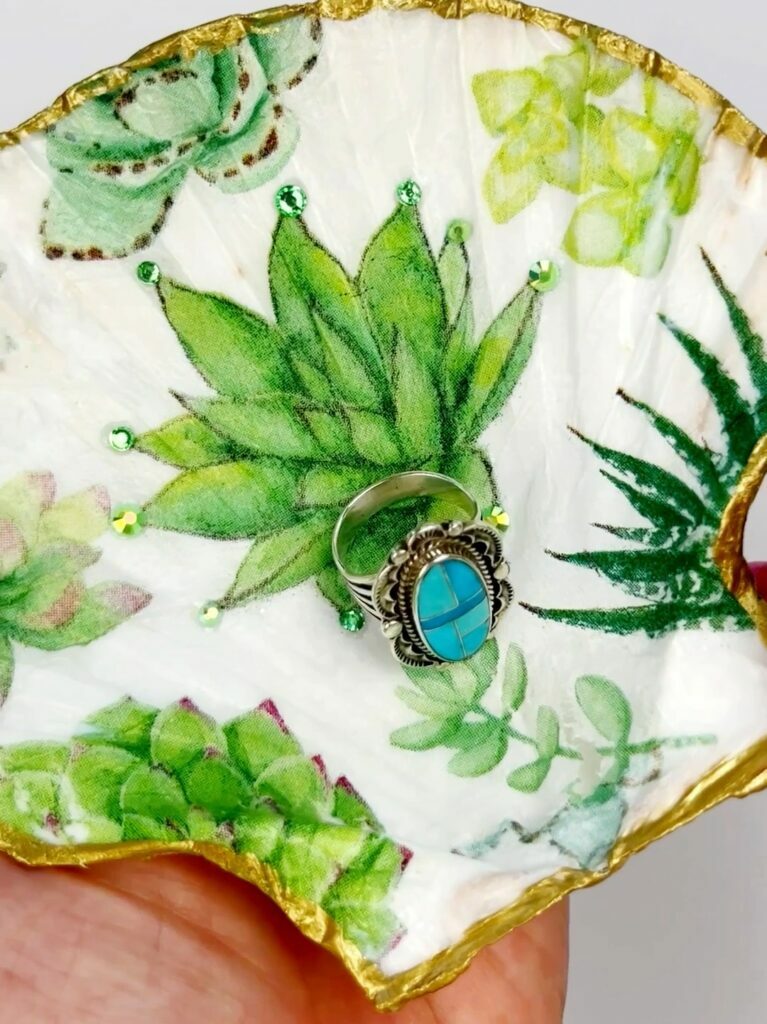
Supplies for Decoupaging Napkins onto Shells
Find the full list of supplies on my Like to Know It page here or see below.
- Succulent Paper Napkins
- Iris Deep Shell
- Mod Podge Gloss
- Foam Brush
- Gold Acrylic Paint
- Rhinestones
- Rhinestone Picker Tool (optional)
How do you seal napkin decoupage?
I don’t always seal my napkin decoupage, but if you want to seal your finished design you can add another layer of Mod Podge or decoupage glue on top once it’s dry. You could also use an acrylic spray sealant.
What can I decoupage napkins onto?
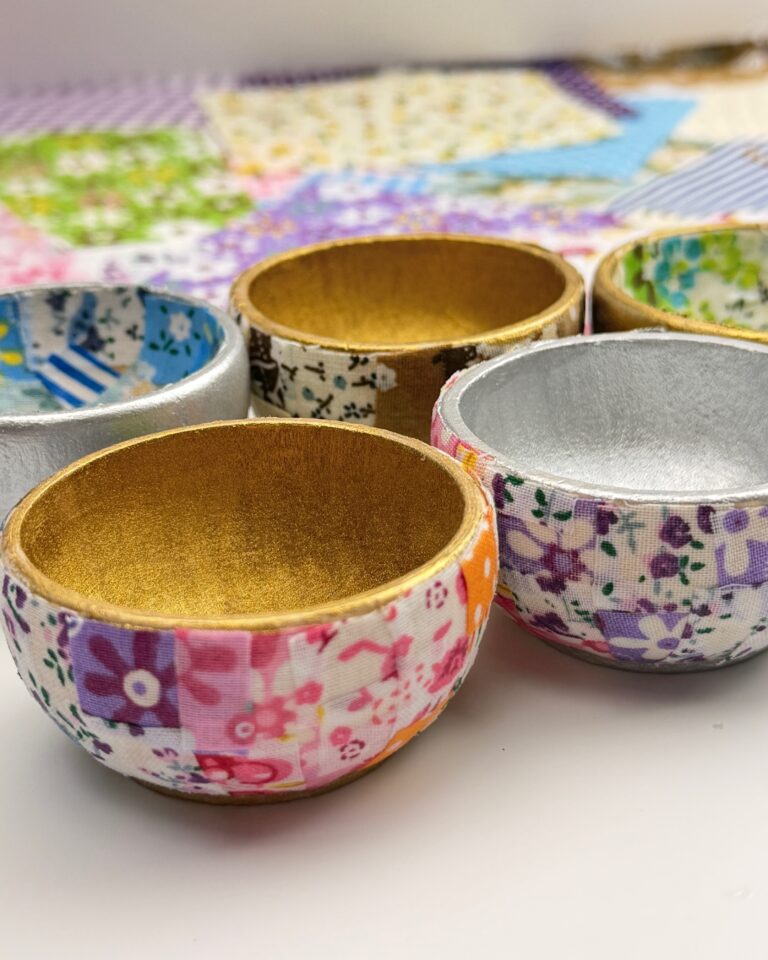
You could decoupage almost any surface with napkins. Wood is a great surface for decoupaging with napkins. You could also decoupage vases, mason jars, tile coasters, and more. Check out my tutorial on how to decoupage rocks with napkins. 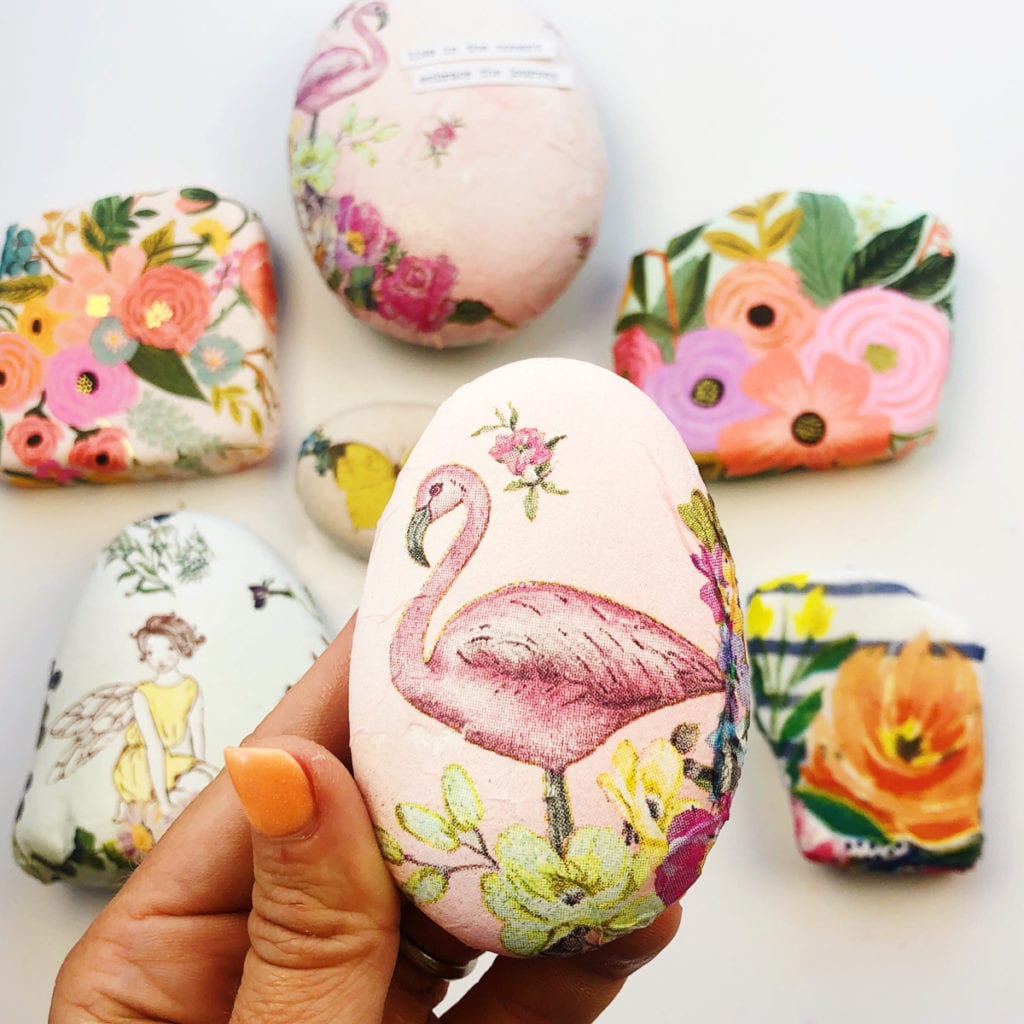
Decoupaging napkins is a great DIY craft that’s fun and easy to do. There are so many fun possibilities and this technique is really easy to master. I’d love to see what you come up with. Come share your finished decoupage project with me on social media at @colormadehappy.