How to Decoupage Pumpkins with Napkins
As an Amazon Associate, I earn from qualifying purchases. This post may contain affiliate links. See our full disclosure here.
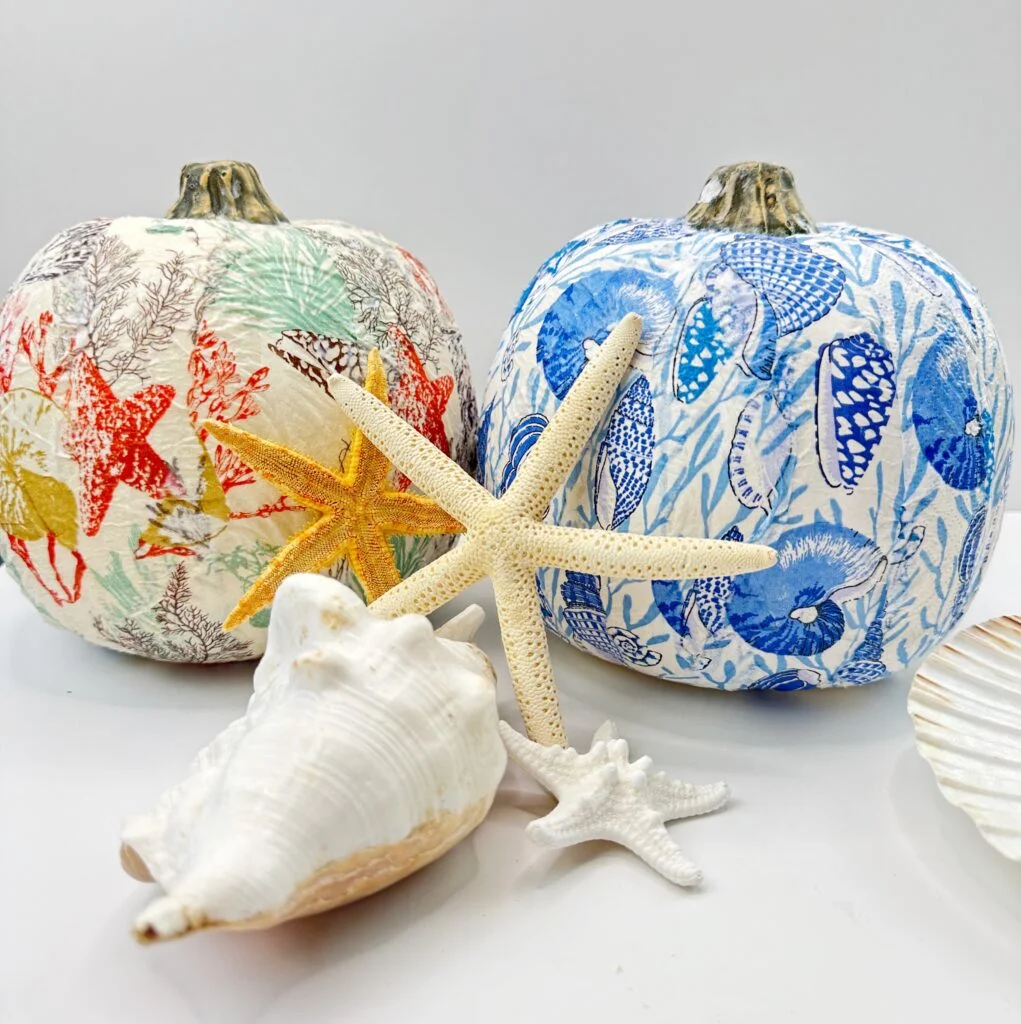
Using napkins for crafts might be one of my favorite crafting techniques because it’s quick, fun and has a beautiful outcome. Making decoupage pumpkins with napkins is a great fall craft that can be customized with different napkin themes and designs.
See below for the list of supplies to make napkin pumpkins and the easy step-by-step tutorial. The best part is that there are so many different napkins to choose from so you can make pumpkins to fit any style and color palette.
Related: Check out by other napkin decoupage crafts; decoupage shells, napkin ring dishes, decoupage eggs, and napkin ornaments.
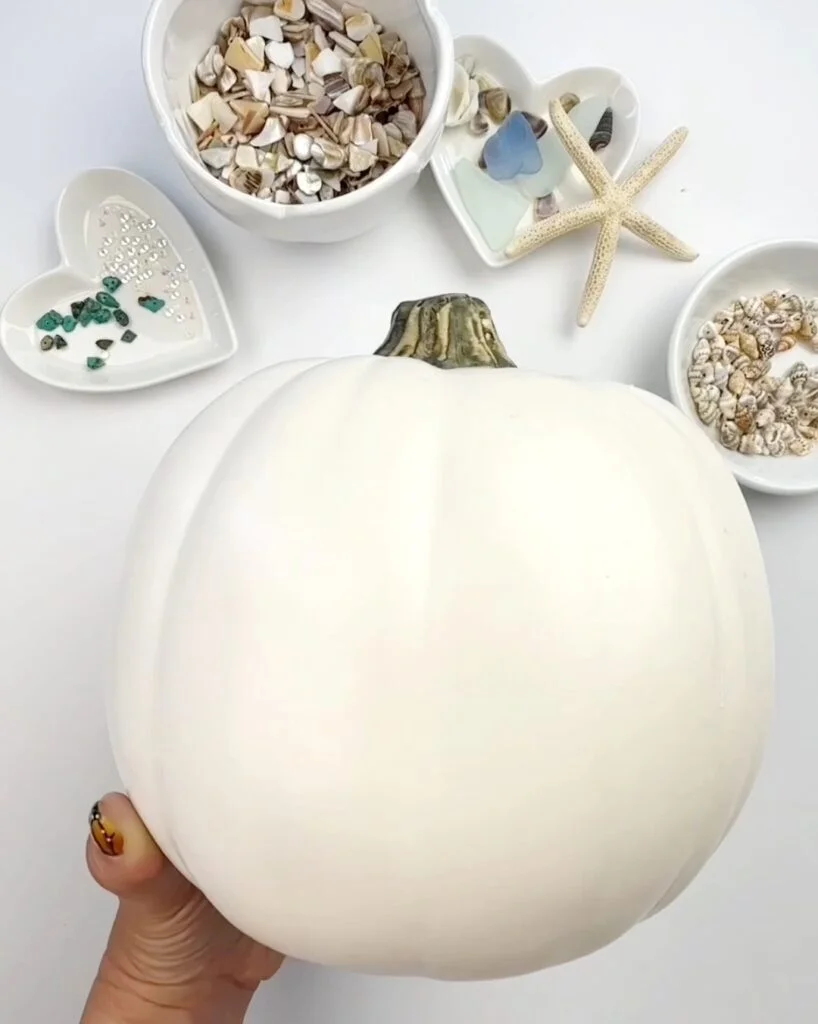
Supplies for Decoupage Pumpkins
- Fake white pumpkins – You want to make sure the pumpkins are white so the color doesn’t show through.
- Napkins – I used blue shell napkins and these ocean napkins
- Here are some other napkins that would work great for this project: autumn leaves napkins, butterfly napkins, succulent napkins
- Mod Podge – I always use matte
- Foam brushes
Directions for Napkin Pumpkins
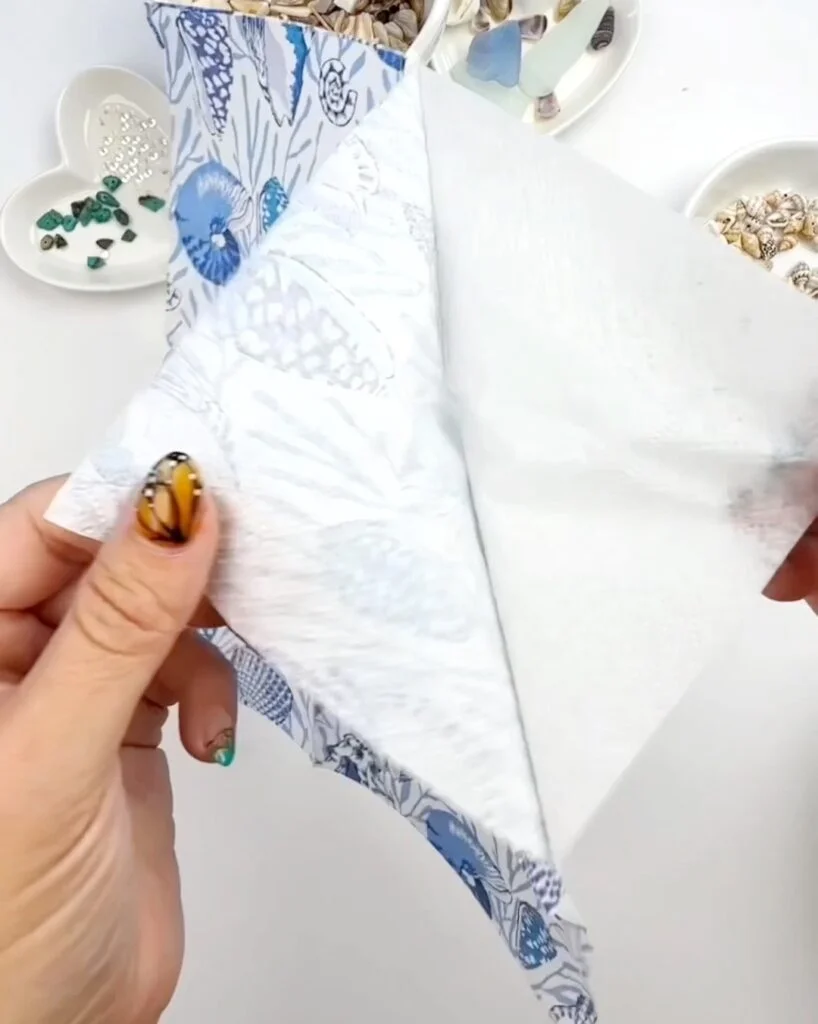
Step 1. Start by separating your napkin to 1 ply. You’ll only be using the top ply which is the printed part of the top of the napkin. Most cocktail napkins are 2 ply but some may be 3 ply so you will need to remove another layer.
Step 2. Next tear your napkin in to long pieces that aren’t too thick. When working with patterns I prefer to keep my piece long instead of tearing a lot of small pieces that make it difficult to see the pattern. If you have a napkin that has large images instead of a pattern you can individually cut out the images.

Step 3. Next add a thin layer of mod podge on top of the pumpkin in a small area.
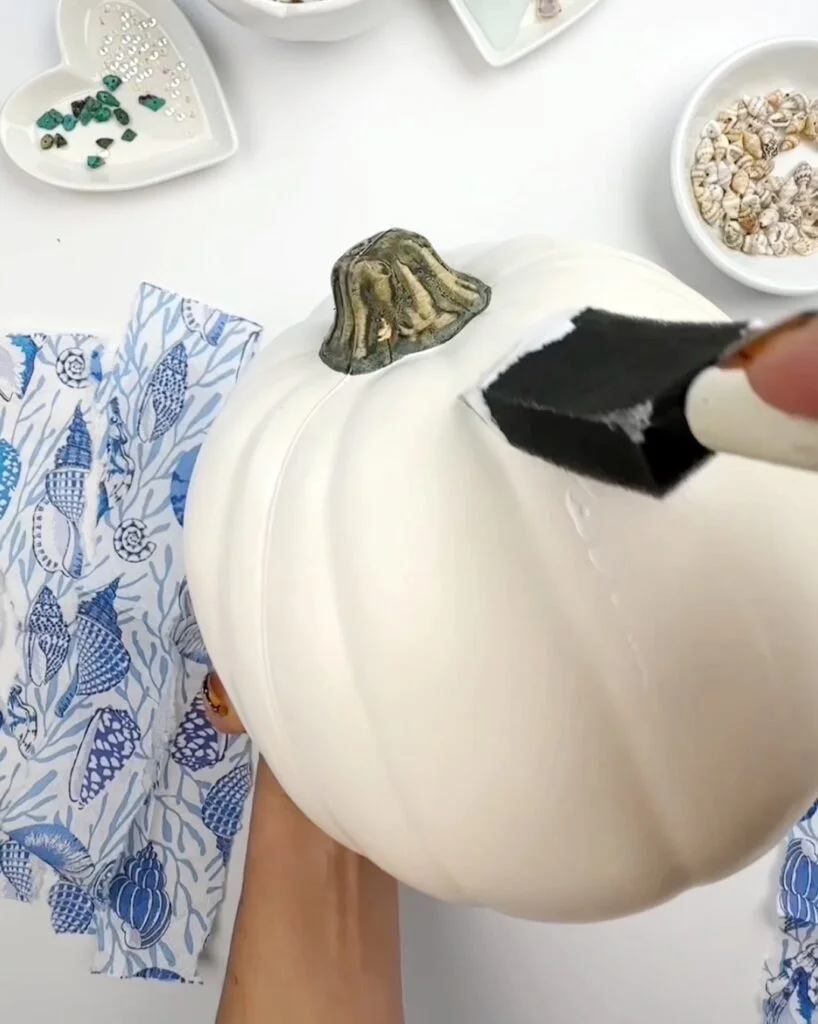
Step 4. Add a piece of the torn napkin on top of the glue you just added and then add a think layer of Mod Podge over the top of the napkin.
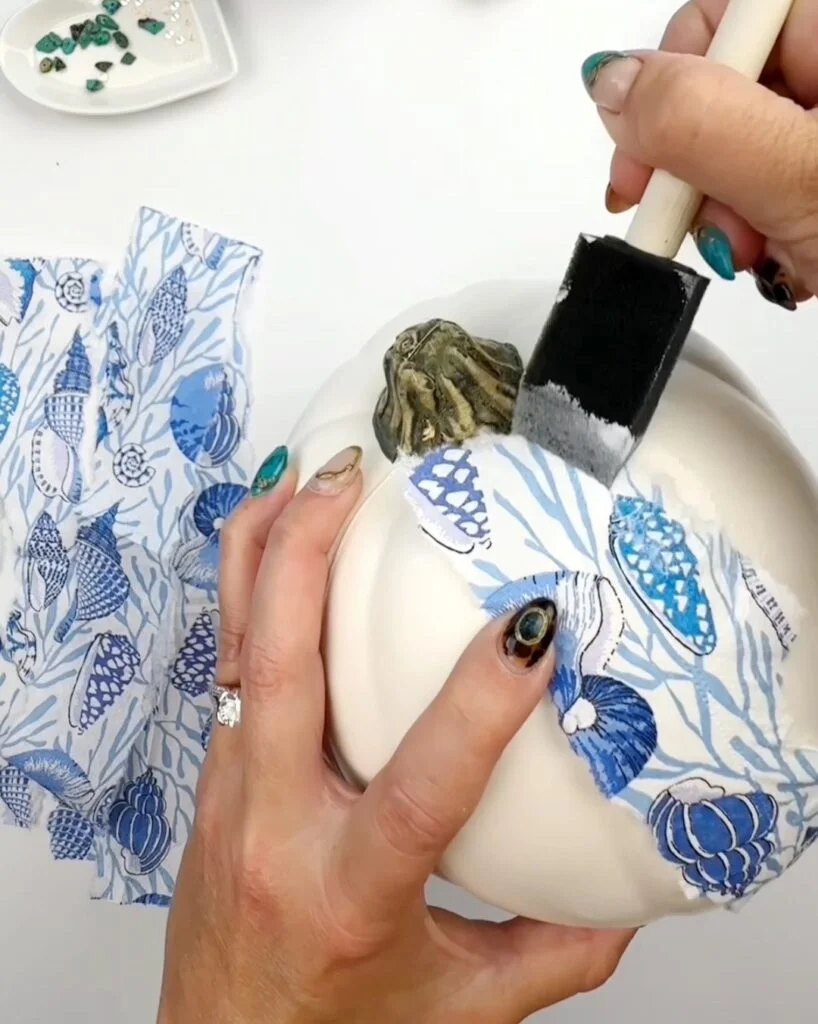
Step 5. Continue to add Mod Podge and napkin pieces as you work your way around the pumpkin. I didn’t line up all of the pattern images but I did line up a few to make it look like a seamless pattern. If you are working with just large images that you cut from the napkin you can just add them all individually around the pumpkin.
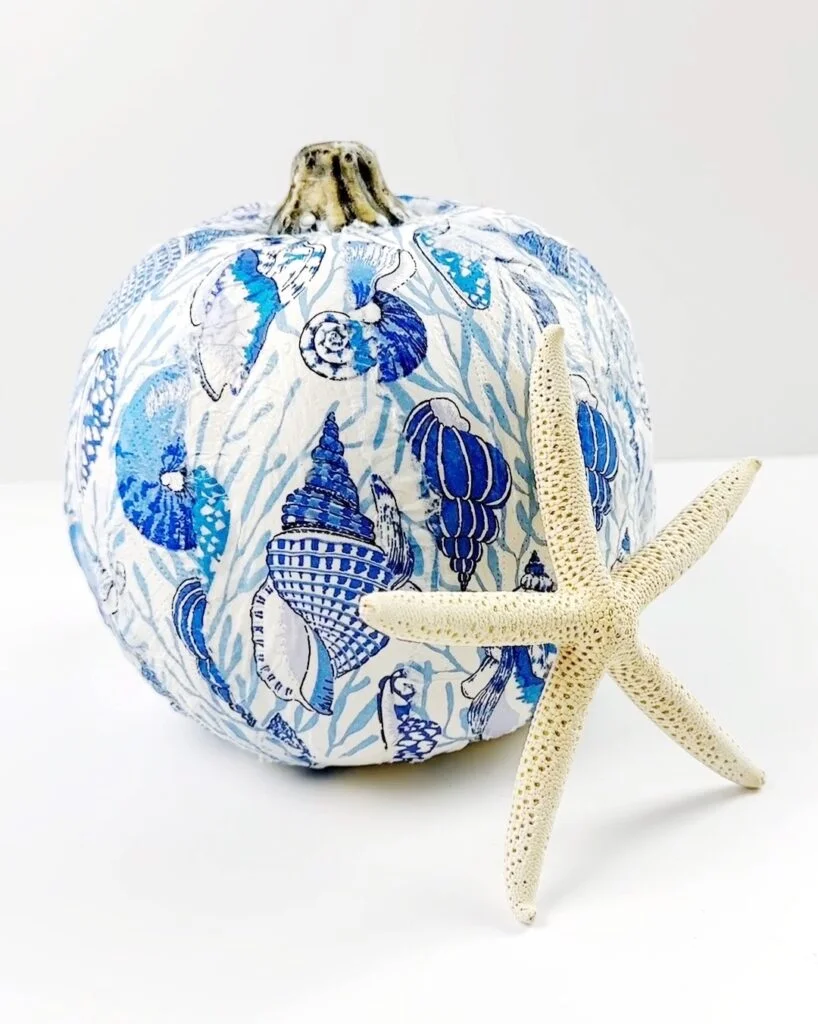
Step 6. Once you’ve covered the entire pumpkin let it dry completely. You can add embellishments to the top stem like ribbon, rhinestones, shells, and more.
How to Customize Decoupage Pumpkins With Napkins
There are many different ways to customize your decoupage pumpkins using different materials and styles.
- Try using your napkin to create a shape on the pumpkin like a heart, butterfly, mountains or a letter.
- Decoupage with sheet music, old book pages or scrapbook paper.
- Add additional embellishments like stickers, ribbon and trinkets.
- Create a collage with different napkin designs.
- Paint a design on top of the decoupaged napkins once they are dry on the pumpkins.