Nail Polish Marbling a Ring Dish
As an Amazon Associate, I earn from qualifying purchases. This post may contain affiliate links. See our full disclosure here.
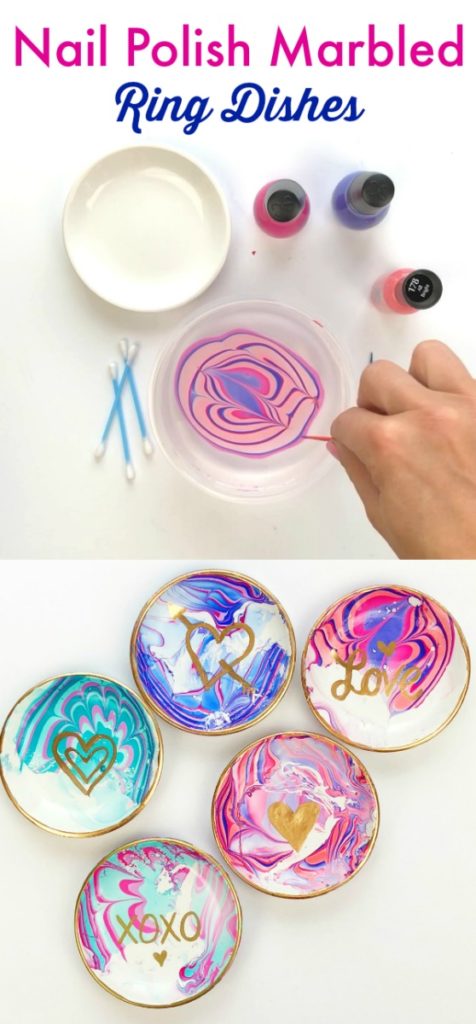
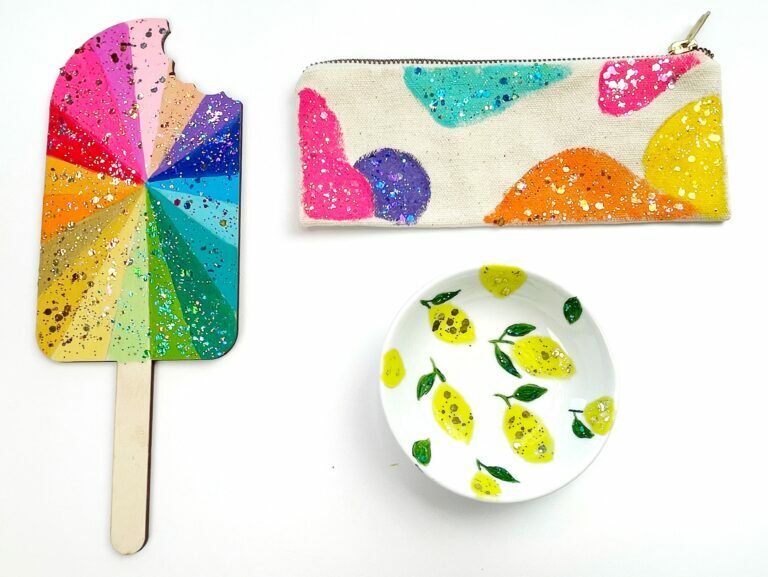
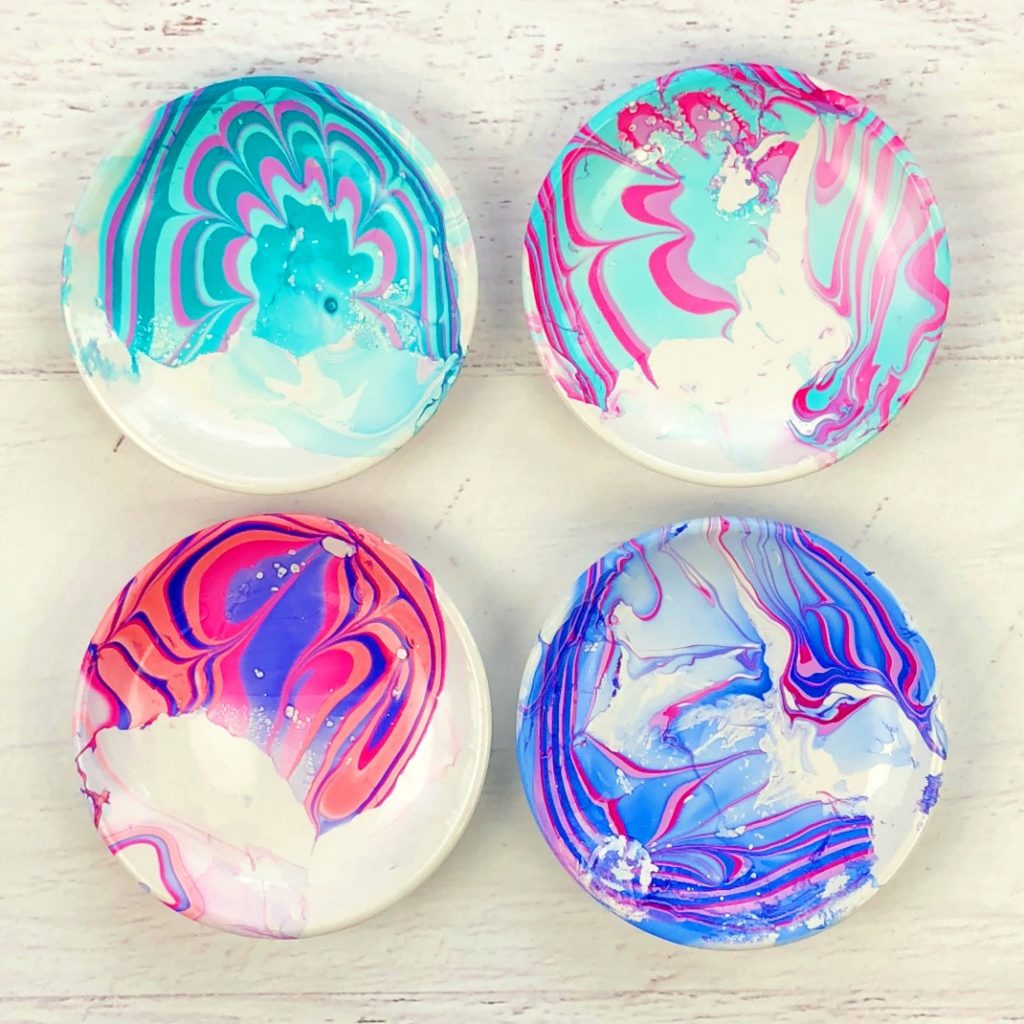
 It’s easy and lots of fun to marble with nail polish. My obsession with nail polish marbling came after I marbled mini pumpkins with nail polish for Halloween. I thought it would fun to try marbling little ring dishes next. The results were amazing! Wouldn’t these marbled ring dishes make wonderful Valentine’s gifts. I share all of my secrets below.
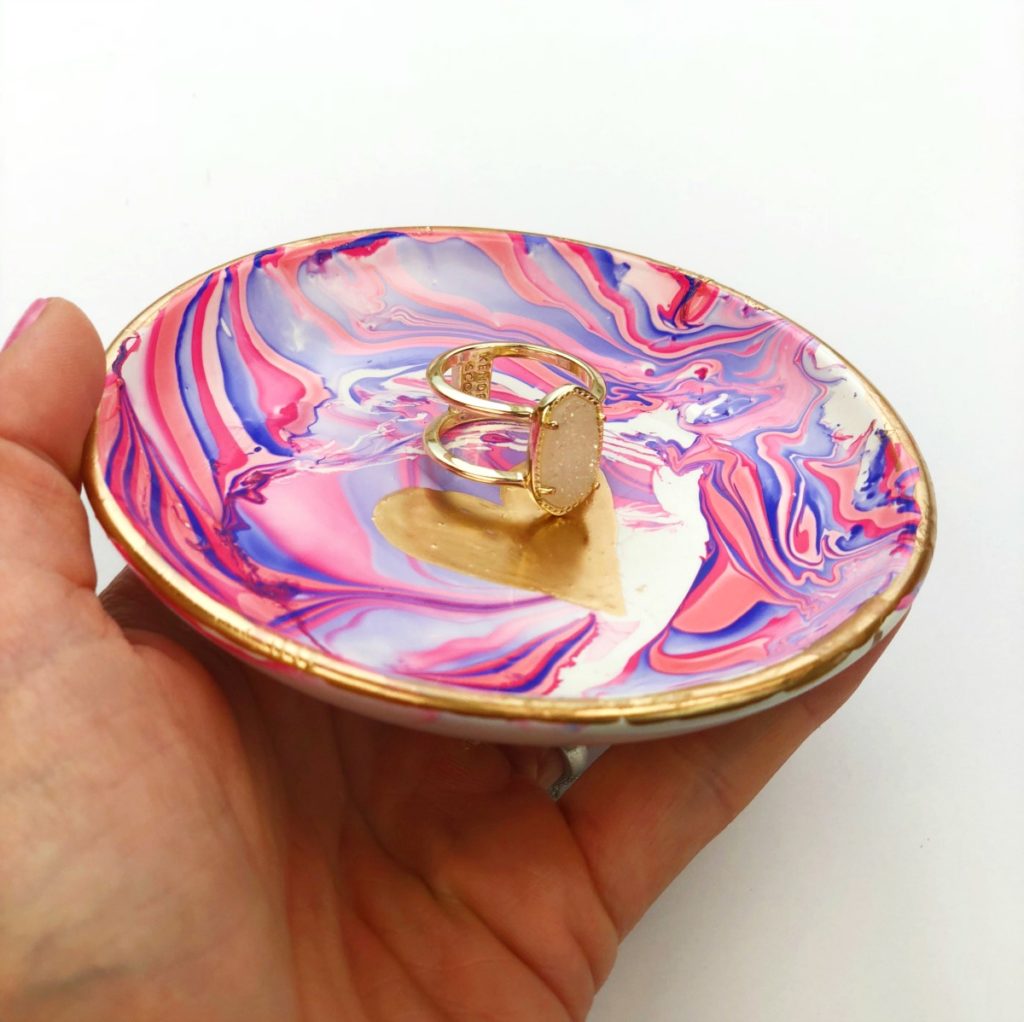
See the full video below:
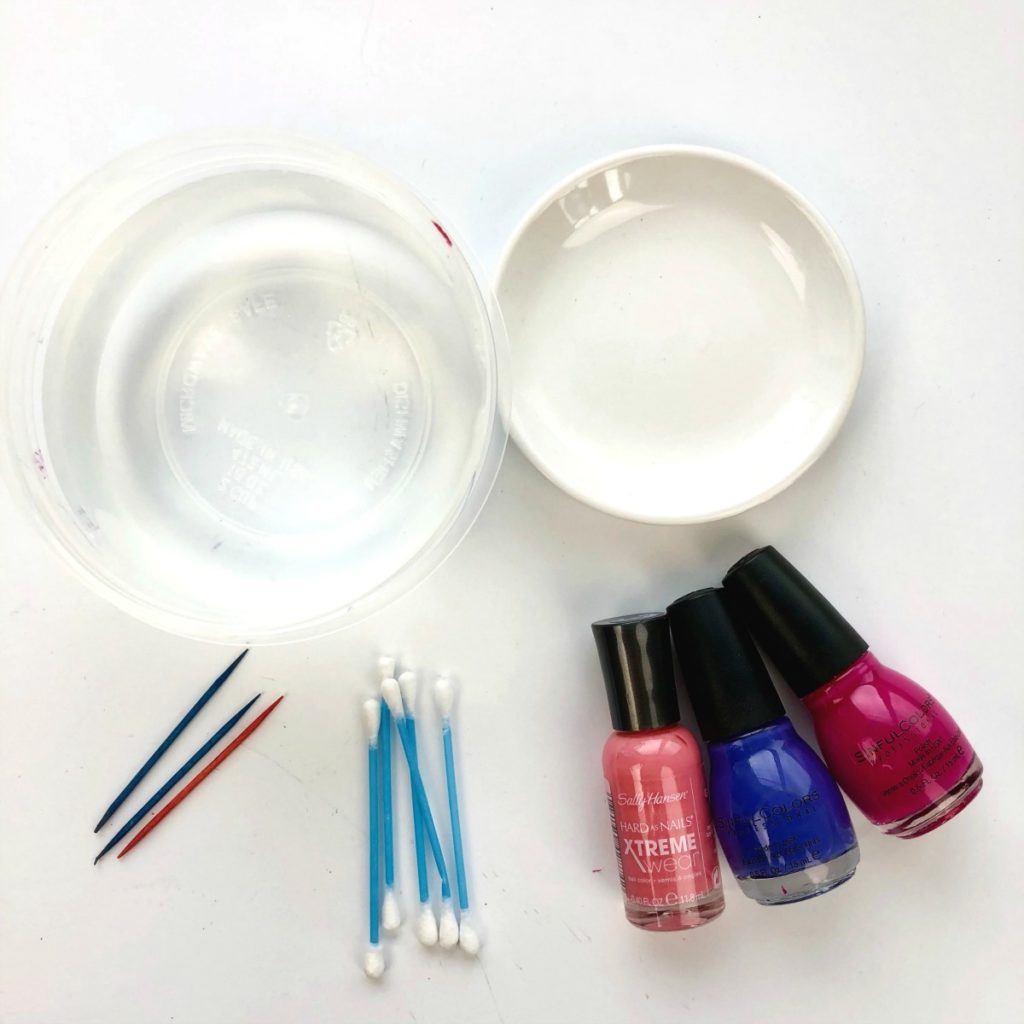
NAIL POLISH MARBLING SUPPLIES (affiliate links provided for your convenience):
- Nail Polish – I used both Sally Hansen Extreme Wear Nail Polish and Sinful Colors Professional Nail Polish. You can also find Sinful Colors Nail polish here.
- Ring Dish – I bought mine at Michael’s but these are similar or these heart dishes would be awesome too!
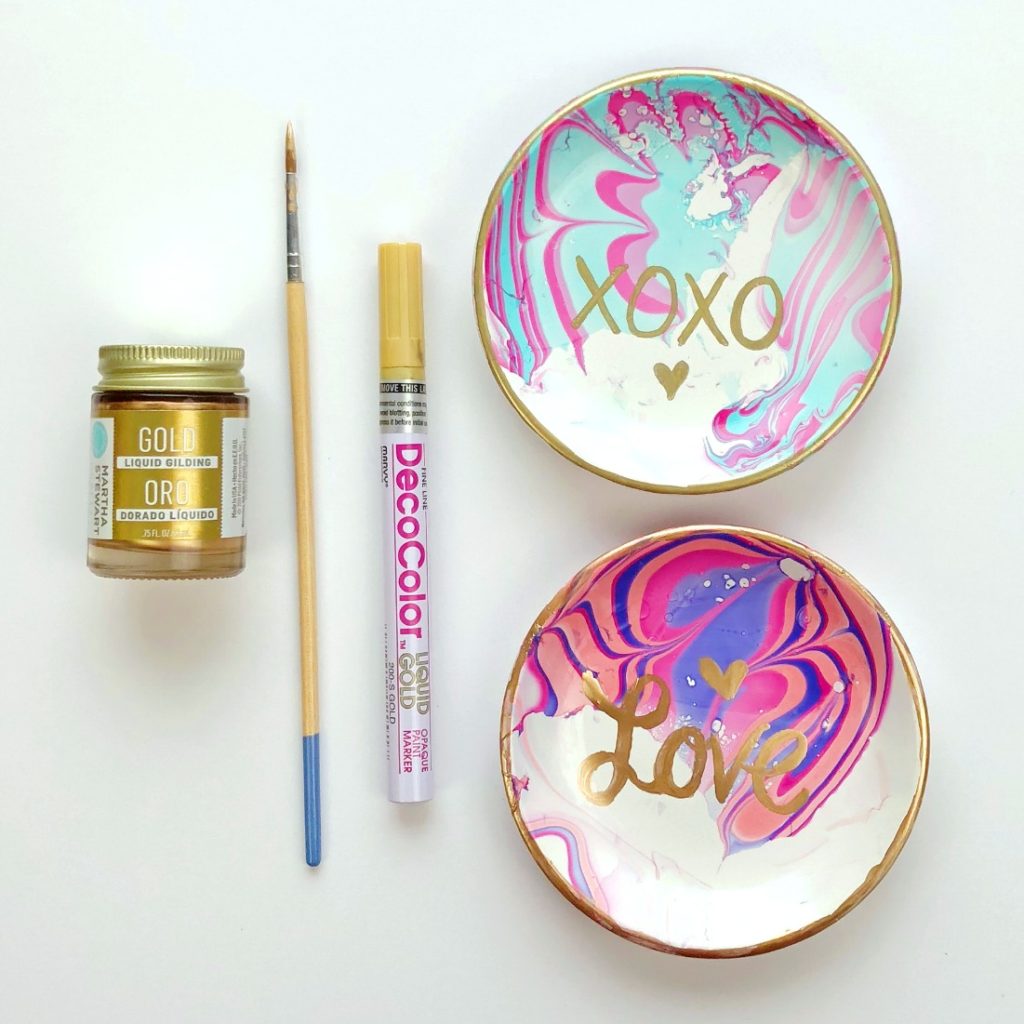
- Gold Paint Marker or Gold Sharpie or Gold Leaf Paint
- Water Container – Try to find something not much bigger than the ring dish. You want the nail polish to stay in a small confined area.
- Room Temperature Water
- Toothpicks
- Q-Tips
- Gloves (optional) – I was careful not to get my fingers in the nail polish when I dipped but if you want to be extra careful buy some disposable gloves.
- Sealant (optional) – I didn’t seal my dishes but if you wanted to you could use, Rust-Oleum Triple Thick for a very shiny spray-on finish, or this DuraClear paint on varnish that can be used indoors and has no odor.
NAIL POLISH MARBLING DIRECTIONS:
Important Tips:
- Only use room temperature distilled or filtered water. If your water is too hot or too cold the technique will not work.
- Do not use old nail polishes as they won’t work if they are glumpy. Not all nail polishes will work. I found that the Sally Hansen Extreme Wear brand and the Sinful Colors Professional brand work great!
- Turn off any fans or air conditioning. This could cause the nail polish to dry too quickly when dropped into the water.
- Work quickly! If you take too long, the nail polish will dry in the water before you can create designs.
- You can do several dishes in the same water, just use a Q-Tip in between each dip to clean excess nail polish from the top of the water.
- Work in a well ventilated area or outside. There is a strong odor while you are working, but the final marbled dishes don’t smell.
Directions:
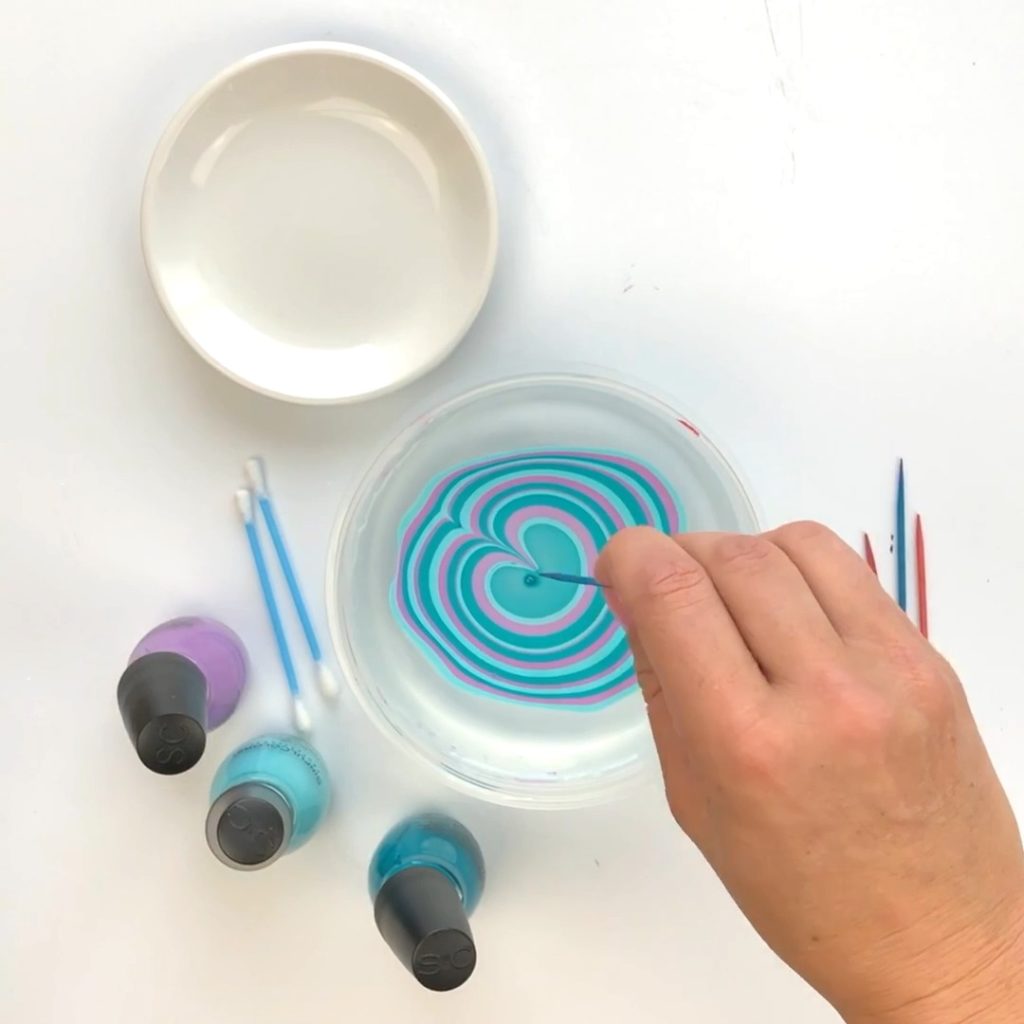
- Add a drop from the brush of your nail polish into the water.
- Make sure your brush is close to the water. If it’s too far away, the polish will sink to the bottom of your container. You’ll know right away if the polish will work. It should spread quickly in the water. If it drops to the bottom of the container without spreading it will not work.
- Add 10-15 more drops of nail polish alternating between different colors to create a bullseye design.
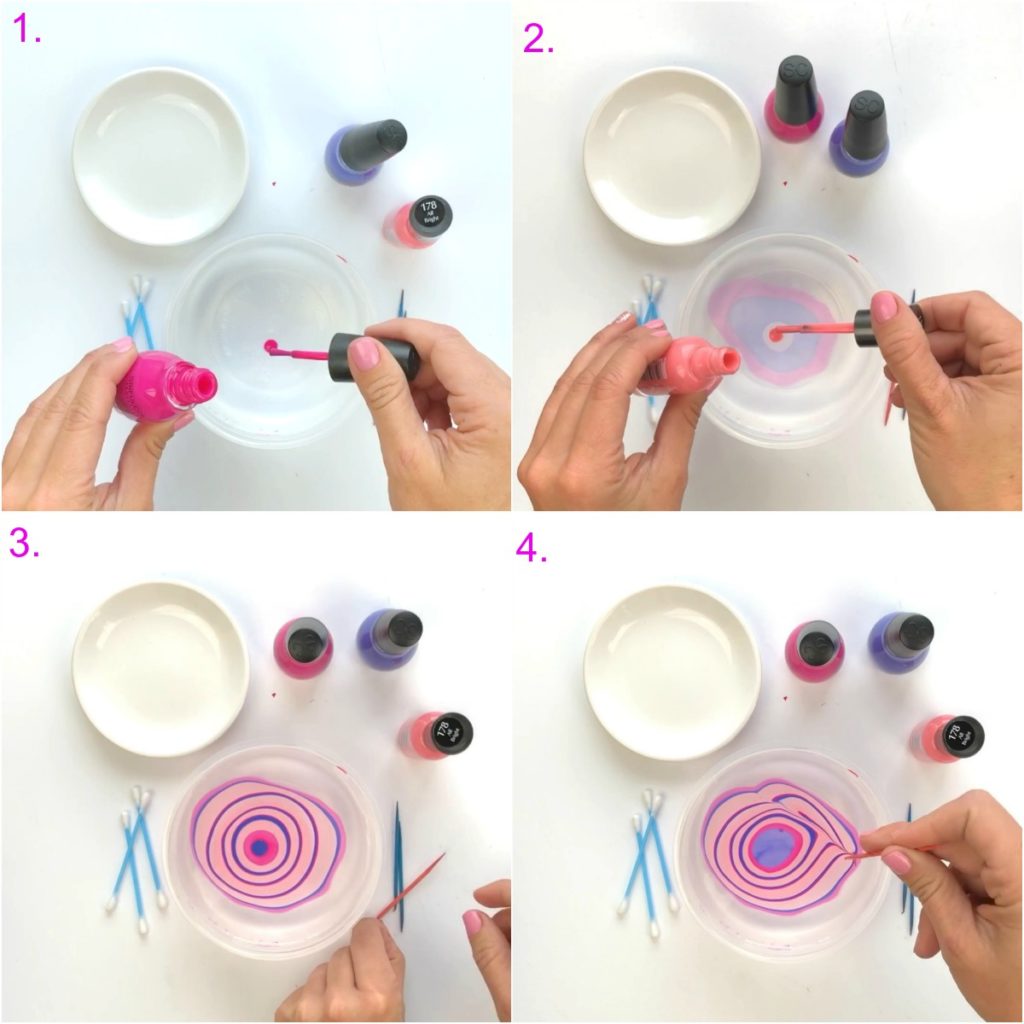
- Create your design by using a toothpick. Make sure you DO NOT start from the outer three rings of color. These rings will already be dry.
- Use each end of the toothpick, and then switch to a clean one.
- To create a zigzag design, drag lines with the toothpick from the top to the bottom of the design reversing directions each time (remember, don’t tough the outer three rings).
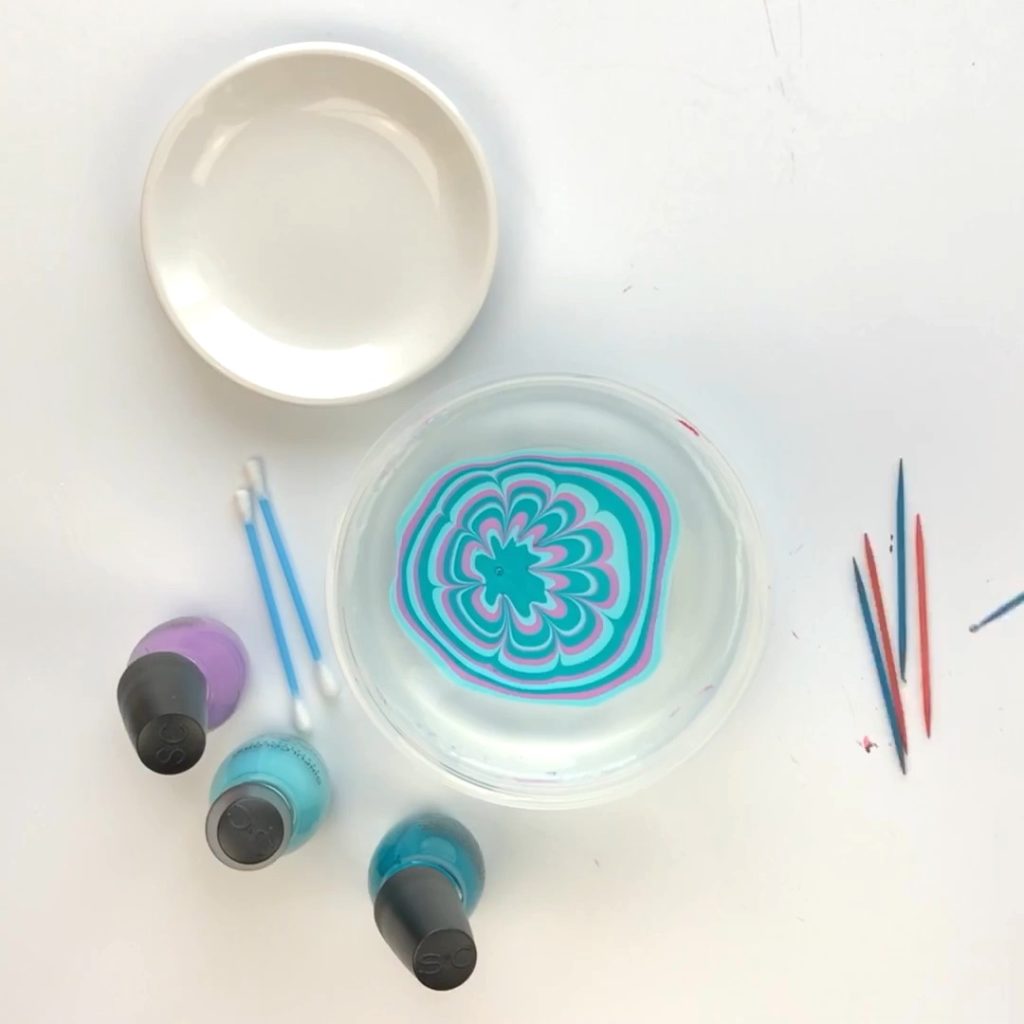
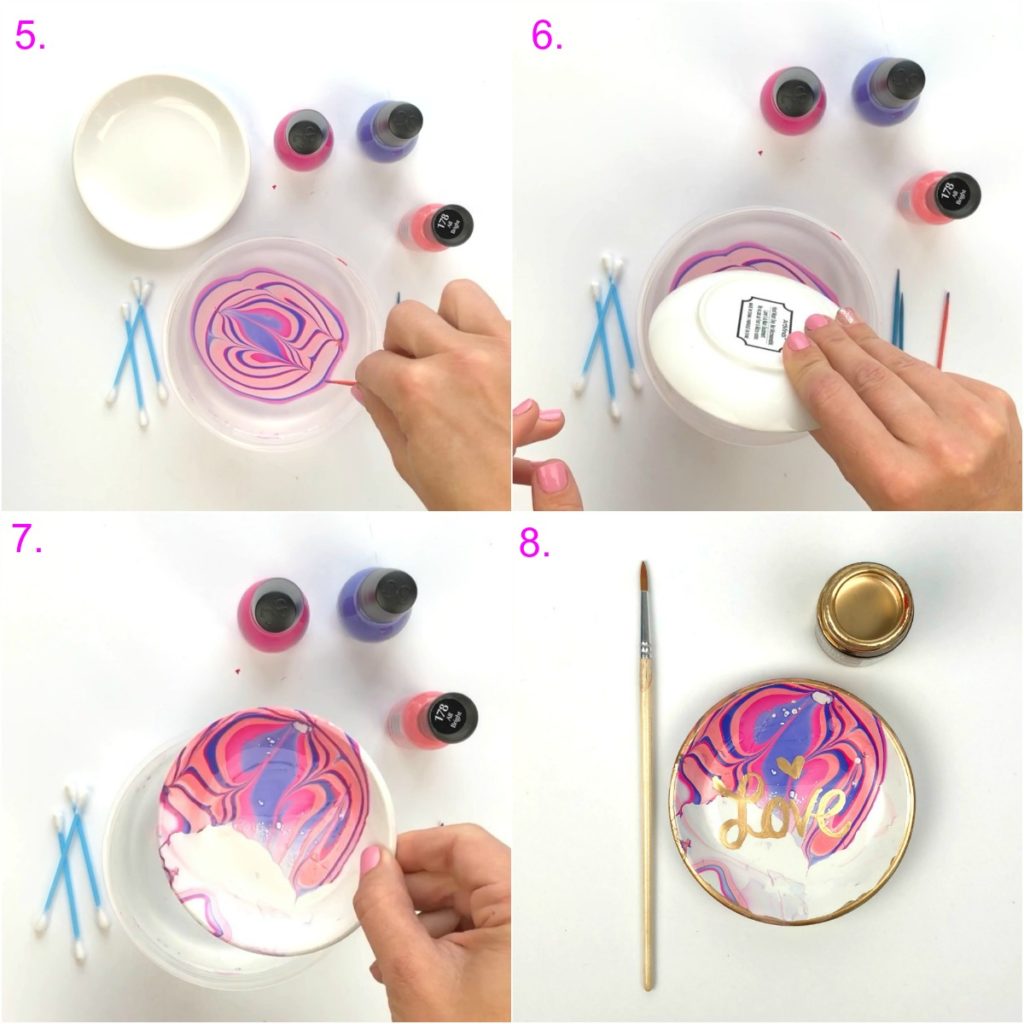
- To create a flower design, start at least three layers from the outer ring and drag lines to the center of the circle. Repeat this step around the entire polish circle.
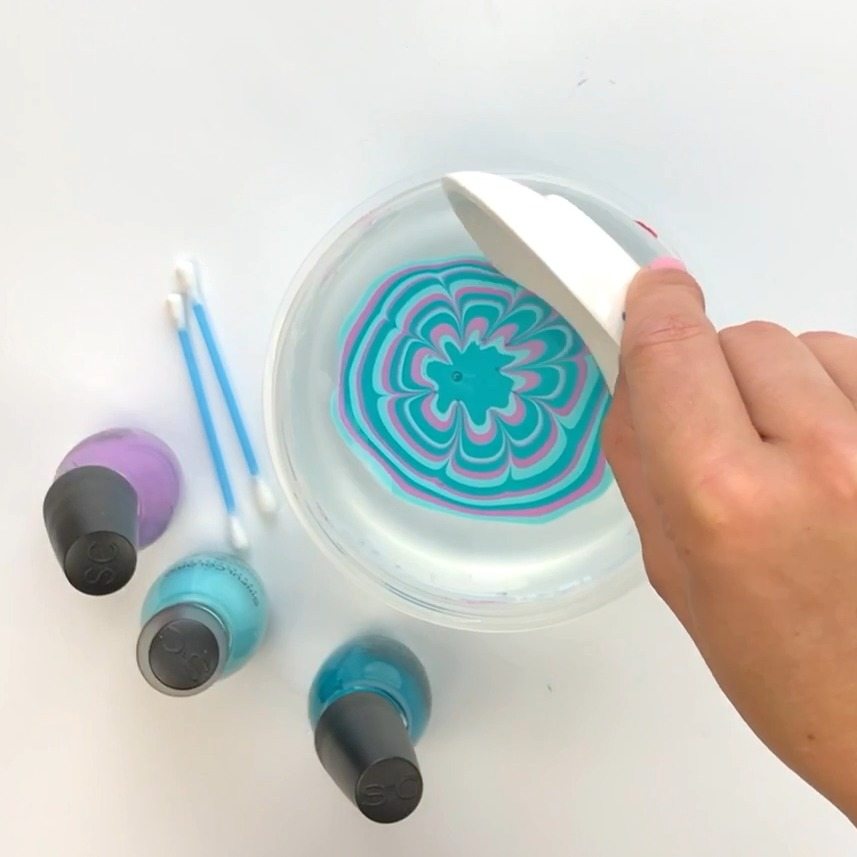
- With the ring dish slightly facing down and dip into the polish/water container. Rotate slightly to help the polish cover more of the dish. (You might want to wear gloves to protect your hands).
- Use a Q-Tip to remove any excess polish before lighting the dish from the water.
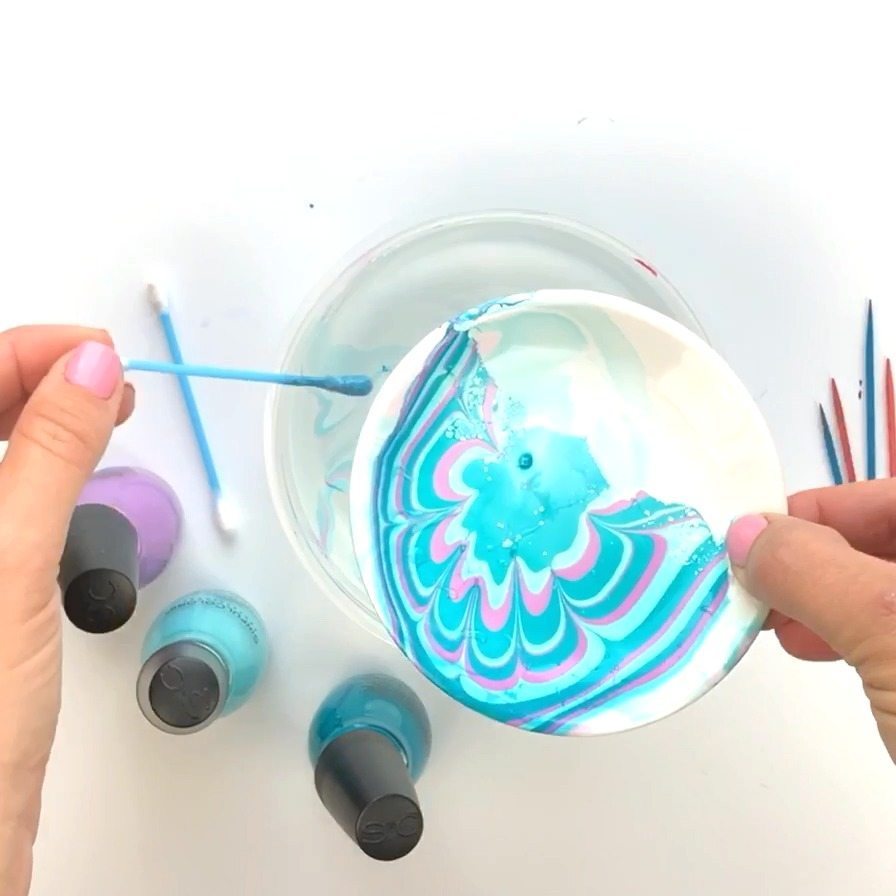
- Don’t worry about the polish covering the entire ring dish. It looks beautiful with the design on just part of the dish.
- Put the dish on a drying rack. You can also use an egg carton. Let dry completely. Takes about an hour.
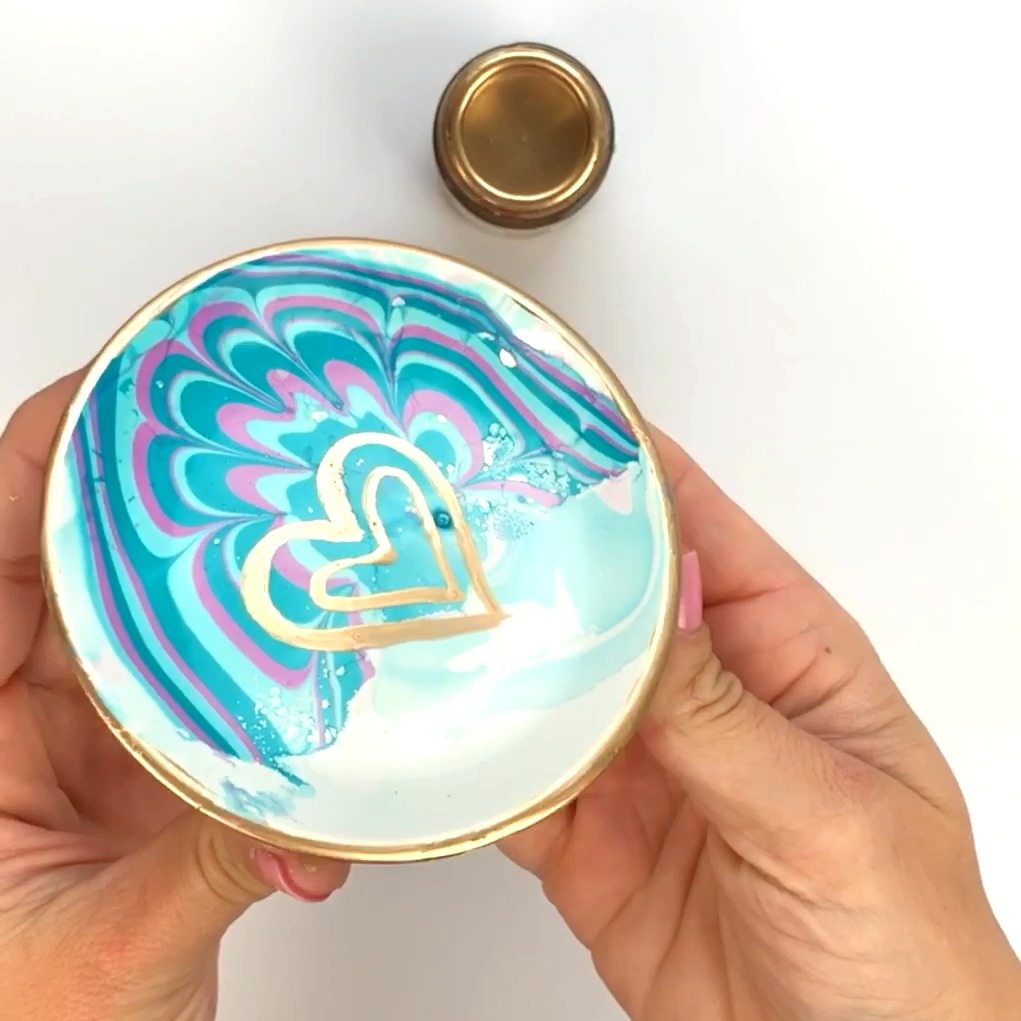
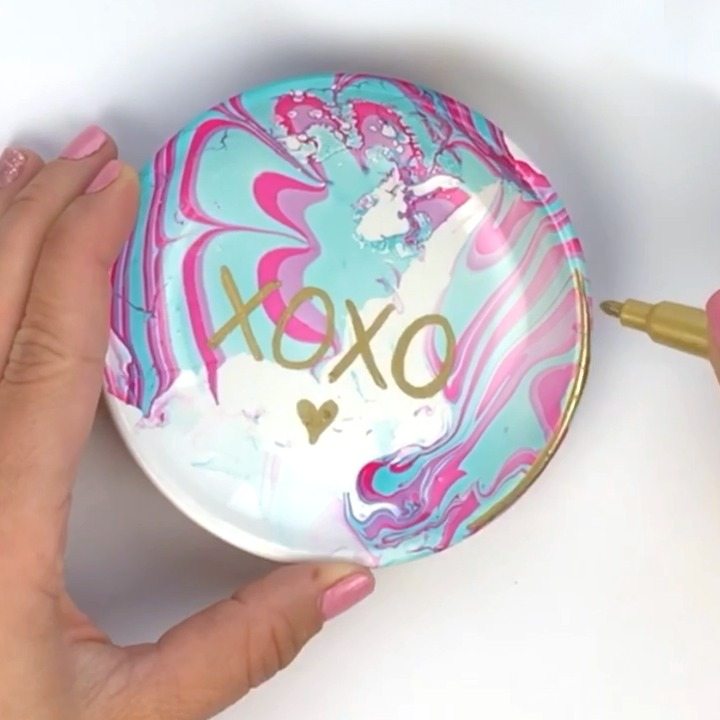
- Add gold details with either a gold Sharpie marker, gold paint marker or by painting on liquid gold leaf paint using a paint brush.
- I didn’t seal my dishes but if you wanted to you could use, Rust-Oleum Triple Thick for a very shiny spray-on finish, or this DuraClear paint on varnish that can be used indoors and has no odor.
I can’t wait to give some of these ring dishes to my friends for Valentine’s Day. They would also be great as DIY bridesmaid gifts. Even better, get some of your friends together and have a nail polish marbling crafting party!
I’d love to see what you create using this nail polish marbling tutorial. You can share a pic with me on Instagram or Facebook.